Introdução
- Turn drone upside down to expose underside plate.
- Begin to remove all 8 screws from the plate . Remember the 2 middle screws are bigger than the other 6 so set those aside separately.
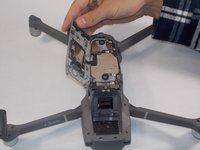
- Pull plate off, exposing the main board.
- Detach 3 ribbons on the top of the board. Near the head of the drone. Use spreader.
- Remove screw holding circuit board in. 1 near the top, 2 near the bottom.
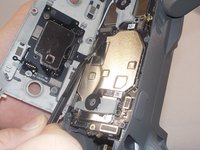
- Pop of all 4 antennas at the bottom of the circuit board. Use spreader.
- Pull away antennas and remove board carefully.
- Replace new circuit board.
- Attach 3 ribbons.
- Attach 4 antennas.
- Screw circuit board back in.
- Place the plate back on and screw back in all 8 screws.
O que você precisa


Quase terminado!
To reassemble your device, follow these instructions in reverse order.
Conclusão
To reassemble your device, follow these instructions in reverse order.
Cancelar: não concluí este guia.
2 outras pessoas executaram este guia.

Equipe

UMass Dartmouth, Team S15-G3, Barthe Fall 2019 Membro de UMass Dartmouth, Team S15-G3, Barthe Fall 2019
UMASSD-BARTHE-F19S15G3
1 Membro
1 Guia de autoria