Introdução
Use this guide to replace a broken display on your MacBook Unibody Model A1342.
O que você precisa
Vídeo de Apresentação
-
-
Remove the eight 4 mm Phillips screws securing the lower case to the MacBook.
-
-
-
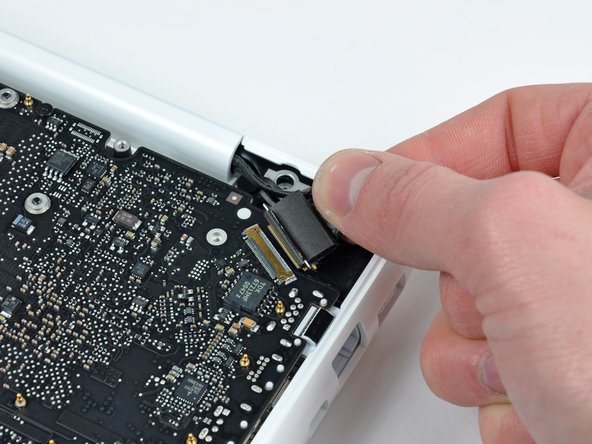
Use the flat end of a spudger to lift the battery connector up out of its socket on the logic board.
-
-
-
Remove the following screws from the optical drive side of the rear vent:
-
Two 10 mm T8 Torx
-
Two 5.2 mm Phillips
-
-
-
-
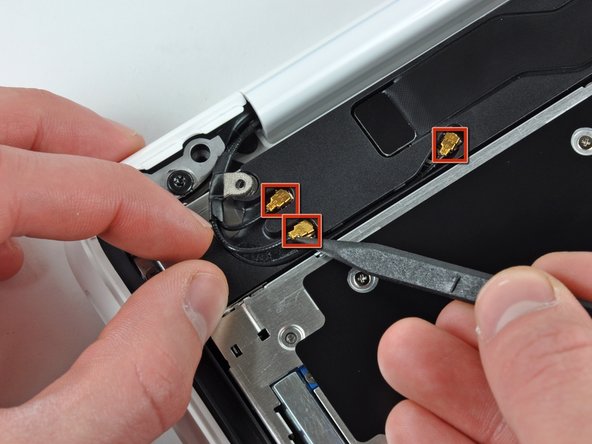
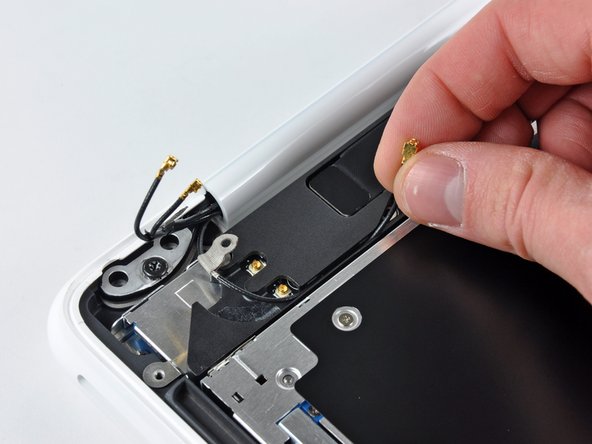
Remove the single 3 mm Phillips screw securing the AirPort/Bluetooth antenna ground strap to the rear speaker.
-


To reassemble your device, follow these instructions in reverse order.
To reassemble your device, follow these instructions in reverse order.
Cancelar: não concluí este guia.
78 outras pessoas executaram este guia.

3 comentários
Great guide worked perfectly....
The problems I encountered….
1) (IMPORTANT) The vent cover has a small beveled slot were the picture cable fits into nicely and the first time I reassembled my mac I did not allow the cord adequate space between the vent cover and the computer housing. This lead to a red, green, and blue alternating screen upon booting and troubleshooting the issue to find out that it was just a pinched cable took longer than I would have liked.
2) The picture cable removal and reassembly was not as seamless as it seemed in the picture. The metal connector under the cable was very flimsy and weak. It did not break however it did bend slightly and I wasn’t the happiest about it.
3) The power cord broke (chipped) a small amount. As previously mentioned. Not a big deal but not fun. (Be careful)
Whole process took 45 min… very easy
Couldn’t have done it without the guides and the tools
Thanks for saving me like $300
In your opinion, could I replace the screen of my A1342 (2011) by the screen of a A1181 (mid 2009)?
They seem to be identical.
Wow, what an excellent guide. I watched the video first and it looked easy enough. I ensure I had the right equipment first, followed the steps as per the instructions. Had to be careful with Step 9; i.e. removing the plastic pull tab secured to the display data cable lock as it’s fragile. Step 13/14 was difficult too but followed the advice and got there eventually. Reversing back, step 13/14 took a while as did Step 10 and Step 8. Step 8 was a pain actually as I found it really difficult to get the AirPort and Blue tooth antenna back in again.
All in all, as I’m a novice I think it took me almost 90 minutes but I did it and I now have a new screen working perfectly so have renewed my Apple mac laptop. I’ve been meaning to do this for 2 years, but was too scared and thought hey just buy the part and give it a go. If I mess it up, i’ve not used the laptop in 2-years+ so it can go in the bin. Fortunately, even I (complete novice) was able to follow the instructions! Thank you as I now have use of my mac again.