Esta versão pode conter edições incorretas. Mude para o último instantâneo verificado.
O que você precisa
-
Este passo não foi traduzido. Ajude a traduzi-lo
-
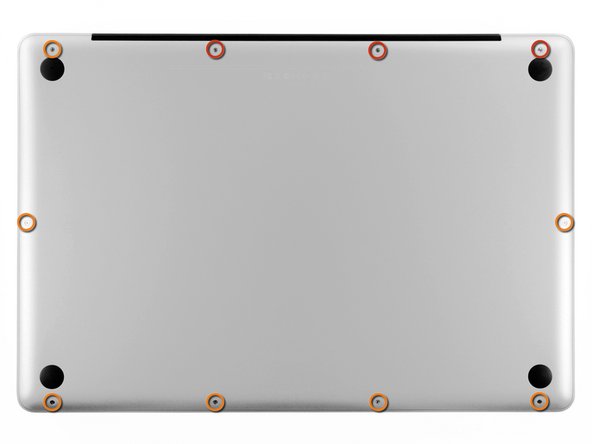
Remove the following ten screws securing the lower case to the upper case:
-
Three 13.5 mm Phillips screws.
-
Seven 3 mm Phillips screws.
-
-
Este passo não foi traduzido. Ajude a traduzi-lo
-
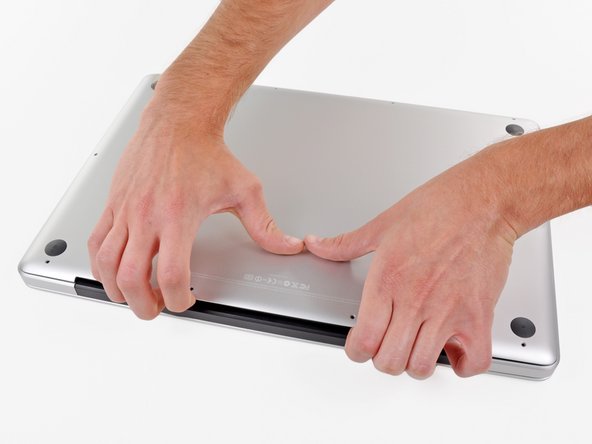
Wedge your fingers between the lower case and the vent, and lift upward to release the two clips holding the lower case to the upper case.
-
Remove the lower case.
-
-
Este passo não foi traduzido. Ajude a traduzi-lo
-
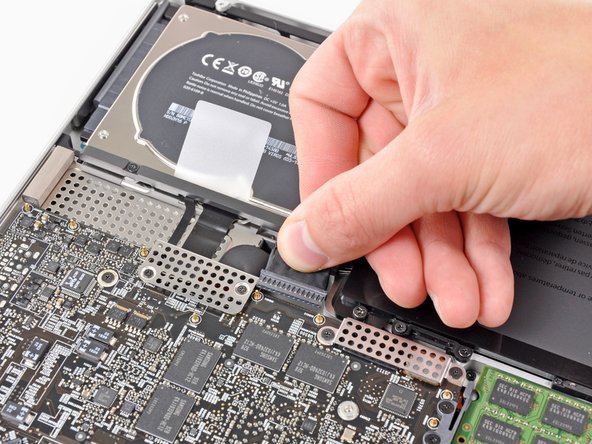
If present, grab the plastic tab attached to the battery connector and pull it toward the front edge of the device. For Late-2011 models the battery connector will not have a tab and is simply a plug that inserts straight down into the motherboard--to remove pry the plug straight up.
-
-
-
Este passo não foi traduzido. Ajude a traduzi-lo
-
Carefully pull the Bluetooth cable toward the fans to disconnect it from the Bluetooth board.
-
-
Este passo não foi traduzido. Ajude a traduzi-lo
-
Use the flat end of a spudger to peel the thin plastic cover off the top and sides of the Bluetooth board housing.
-
-
Este passo não foi traduzido. Ajude a traduzi-lo
-
Use the flat end of a spudger to pry the Bluetooth antenna connector up and off its socket on the Bluetooth board.
-
-
Este passo não foi traduzido. Ajude a traduzi-lo
-
Remove the two 2.2 mm Phillips screws securing the Bluetooth housing to the side of the optical drive.
-
-
Este passo não foi traduzido. Ajude a traduzi-lo
-
De-route the camera cable from its slot in the Bluetooth housing and remove the Bluetooth board from the upper case.
-
Cancelar: não concluí este guia.
6 outras pessoas executaram este guia.


