Ir para o conteúdo principal

MacBook Pro 15" Retina Display Mid 2015 Microphones Replacement

O que você precisa

  1. MacBook Pro 15" Retina Display Mid 2015 Microphones Replacement, Lower Case: passo 1, imagem 1 %32
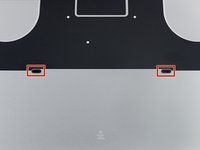
    • Remove the following P5 pentalobe screws securing the lower case to the MacBook Pro:

    • Eight 3.1 mm

    • Two 2.3 mm

  2. MacBook Pro 15" Retina Display Mid 2015 Microphones Replacement: passo 2, imagem 1 %32 MacBook Pro 15" Retina Display Mid 2015 Microphones Replacement: passo 2, imagem 2 %32
    • Lifting from the edge nearest the clutch cover, lift the lower case off the MacBook Pro.

  3. MacBook Pro 15" Retina Display Mid 2015 Microphones Replacement: passo 3, imagem 1 %32 MacBook Pro 15" Retina Display Mid 2015 Microphones Replacement: passo 3, imagem 2 %32 MacBook Pro 15" Retina Display Mid 2015 Microphones Replacement: passo 3, imagem 3 %32
    • The lower case has two plastic pegs (red) that fit into plastic clips in the upper case (orange).

    • During reassembly, gently push down the center of the lower case to reattach the case to its two plastic clips.

  4. MacBook Pro 15" Retina Display Mid 2015 Microphones Replacement, Battery Connector: passo 4, imagem 1 %32
    • Peel back the sticker covering the battery connector.

  5. MacBook Pro 15" Retina Display Mid 2015 Microphones Replacement: passo 5, imagem 1 %32 MacBook Pro 15" Retina Display Mid 2015 Microphones Replacement: passo 5, imagem 2 %32 MacBook Pro 15" Retina Display Mid 2015 Microphones Replacement: passo 5, imagem 3 %32
    • Gently lift each side of the battery connector to pry the connector out of its socket on the logic board.

    • Bend the connector back toward the battery, ensuring that the battery connector doesn't accidentally make contact with the logic board.

  6. MacBook Pro 15" Retina Display Mid 2015 Microphones Replacement, AirPort/Camera Cables: passo 6, imagem 1 %32 MacBook Pro 15" Retina Display Mid 2015 Microphones Replacement, AirPort/Camera Cables: passo 6, imagem 2 %32 MacBook Pro 15" Retina Display Mid 2015 Microphones Replacement, AirPort/Camera Cables: passo 6, imagem 3 %32
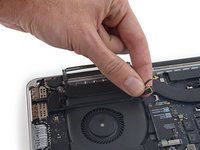
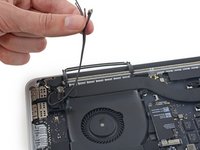
    • Use a spudger or tweezers to pry the three AirPort antenna cables straight up off of their sockets on the AirPort board, and bend them up and out of the way.

    • The cable connection points are very fragile. Be careful to lift only on the connector, and not on the socket or cable.

    • To reconnect, align the connector carefully into position over the socket, and press it down firmly with the flat of your spudger.

  7. MacBook Pro 15" Retina Display Mid 2015 Microphones Replacement: passo 7, imagem 1 %32 MacBook Pro 15" Retina Display Mid 2015 Microphones Replacement: passo 7, imagem 2 %32
    • Peel the right rubber cover up off the fan and fold it out of the way.

  8. MacBook Pro 15" Retina Display Mid 2015 Microphones Replacement: passo 8, imagem 1 %32 MacBook Pro 15" Retina Display Mid 2015 Microphones Replacement: passo 8, imagem 2 %32
    • Use the tip of a spudger to push the camera cable connector out of its socket on the logic board.

    • Be sure to push parallel to the board, pushing first on one side, then the other to "walk" the connector out of its socket.

  9. MacBook Pro 15" Retina Display Mid 2015 Microphones Replacement: passo 9, imagem 1 %32 MacBook Pro 15" Retina Display Mid 2015 Microphones Replacement: passo 9, imagem 2 %32 MacBook Pro 15" Retina Display Mid 2015 Microphones Replacement: passo 9, imagem 3 %32
    • Use your fingers to pull the AirPort/Camera cables up off the fan.

    • The cables are adhered to the fan, so peel them up carefully to avoid damaging them.

    • Carefully de-route the cables from the plastic cable guide.

    • On reassembly, there should be enough adhesive still on these cables to stick them back down to the fan.

  10. MacBook Pro 15" Retina Display Mid 2015 Microphones Replacement, I/O Board Cable (Top): passo 10, imagem 1 %32
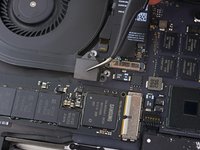
    • Remove the four 2.2 mm T5 Torx screws securing the I/O board cable connector covers.

  11. MacBook Pro 15" Retina Display Mid 2015 Microphones Replacement: passo 11, imagem 1 %32 MacBook Pro 15" Retina Display Mid 2015 Microphones Replacement: passo 11, imagem 2 %32
    • Remove the left connector cover.

    • Use the flat end of a spudger to pry the left end of the I/O board cable up from its socket on the logic board.

  12. MacBook Pro 15" Retina Display Mid 2015 Microphones Replacement: passo 12, imagem 1 %32 MacBook Pro 15" Retina Display Mid 2015 Microphones Replacement: passo 12, imagem 2 %32
    • Remove the right connector cover.

    • Use the flat end of a spudger to pry the right end of the I/O board cable up from its socket on the logic board.

  13. MacBook Pro 15" Retina Display Mid 2015 Microphones Replacement: passo 13, imagem 1 %32
    • Peel the I/O board cable up from the adhesive securing it to the fan.

    • Remove the cable.

  14. MacBook Pro 15" Retina Display Mid 2015 Microphones Replacement, Right Fan: passo 14, imagem 1 %32
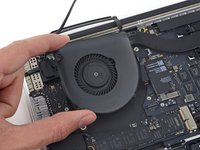
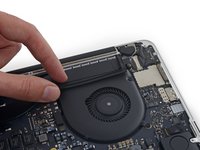
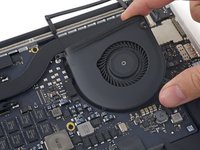
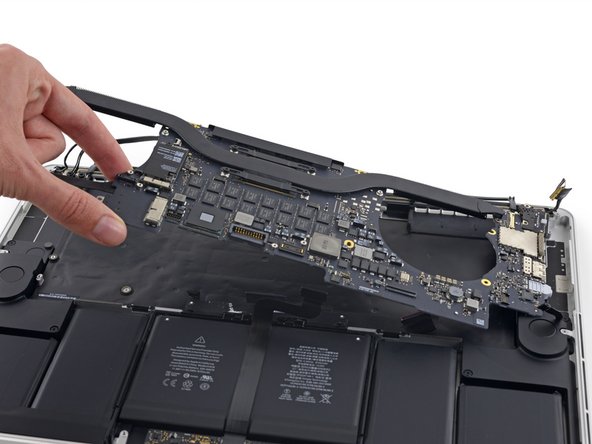
    • Use a T5 Torx driver to remove the following three screws securing the right fan to the logic board:

    • One 5.0 mm screw with a 2.0 mm long shoulder

    • One 4.0 mm screw with a wide head

    • One 4.4 mm screw

  15. MacBook Pro 15" Retina Display Mid 2015 Microphones Replacement: passo 15, imagem 1 %32 MacBook Pro 15" Retina Display Mid 2015 Microphones Replacement: passo 15, imagem 2 %32 MacBook Pro 15" Retina Display Mid 2015 Microphones Replacement: passo 15, imagem 3 %32
    • Use the tip of a spudger to flip up the retaining flap on the right fan ribbon cable ZIF socket.

    • Be sure you are prying up on the hinged retaining flap, not the socket itself.

  16. MacBook Pro 15" Retina Display Mid 2015 Microphones Replacement: passo 16, imagem 1 %32 MacBook Pro 15" Retina Display Mid 2015 Microphones Replacement: passo 16, imagem 2 %32
    • Lift the fan and push it gently towards the back edge of the MacBook to free the fan cable from its socket.

    • The fan cable may be adhered to the logic board—to avoid tearing the cable, gently peel it up while lifting the fan.

    • Remove the fan.

  17. MacBook Pro 15" Retina Display Mid 2015 Microphones Replacement, Left Fan: passo 17, imagem 1 %32 MacBook Pro 15" Retina Display Mid 2015 Microphones Replacement, Left Fan: passo 17, imagem 2 %32
    • Peel the left rubber cover up off the fan and fold it out of the way.

  18. MacBook Pro 15" Retina Display Mid 2015 Microphones Replacement: passo 18, imagem 1 %32
    • Remove the following three screws securing the left fan to the logic board:

    • One 3.6 mm T5 Torx screw with a wide head

    • One 5.0 mm T5 Torx screw with a 2.0 mm long shoulder

    • One 4.4 mm T5 Torx screw

  19. MacBook Pro 15" Retina Display Mid 2015 Microphones Replacement: passo 19, imagem 1 %32 MacBook Pro 15" Retina Display Mid 2015 Microphones Replacement: passo 19, imagem 2 %32
    • Use the tip of a spudger to flip up the retaining flap on the left fan ribbon cable ZIF socket.

    • Be sure you are prying up on the hinged retaining flap, not the socket itself.

  20. MacBook Pro 15" Retina Display Mid 2015 Microphones Replacement: passo 20, imagem 1 %32 MacBook Pro 15" Retina Display Mid 2015 Microphones Replacement: passo 20, imagem 2 %32
    • Lift the fan and push it gently towards the back edge of the MacBook to free the fan cable from its socket.

    • The fan cable may be adhered to the logic board—to avoid tearing the cable, gently peel it up while lifting the fan.

    • Remove the fan.

  21. MacBook Pro 15" Retina Display Mid 2015 Microphones Replacement, SSD: passo 21, imagem 1 %32
    • Remove the single 2.9 mm T5 Torx screw securing the SSD to the logic board.

  22. MacBook Pro 15" Retina Display Mid 2015 Microphones Replacement: passo 22, imagem 1 %32 MacBook Pro 15" Retina Display Mid 2015 Microphones Replacement: passo 22, imagem 2 %32 MacBook Pro 15" Retina Display Mid 2015 Microphones Replacement: passo 22, imagem 3 %32
    • Lift the end of the SSD up enough to pass over the speaker directly behind it.

    • Do not lift the SSD too high, or you could damage the contacts or socket.

    • Pull the SSD straight out of its socket on the logic board.

  23. MacBook Pro 15" Retina Display Mid 2015 Microphones Replacement: passo 23, imagem 1 %32 MacBook Pro 15" Retina Display Mid 2015 Microphones Replacement: passo 23, imagem 2 %32 MacBook Pro 15" Retina Display Mid 2015 Microphones Replacement: passo 23, imagem 3 %32
    • Use the point of a spudger to flip up the locking mechanism on the I/O board connector.

    • Flip the spudger around and use the flat end to slide the I/O cable out of the connector.

    • Push on the opened locking mechanism for an easy way to slide the I/O cable out of the connector. This could help prevent accidental damage to the cable or connector contacts.

  24. MacBook Pro 15" Retina Display Mid 2015 Microphones Replacement: passo 24, imagem 1 %32
    • Remove the two 3.1 mm T5 Torx screws from the I/O board.

  25. MacBook Pro 15" Retina Display Mid 2015 Microphones Replacement: passo 25, imagem 1 %32 MacBook Pro 15" Retina Display Mid 2015 Microphones Replacement: passo 25, imagem 2 %32
    • Slightly lift the interior edge of the I/O board and pull it toward the center of the MacBook, away from the side of the case.

    • Remove the I/O board.

  26. MacBook Pro 15" Retina Display Mid 2015 Microphones Replacement, Logic Board Assembly: passo 26, imagem 1 %32 MacBook Pro 15" Retina Display Mid 2015 Microphones Replacement, Logic Board Assembly: passo 26, imagem 2 %32
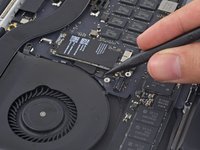
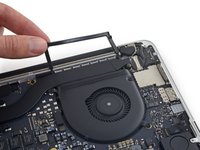
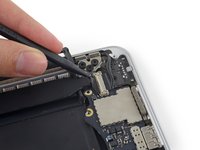
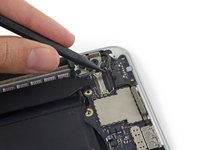
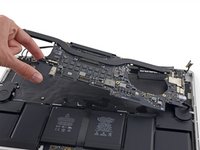
    • Remove the two 2.2 mm Torx T5 screws securing the touchpad cable connector cover to the logic board.

    • Remove the cover.

  27. MacBook Pro 15" Retina Display Mid 2015 Microphones Replacement: passo 27, imagem 1 %32 MacBook Pro 15" Retina Display Mid 2015 Microphones Replacement: passo 27, imagem 2 %32 MacBook Pro 15" Retina Display Mid 2015 Microphones Replacement: passo 27, imagem 3 %32
    • Use the flat end of a spudger to disconnect the touchpad cable connector from its socket in the logic board.

    • Slightly twisting the flat end of a spudger is an easy way to pry up the cable connector from these types of sockets.

    • Be careful to only pry up against the connector, and not the logic board socket.

  28. MacBook Pro 15" Retina Display Mid 2015 Microphones Replacement: passo 28, imagem 1 %32
    • Remove a small rubber cap off the screw at the end of the heat sink.

  29. MacBook Pro 15" Retina Display Mid 2015 Microphones Replacement: passo 29, imagem 1 %32
    • Remove the following six screws securing the logic board assembly to the upper case.

    • One 3.8 mm T5 Torx screw

    • Two 5.7 mm T5 Torx screws

    • One 5.6 mm T5 Torx screw (this one is silver and has a taller head than the others)

    • One 2.6 mm T5 Torx screw

    • One 3.2 mm T5 Torx screw

    • On reassembly, start all six screws but do not tighten any of them. Move the logic board around until all of the screws are centered in their holes and the ports are lined up with their openings in the side of the upper case. Then tighten all of the screws.

  30. MacBook Pro 15" Retina Display Mid 2015 Microphones Replacement: passo 30, imagem 1 %32
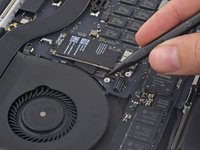
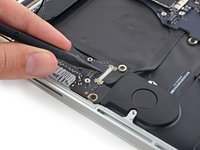
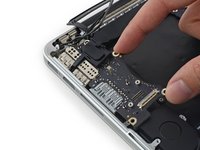
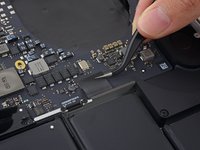
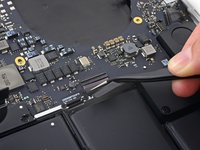
    • The following steps will detail disconnecting these six connectors. Be sure to read each step, as these connectors come in different styles that disconnect differently.

    • Microphone cable

    • Left speaker cable

    • Keyboard data cable

    • Right speaker cable

    • Keyboard backlight cable
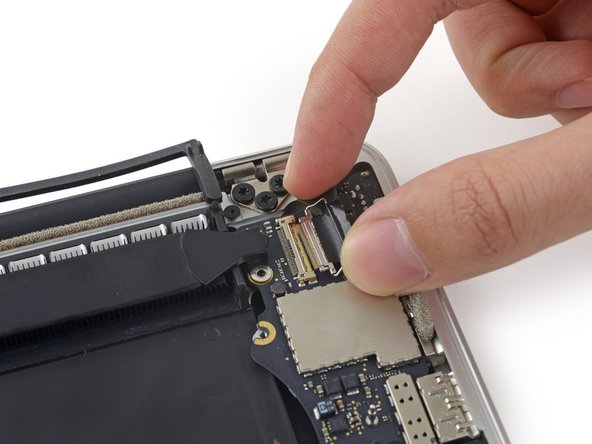
    • Display data cable

    • On reassembly, check to make sure all of these connectors are connected and fully seated in their sockets.

  31. MacBook Pro 15" Retina Display Mid 2015 Microphones Replacement: passo 31, imagem 1 %32 MacBook Pro 15" Retina Display Mid 2015 Microphones Replacement: passo 31, imagem 2 %32 MacBook Pro 15" Retina Display Mid 2015 Microphones Replacement: passo 31, imagem 3 %32
    • Use the tip of a spudger to flip up the retaining flap on the microphone ribbon cable ZIF socket.

    • Pull the microphone ribbon cable out of its socket, parallel to the logic board.

  32. MacBook Pro 15" Retina Display Mid 2015 Microphones Replacement: passo 32, imagem 1 %32 MacBook Pro 15" Retina Display Mid 2015 Microphones Replacement: passo 32, imagem 2 %32 MacBook Pro 15" Retina Display Mid 2015 Microphones Replacement: passo 32, imagem 3 %32
    • Use the flat end of a spudger to pry the left speaker connector up and out of its socket on the logic board.

    • Be sure to pry on the cable connector and not on the socket on the logic board. Prying on the socket may cause it to separate from the logic board.

    • Gently fold the cable up and out of the way of the logic board.

  33. MacBook Pro 15" Retina Display Mid 2015 Microphones Replacement: passo 33, imagem 1 %32 MacBook Pro 15" Retina Display Mid 2015 Microphones Replacement: passo 33, imagem 2 %32
    • Peel back the tape covering the top of the keyboard data cable connector.

  34. MacBook Pro 15" Retina Display Mid 2015 Microphones Replacement: passo 34, imagem 1 %32 MacBook Pro 15" Retina Display Mid 2015 Microphones Replacement: passo 34, imagem 2 %32 MacBook Pro 15" Retina Display Mid 2015 Microphones Replacement: passo 34, imagem 3 %32
    • Use the tip of a spudger to flip up the retaining flap on the keyboard data cable ZIF socket.

    • Be sure you are prying up on the hinged retaining flap, not the socket itself.

    • Pull the keyboard data cable out of its ZIF socket. Be sure to pull parallel to the logic board, and not straight up.

  35. MacBook Pro 15" Retina Display Mid 2015 Microphones Replacement: passo 35, imagem 1 %32 MacBook Pro 15" Retina Display Mid 2015 Microphones Replacement: passo 35, imagem 2 %32 MacBook Pro 15" Retina Display Mid 2015 Microphones Replacement: passo 35, imagem 3 %32
    • Use the tip of a spudger to pry the right speaker connector up and out of its socket on the logic board.

    • Be sure to pry on the cable connector and not on the socket on the logic board. Prying on the socket may cause it to separate from the logic board.

    • Gently fold the cable up and out of the way of the logic board.

  36. MacBook Pro 15" Retina Display Mid 2015 Microphones Replacement: passo 36, imagem 1 %32 MacBook Pro 15" Retina Display Mid 2015 Microphones Replacement: passo 36, imagem 2 %32
    • Use the point of a spudger to pry the keyboard backlight connector up from its socket on the logic board.

  37. MacBook Pro 15" Retina Display Mid 2015 Microphones Replacement: passo 37, imagem 1 %32 MacBook Pro 15" Retina Display Mid 2015 Microphones Replacement: passo 37, imagem 2 %32
    • Use the tip of a spudger to flip up the display data cable lock and rotate it toward the MagSafe 2 power port side of the computer.

  38. MacBook Pro 15" Retina Display Mid 2015 Microphones Replacement: passo 38, imagem 1 %32 MacBook Pro 15" Retina Display Mid 2015 Microphones Replacement: passo 38, imagem 2 %32 MacBook Pro 15" Retina Display Mid 2015 Microphones Replacement: passo 38, imagem 3 %32
    • Pull the display data cable straight out of its socket on the logic board.

    • Do not lift up on the display data cable, as its socket is very fragile. Pull the cable parallel to the face of the logic board.

    • Do not touch the contacts on the data connector or its socket with your fingers or any tools, as you may deposit oils or damage the pins.

    • Gently bend the display data cable toward the display hinge, to expose the screws on the MagSafe 2 board.

  39. MacBook Pro 15" Retina Display Mid 2015 Microphones Replacement: passo 39, imagem 1 %32
    • Remove the two 4.0 mm T5 Torx screws from the MagSafe 2 board.

  40. MacBook Pro 15" Retina Display Mid 2015 Microphones Replacement: passo 40, imagem 1 %32 MacBook Pro 15" Retina Display Mid 2015 Microphones Replacement: passo 40, imagem 2 %32 MacBook Pro 15" Retina Display Mid 2015 Microphones Replacement: passo 40, imagem 3 %32
    • Lift and pull the entire logic board assembly away from the wall of the upper case.

    • When reassembling, be sure to line up the ports with their cutouts in the upper case.

  41. MacBook Pro 15" Retina Display Mid 2015 Microphones Replacement, Microphones: passo 41, imagem 1 %32 MacBook Pro 15" Retina Display Mid 2015 Microphones Replacement, Microphones: passo 41, imagem 2 %32 MacBook Pro 15" Retina Display Mid 2015 Microphones Replacement, Microphones: passo 41, imagem 3 %32
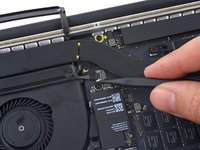
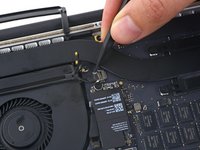
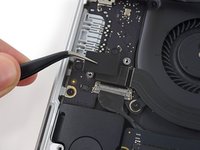
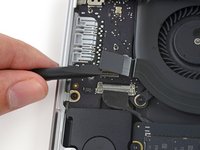
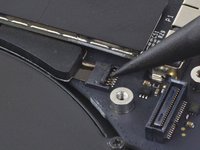
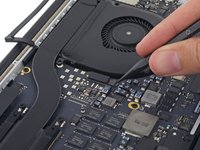
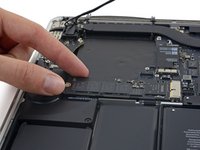
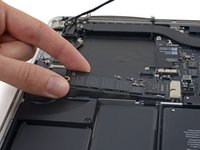
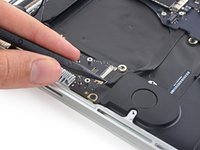
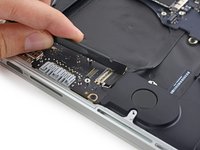
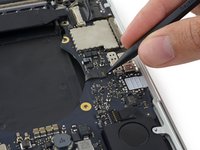
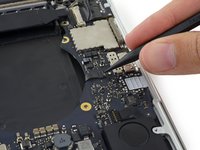
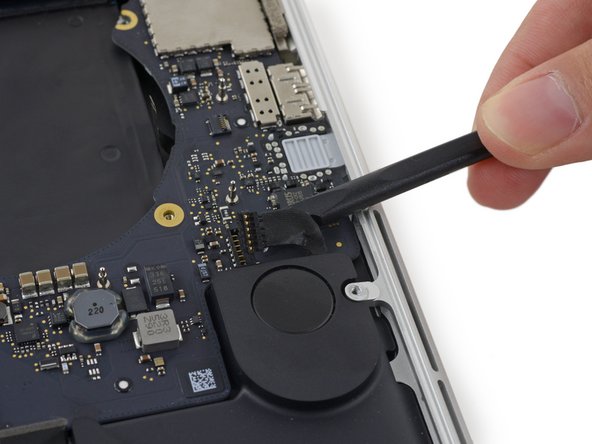
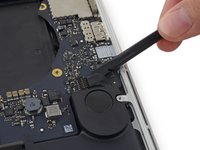
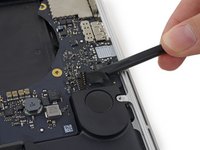
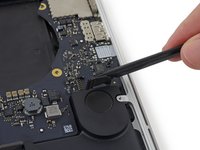
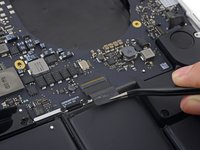
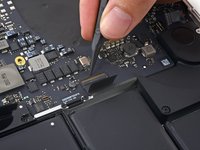
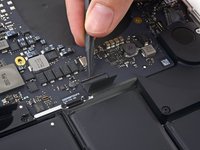
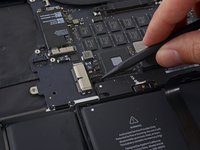
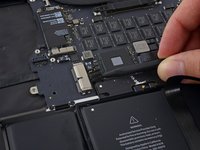
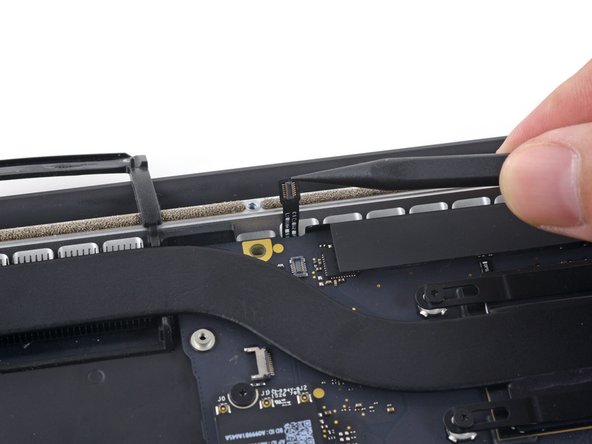
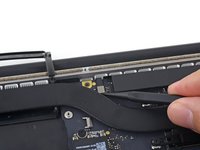
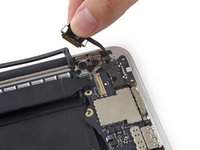
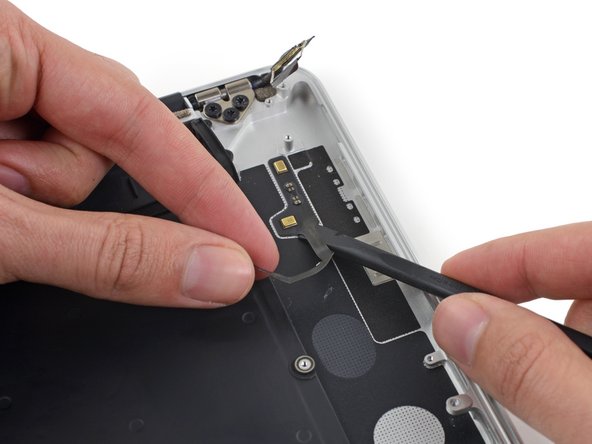
    • While gently pulling up on the microphone cable, push the flat end of a spudger underneath the cable, to cut the adhesive securing it to the upper case.

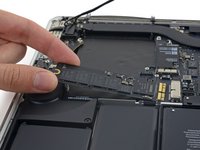
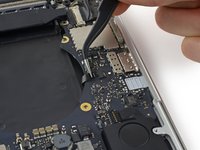
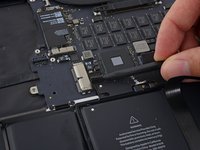
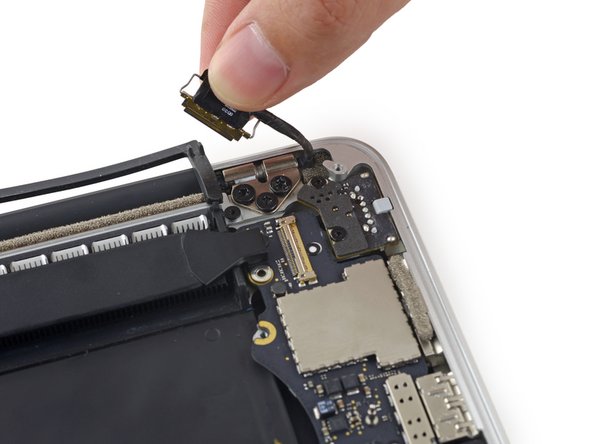
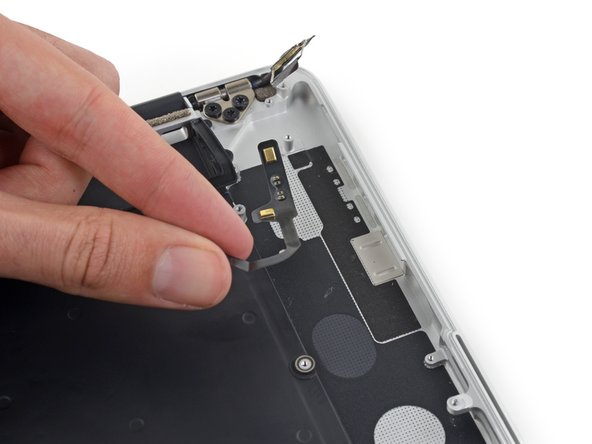
    • Remove the microphone cable.

Conclusão

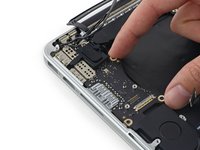
To reassemble your device, follow these instructions in reverse order.

5 outras pessoas executaram este guia.

Andrew Optimus Goldheart

Membro desde: 10/17/09

502.332 Reputação

Autoria de 407 guias

Equipe

iFixit Membro de iFixit

Staff

Membros da 136

Autoria de 16.573 guias

Um comentário

Dear Andrew,

Thank you so much for an amazing guide. The only trouble I have is sourcing the part. The only microphones I can find online are 2012-2013 compatible models.

Apple Part #:

923-0100

Manufacturer Part #:

821-1571-A

Are these the same part, and if not do you by any chance have a suggestion for finding the correct part number?

Best regards,

Rob

Rob Smith - Responder

Adicione um comentário

Exibir estatísticas:

Últimas 24 horas: 5

Últimos 7 dias: 24

Últimos 30 dias: 101

Duração total: 26,576