Esta versão pode conter edições incorretas. Mude para o último instantâneo verificado.
O que você precisa
-
-
Remova os seguintes parafusos pentalobe P5 que prendem a estrutura inferior ao MacBook Pro:
-
Oito de 3,0 mm
-
Dois de 2,3 mm
-
-
-
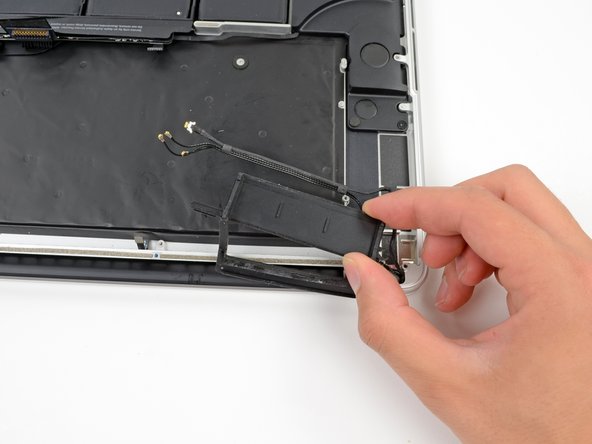
Com uma espátula ou uma pinça, retire os três cabos da antena do AirPort, desconectando-os de seus soquetes na placa do AirPort.
-
-
Este passo não foi traduzido. Ajude a traduzi-lo
-
Use the flat end of a spudger to pry the rubber hinge covers up off the left and right hinges.
-
-
Este passo não foi traduzido. Ajude a traduzi-lo
-
Remove the two 3.1 mm T5 Torx screws securing the aluminum hinge covers to the upper case.
-
Remove the two aluminum hinge brackets from the MacBook Pro.
-
-
-
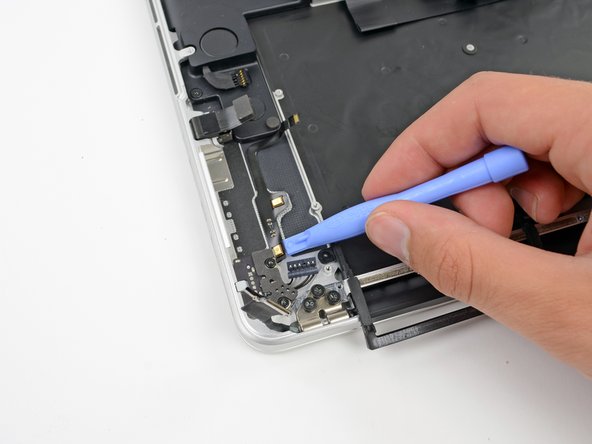
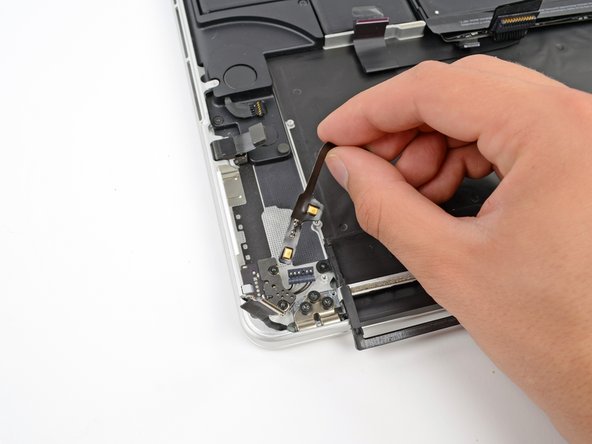
Com a parte plana de uma espátula, levante o conector da placa de E/S em linha reta de seu soquete na placa lógica.
-
De maneira semelhante, remova o conector do cabo da placa de E/S de seu soquete na placa de E/S.
-
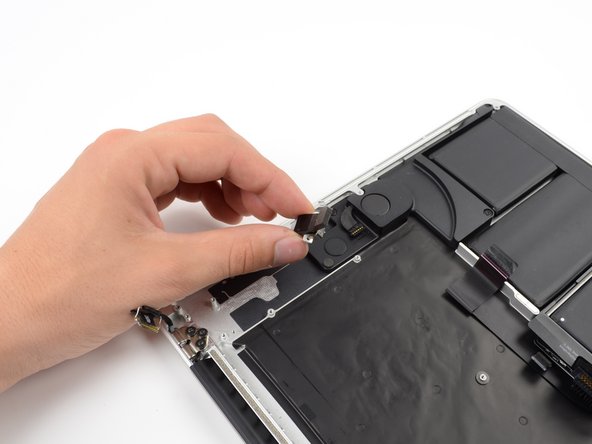
Remova o cabo da placa de E/S do MacBook Pro.
-
-
-
Remova o único parafuso Torx T5 (às vezes T6) de 2,9 mm que prende a placa do AirPort à placa lógica.
-
-
-
-
Com a ponta plana de uma espátula, levante a capa de borracha do dissipador de calor da ventoinha esquerda.
-
-
-
Com a ponta pontiaguda de uma espátula, levante a aba de retenção do soquete ZIF do cabo plano da ventoinha esquerda.
-
Começando pela parte superior do cabo, deslize uma ferramenta de abertura de plástico sob o cabo da ventoinha esquerda para liberá-lo da placa lógica.
-
Levante a ventoinha esquerda para fora do dispositivo.
-
-
-
Com a ponta pontiaguda de uma espátula, levante a trava do cabo de dados da placa de E/S e gire-a em direção ao lado da bateria do computador.
-
Com a ponta plana de uma espátula, deslize o cabo de dados da placa de E/S em linha reta para fora de seu soquete na placa lógica.
-
-
-
Remova os dois parafusos Torx T5 de 3,1 mm que prendem a placa de E/S à placa lógica.
-
Em alguns modelos, a remoção do parafuso Torx T5 prateado de 3,5 mm do dissipador de calor também pode ajudar na remoção da placa de E/S.
-
Levante cuidadosamente a placa de E/S e remova-a da estrutura inferior.
-
-
-
Com a ponta plana de uma espátula, erga o conector de entrada do fone de ouvido do seu soquete na placa lógica.
-
-
-
Levantando o lado mais próximo da bateria, gire a placa lógica em direção à parte superior do MacBook Pro.
-
Com a ponta plana de uma espátula, empurre cuidadosamente o conector MagSafe 2 para fora de seu soquete na parte inferior da placa lógica.
-
No sentido horário, de cima para baixo: teclado, trackpad, bateria, alto-falante direito, retroiluminação do teclado, tela, microfone, entrada para fone de ouvido, alto-falante esquerdo.
-
-
Este passo não foi traduzido. Ajude a traduzi-lo
-
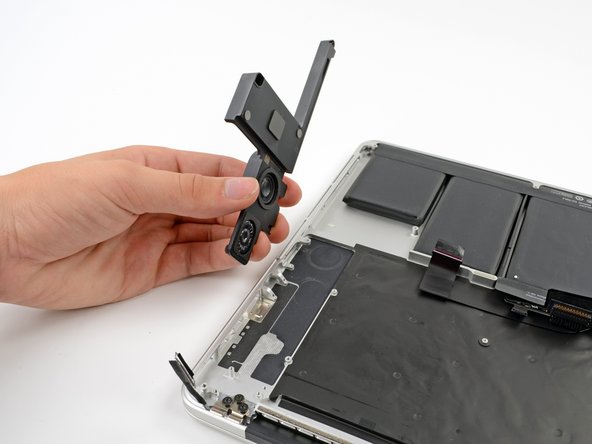
Remove the single 2.6 mm T5 Torx screw securing the left rubber hinge cover in place.
-
Slide the hinge cover out of its bezel, then lift it up and out of the device.
-
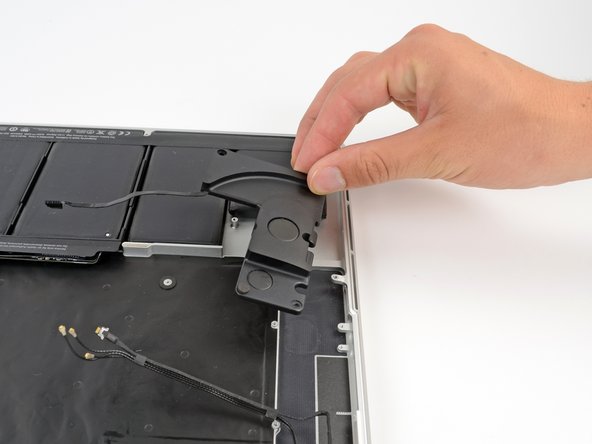
Slide the right cover out of its bezel, then lift it out of the device.
-
-
Este passo não foi traduzido. Ajude a traduzi-lo
-
Insert the edge of a plastic opening tool underneath the upper microphone.
-
Slide the blade of a plastic opening tool along the bottom of the upper microphone, releasing the adhesive.
-
In a similar manner, release the adhesive underneath the lower microphone.
-
Lift the cable out of the device.
-
-
Este passo não foi traduzido. Ajude a traduzi-lo
-
Remove the two 4.0 mm T5 Torx screws securing the MagSafe DC-In board to the upper case.
-
Slide the MagSafe DC-In board towards the right free it from its recess within the upper case.
-
Lift and remove the MagSafe DC-In board out of the upper case assembly.
-
-
Este passo não foi traduzido. Ajude a traduzi-lo
-
Remove the two 3.6 mm T5 Torx screws securing the headphone jack to the upper case assembly.
-
Slide the headphone jack away from the upper case.
-
Lift and remove the headphone jack out from its recess in the upper case.
-
-
Este passo não foi traduzido. Ajude a traduzi-lo
-
Remove the following three screws securing the left speaker to the upper case:
-
One 5.6 mm T5 Torx screw
-
One 6.9 mm T5 Torx screw
-
One 2.6 mm T5 Torx screw
-
Lift the left speaker out of the upper case and set it aside.
-
-
Este passo não foi traduzido. Ajude a traduzi-lo
-
Remove the following three screws securing the right speaker to the upper case:
-
One 5.6 mm T5 Torx screw
-
One 6.9 mm T5 Torx screw
-
One 2.6 mm T5 Torx screw
-
Remove the right speaker from the MacBook Pro.
-
-
Este passo não foi traduzido. Ajude a traduzi-lo
-
Remove four out of the six 5.3 mm T8 Torx screws securing the display to the upper case.
-
-
Este passo não foi traduzido. Ajude a traduzi-lo
-
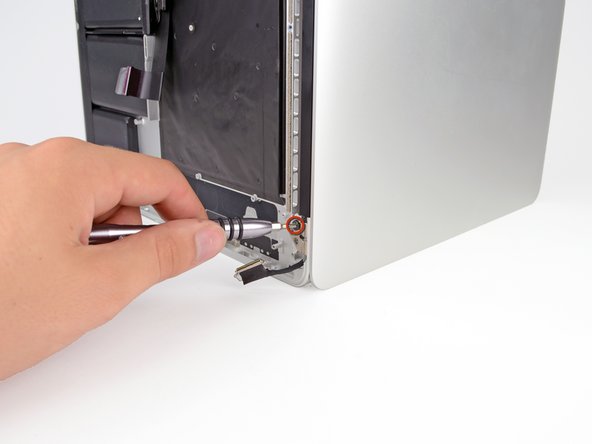
While supporting both halves of the device with one hand, unscrew the upper 5.3 mm T8 Torx screw.
-
-
Este passo não foi traduzido. Ajude a traduzi-lo
-
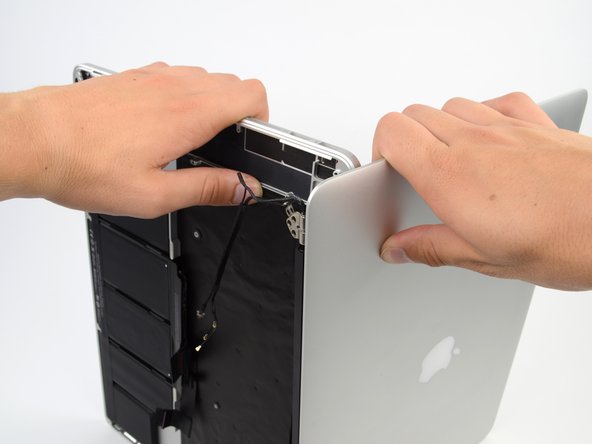
Grip both halves of the device. Firmly put one hand on the top center of the upper case (left) and one in the same place on the display assembly (right).
-
While holding the display assembly in place, slowly push forward on the upper case, releasing it from the display assembly.
-


Cancelar: não concluí este guia.
51 outras pessoas executaram este guia.

10 comentários
How Can I clean a coffee spill on the retina macbook pro? which alcohol to use to clean the logic board and I/O board? Will I get all the necessary tools to open it in Home Tech toolkit?
-It would be cool a 3rd party battery manufacturer to make a spare battery without the glue.
-Ony needed to remove the glued one (no prob. if damage it.. it is no good anyway, anymore) and put in place a new one with no glue held in place just by the lack of space inside the case, or some tiny spongy strips to help remove any play.
-The thing is who would manufacture a spare like this.
-Even Apple could supply spares like this.
I have always turned to iFixIt for repair guides. This particular repair, listed as "difficult," was one that I was apprehensive about undertaking. But I was successful!
I have a brief blog post about it here:
http://www.hightechdad.com/2014/12/22/ho...
And, for those who are going through this guide, I have a LONG (30 minute) video that walks through the repair using the iFixIt guide:
https://www.youtube.com/watch?v=2ODfFSMs...
Hope it helps!
-HTD
== The good ==
Very clear instructions, well done.
== The warning ==
There is one major problem though ... I purchased the Upper Case Assembly as mentioned, although from a local retailer in Australia. When I got to the final step, I realised it didn't have the battery or touchpad. If you purchase the case assembly from elsewhere, make sure it comes with the battery/touchpad as these are impossible to move from one unit to another.