Esta versão pode conter edições incorretas. Mude para o último instantâneo verificado.
O que você precisa
-
-
Remova os 10 parafusos a seguir que fixam a estrutura inferior ao MacBook Pro 13" Monobloco:
-
Sete parafusos Phillips de 3 mm.
-
Três parafusos Phillips de 13,5 mm.
-
-
-
Levante ligeiramente a estrutura inferior e empurre-a em direção à parte traseira do computador para liberar as linguetas de montagem.
-
-
Este passo não foi traduzido. Ajude a traduzi-lo
-
Use the flat end of a spudger to lift the battery connector up out of its socket on the logic board.
-
-
Este passo não foi traduzido. Ajude a traduzi-lo
-
Remove the soft padding that may be on top and gently pull the connector up out of its socket on the logic board.
-
-
Este passo não foi traduzido. Ajude a traduzi-lo
-
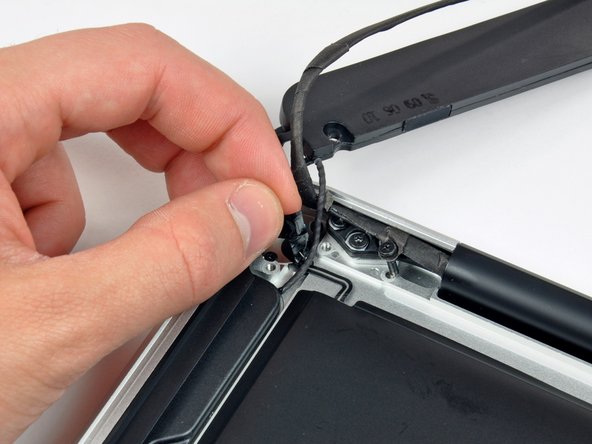
Pull the camera cable connector toward the optical drive to disconnect it from the logic board.
-
-
-
Este passo não foi traduzido. Ajude a traduzi-lo
-
Use the flat end of a spudger to pry the optical drive connector straight up off the logic board.
-
-
Este passo não foi traduzido. Ajude a traduzi-lo
-
Use the flat end of a spudger to pry the hard drive connector straight up off the logic board.
-
-
Este passo não foi traduzido. Ajude a traduzi-lo
-
Remove the following screws securing the subwoofer to the upper case:
-
One 3.8 mm Phillips screw
-
One 5 mm Phillips screw
-
-
Este passo não foi traduzido. Ajude a traduzi-lo
-
Lift the subwoofer off the optical drive, and set it above the computer.
-
-
Este passo não foi traduzido. Ajude a traduzi-lo
-
Remove the two 10 mm Phillips screws securing the camera cable bracket to the upper case.
-
Lift the camera cable bracket out of the upper case.
-
-
Este passo não foi traduzido. Ajude a traduzi-lo
-
Remove the three 2.5 mm Phillips screws securing the optical drive to the upper case.
-
Lift the optical drive from its right edge and pull it out of the computer.
-
-
Este passo não foi traduzido. Ajude a traduzi-lo
-
Peel back the small piece of black tape covering the right speaker cable.
-
-
Este passo não foi traduzido. Ajude a traduzi-lo
-
Use the tip of a spudger to pry the right speaker up off the adhesive securing it to the upper case.
-
-
Este passo não foi traduzido. Ajude a traduzi-lo
-
Lift the subwoofer and right speaker assembly out of the upper case.
-


Cancelar: não concluí este guia.
52 outras pessoas executaram este guia.

3 comentários
Hello, I've just brought a MacBook Pro 8,1 to life with an SSD. It works great but unfortunately no sound. There is no output listed in sound window. I tried cmd+opt+P+R without success. Would replacing the speaker assembly solve the problem or is this a hardware problem? Thanx
PS- I also restarted cord...something in processes that didn't work either.