Esta versão pode conter edições incorretas. Mude para o último instantâneo verificado.
O que você precisa
-
Este passo não foi traduzido. Ajude a traduzi-lo
-
Remove the following ten screws:
-
Two 8 mm 5-point Pentalobe screws
-
Eight 2.5 mm 5-point Pentalobe screws
-
-
Este passo não foi traduzido. Ajude a traduzi-lo
-
Wedge your fingers between the display and the lower case and pull upward to pop the lower case off the Air.
-
-
Este passo não foi traduzido. Ajude a traduzi-lo
-
Use the flat end of a spudger to pry both short sides of the battery connector upward to disconnect it from its socket on the logic board.
-
Bend the battery cable slightly away from the logic board so the connector will not accidentally bend back and make contact with its socket.
-
-
Este passo não foi traduzido. Ajude a traduzi-lo
-
Use the flat end of a spudger to pry the left and right I/O board cable connectors up off their respective sockets on the I/O board.
-
-
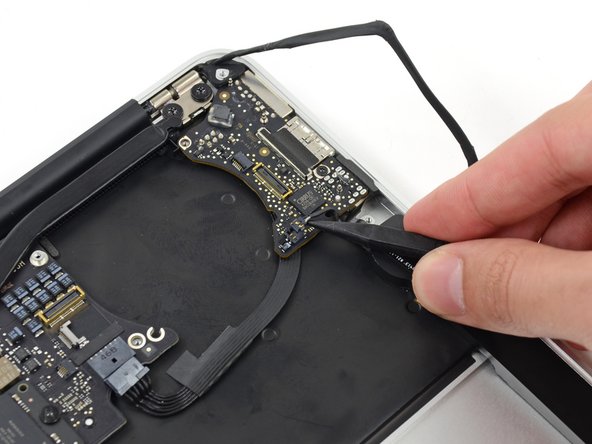
Este passo não foi traduzido. Ajude a traduzi-lo
-
Use the tip of a spudger to carefully push on each side of the iSight camera cable connector to loosen it out of its socket on the logic board.
-
-
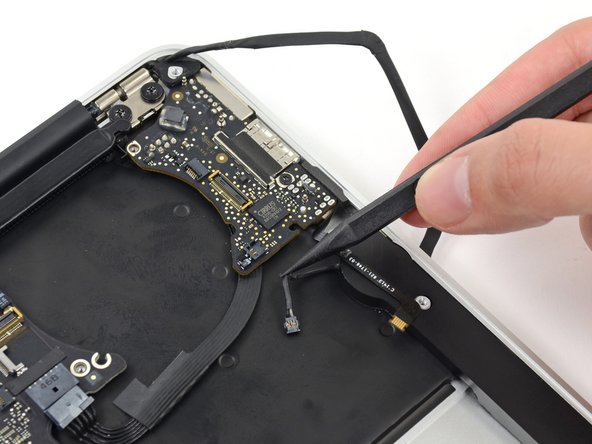
Este passo não foi traduzido. Ajude a traduzi-lo
-
Peel the iSight camera cable up off the adhesive securing it to the fan.
-
-
-
Este passo não foi traduzido. Ajude a traduzi-lo
-
Use the tip of a spudger to carefully flip up the retaining flap on the fan cable ZIF socket.
-
-
Este passo não foi traduzido. Ajude a traduzi-lo
-
Remove the following three screws securing the fan to the upper case:
-
Two 5.5 mm T5 Torx screws
-
One 4.6 mm T5 Torx screw
-
-
Este passo não foi traduzido. Ajude a traduzi-lo
-
Lift, but do not remove the fan out of its recess in the upper case.
-
Carefully pull the fan ribbon cable out of its socket as you remove the fan from the Air.
-
-
Este passo não foi traduzido. Ajude a traduzi-lo
-
Remove the following five screws securing the battery to the upper case:
-
Two 5.2 mm T5 Torx screws
-
One 6 mm T5 Torx screw
-
Two 2.6 mm T5 Torx screws
-
-
Este passo não foi traduzido. Ajude a traduzi-lo
-
Lift the battery from its edge nearest the logic board and remove it from the upper case.
-
-
Este passo não foi traduzido. Ajude a traduzi-lo
-
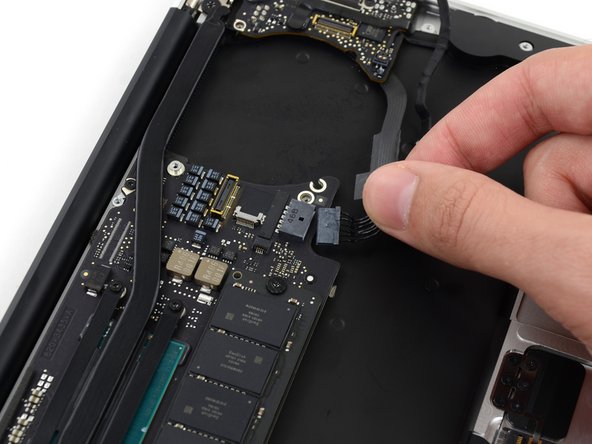
Disconnect the I/O board power cable from the logic board by pulling the cable out of its socket on the logic board.
-
-
Este passo não foi traduzido. Ajude a traduzi-lo
-
Use the tip of a spudger to carefully flip up the retaining flap on the microphone cable ZIF socket.
-
Pull the microphone ribbon cable straight out of its socket.
-
-
Este passo não foi traduzido. Ajude a traduzi-lo
-
Use the tip of a spudger to pry under the speaker cable near the connector to lift the connector straight up out of its socket.
-
-
Este passo não foi traduzido. Ajude a traduzi-lo
-
De-route the cable from its notch in the I/O board.
-
-
Este passo não foi traduzido. Ajude a traduzi-lo
-
Remove the small rubber gasket from the corner of the upper case nearest the I/O board.
-
-
Este passo não foi traduzido. Ajude a traduzi-lo
-
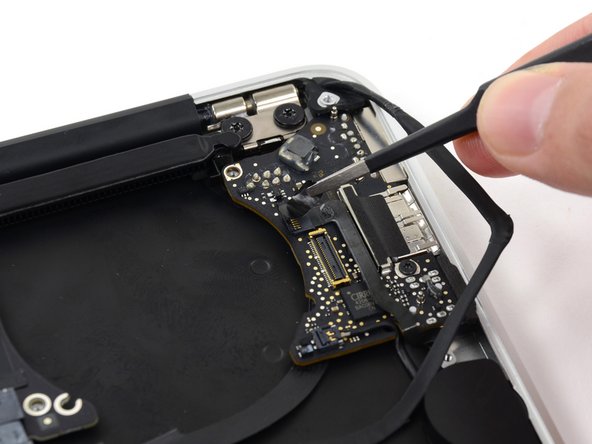
Remove the single 3.6 mm T5 Torx screw securing the I/O board to the upper case.
-
In some models this is a 3.1 mm T5 Torx screw.
-
-
Este passo não foi traduzido. Ajude a traduzi-lo
-
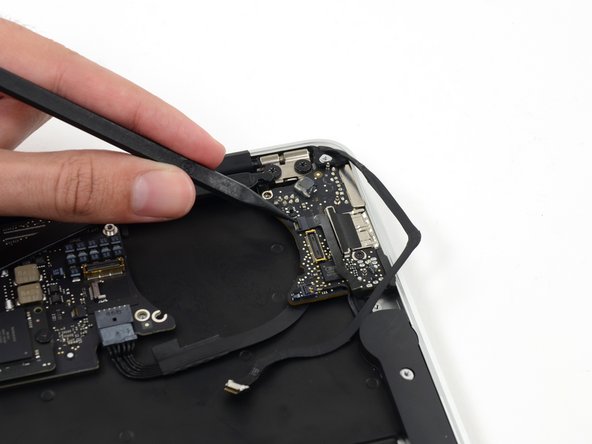
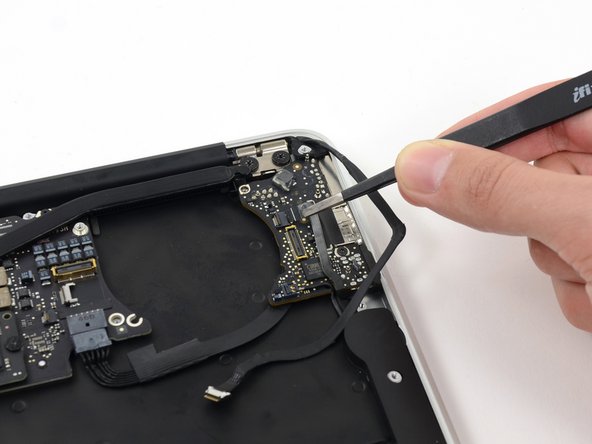
Carefully lift the I/O board by its power cable and pull it away from the edge of the case.
-


Cancelar: não concluí este guia.
21 outras pessoas executaram este guia.


Um comentário
Great tutorial. I may do this for sure. I get no audio and no microphone on my MacBook air. I took it to Apple and they told me it was hardware and not software. In Settins in Audio, there is no Audio Ouput available and No built in Mic available. Would you imagine this might be what is wrong with my Air?