Ir para o conteúdo principal

Mac Pro Late 2013 Power Supply Assembly Replacement

Pré-requisito somente
Este guia destina-se apenas a ser usado como pré-requisito para outros guias. É incompleto por si só.

O que você precisa

  1. Mac Pro Late 2013 Power Supply Assembly Replacement, Power Supply Assembly: passo 1, imagem 1 %32
    • Flip the Mac Pro back over and set it gently on a flat surface.

    • We recommend laying the Mac Pro on the corner of the heat sink and the two standoff screw posts that attach to the interconnect board.

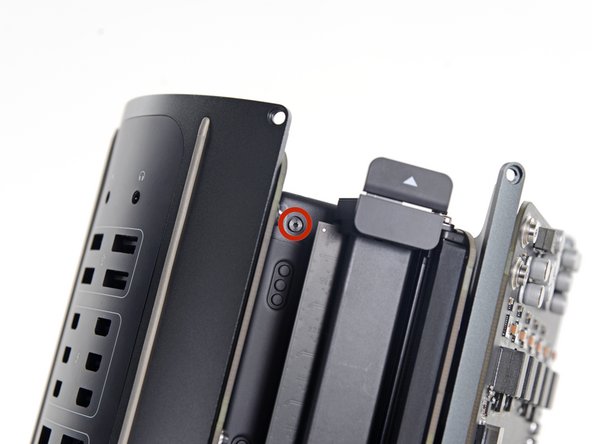
  2. Mac Pro Late 2013 Power Supply Assembly Replacement: passo 2, imagem 1 %32 Mac Pro Late 2013 Power Supply Assembly Replacement: passo 2, imagem 2 %32
    • Remove the two 3.6 mm T5 Torx screws from the sides of the power supply cage (one on each side).

  3. Mac Pro Late 2013 Power Supply Assembly Replacement: passo 3, imagem 1 %32
    • Remove the power supply cage from the top of the power supply.

    • By removing this cage, you are exposing internal components of the power supply. Be very careful not to touch any of the power supply components or circuitry.

    • Be careful not to drop any screws or tools into the power supply, as this may damage the power supply.

  4. Mac Pro Late 2013 Power Supply Assembly Replacement: passo 4, imagem 1 %32
    • Remove the four 5.5 mm T8 Torx screws securing the power supply assembly to the Mac Pro.

  5. Mac Pro Late 2013 Power Supply Assembly Replacement: passo 5, imagem 1 %32
    • Remove the power supply assembly from the Mac Pro.

Conclusão

To reassemble your device, follow these instructions in reverse order.

Andrew Optimus Goldheart

Membro desde: 10/17/09

502.789 Reputação

Autoria de 407 guias

Equipe

iFixit Membro de iFixit

Staff

Membros da 135

Autoria de 16.767 guias

0 comentários

Adicione um comentário

Exibir estatísticas:

Últimas 24 horas: 0

Últimos 7 dias: 0

Últimos 30 dias: 0

Duração total: 92