O que você precisa
-
-
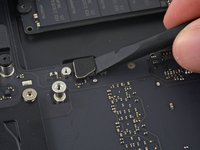
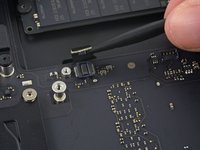
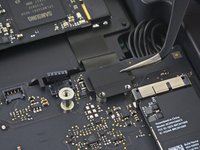
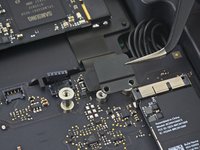
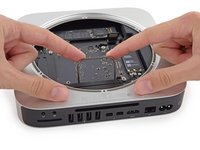
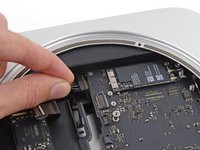
Remove the 2.6 mm T6 screw securing the SATA cable connector bracket.
-
-
-
Ferramenta utilizada neste passo:Mac mini Logic Board Removal Tool$4.99
-
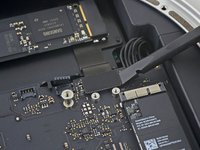
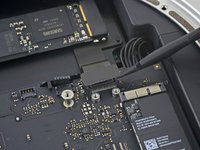
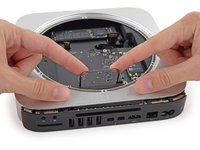
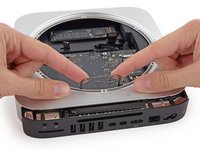
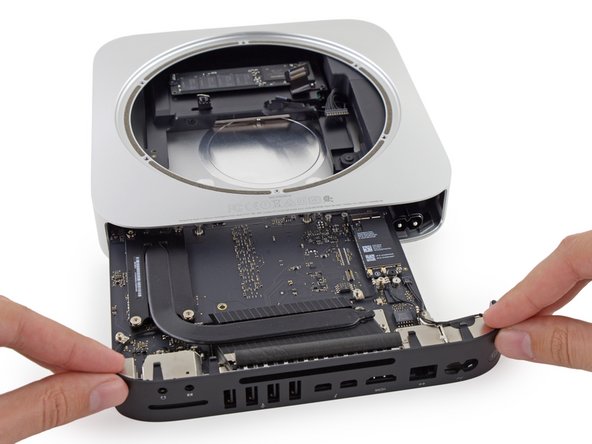
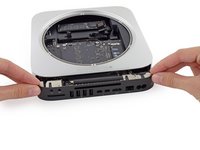
Insert the Mac mini Logic Board Removal Tool into the two holes highlighted in red. Be sure the rods make contact with the case under the logic board before proceeding.
-
-
-
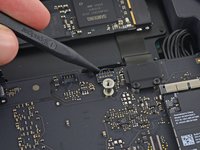
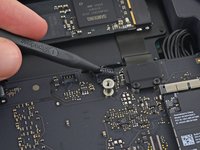
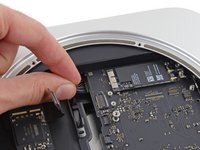
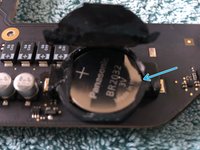
Use a spudger or small screwdriver to push the battery to the side and it will flip out
-


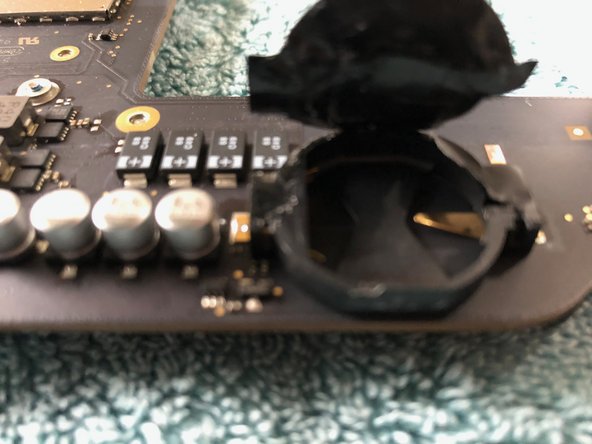


While you can use the CR2032 the BR2032 is recommended as it has a higher heat tollerance and the type fitted by Apple. The chemical make up is also different. To reassemble your device, follow these instructions in reverse order.
Cancelar: não concluí este guia.
13 outras pessoas executaram este guia.
7Comentários do guia
I can’t find a way to contact you anywhere on your site but your fix for installing windows on a mac worked for me. I had been trying to get it to work for 2 days. Deleted my OSX install and everything. Deleting the second EFI partition is what it was. Nowhere else said that but your blog. So man, thanks and keep it up.
No problem, your welcome. Thanks for your help too, you made me realise I broke the website comments during an upgrade.
Tom -
This may sound stupid I have a job lot of Mac mini 2012 at first I installed new hdd and new ram as the Mac mini started beeping when turned on. Once both of these were replaced the Mac minis now turn on but do not chime or display anything with high fan rpms. The PRAM batteries look blown on all of them could this potentially cause this any help will be appreciated
Thats really interesting. I had put a SSD into my Mini a few weeks prior but I think what caused mine was a faulty USB device as the device at the time as the USB came up and then instantly failed taking the Mac with it. The new battery worked fine ever since. I did put a CR2032 in to confirm it resolved it before I put a BR2032 because I wanted to ensure it could tolerate the heat and sustain it long term (interesting article on the differences - https://electronicshacks.com/br2032-vs-c...). I was in a pinch at the time; BR2032's where I live are not common and I had to order it which took a while from memory. Hope that helps.
Tom -