Ir para o conteúdo principal

Lorex MC6950 Circuit Board Replacement

O que você precisa

  1. Lorex MC6950 Circuit Board Replacement, Circuit Board: passo 1, imagem 1 %32 Lorex MC6950 Circuit Board Replacement, Circuit Board: passo 1, imagem 2 %32
    • To remove the circuit board, you must begin by removing the three screw caps and the 15mm JIS 0 screws associated with them located on the plastic containment shell that the camera is in.

  2. Lorex MC6950 Circuit Board Replacement: passo 2, imagem 1 %32 Lorex MC6950 Circuit Board Replacement: passo 2, imagem 2 %32
    • Next, the camera must be removed. A metal spudger will be useful to pry this out as it is sealed inside the outer containment shell.

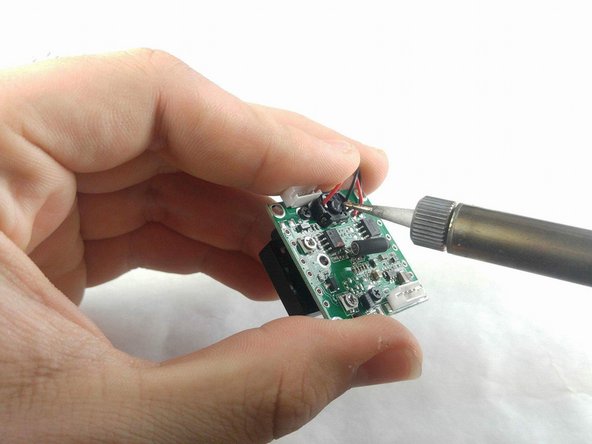
    • Once the camera is removed, remove the wires from the outer containment shell.

    • Be careful. The metal spudger could damage the camera if not handled with care.

  3. Lorex MC6950 Circuit Board Replacement: passo 3, imagem 1 %32 Lorex MC6950 Circuit Board Replacement: passo 3, imagem 2 %32
    • With the camera in hand, the circuit board must be separated from the LED containment shell. There is a 5mm JIS 0 screw at every corner of the circuit board.

    • The wires attaching the circuit board to the shell should be removed as well.

  4. Lorex MC6950 Circuit Board Replacement: passo 4, imagem 1 %32 Lorex MC6950 Circuit Board Replacement: passo 4, imagem 2 %32
    • Now the motor, lens, and wires must be removed from the circuit board. There are three 5mm JIS 0 screws located on the lens side of the circuit board to remove the motor housing.

    • The motor housing will need to be soldered back onto the new circuit board when reassembling. The wires should come from the circuit board and connect to the motor housing on the opposite of the lens side of the circuit board.

  5. Lorex MC6950 Circuit Board Replacement: passo 5, imagem 1 %32
    • The lens has two 5 mm JIS 0 screws located under the motor's previous location.

    • As a final step, the wires that connected the board to the containment shell will need to be removed from the board.

    • The lens should be the first component placed when reassembling the camera

Conclusão

To reassemble your device, follow these instructions in reverse order.

Uma outra pessoa concluiu este guia.

Elijah Conlin

Membro desde: 11/07/17

379 Reputação

Autoria de 3 guias

Equipe

IUPUI, Team S2-G2, Harley Fall 2017 Membro de IUPUI, Team S2-G2, Harley Fall 2017

IUPUI-HARLEY-F17S2G2

Membros da 3

Autoria de 3 guias

0 comentários

Adicione um comentário

Exibir estatísticas:

Últimas 24 horas: 1

Últimos 7 dias: 3

Últimos 30 dias: 13

Duração total: 538