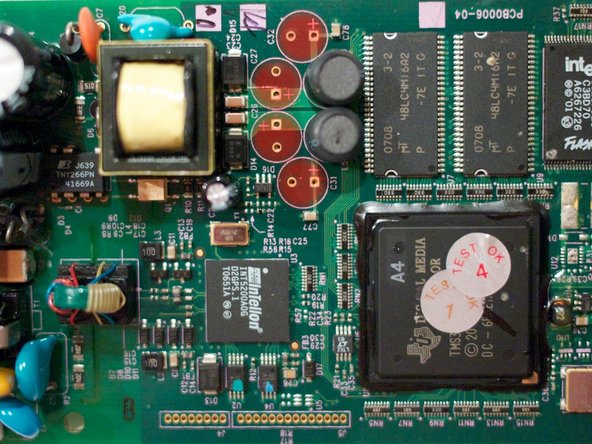
Ir para o conteúdo principal

Logitech WiLife and LukWerks Outdoor Security Camera Capacitor replacement

O que você precisa

  1. Logitech WiLife and LukWerks Outdoor Security Camera Capacitor replacement, Capacitors: passo 1, imagem 1 %32 Logitech WiLife and LukWerks Outdoor Security Camera Capacitor replacement, Capacitors: passo 1, imagem 2 %32 Logitech WiLife and LukWerks Outdoor Security Camera Capacitor replacement, Capacitors: passo 1, imagem 3 %32
    • Obtain (4) 1000uF capacitors rated for 25 volts. The replacement capacitors featured in this guide were purchased from Digi-key. Digi-key part number: UHE1E102MHD6. http://search.digikey.com/scripts/DkSear...

    • Additional suggested tools for this repair are pictured.

  2. Logitech WiLife and LukWerks Outdoor Security Camera Capacitor replacement: passo 2, imagem 1 %32
    • Caution: Be mindful of the dangerous high voltage that exist in this device when powered and for a short time afterward.

    • Place the camera upside down.

    • Using a small flat tool, pry off the plastic covers on each side of the case (outlined in orange)

  3. Logitech WiLife and LukWerks Outdoor Security Camera Capacitor replacement: passo 3, imagem 1 %32
    • Removal of the covers reveal six philips head screws (green highlight).

    • Unscrew all six screws.

  4. Logitech WiLife and LukWerks Outdoor Security Camera Capacitor replacement: passo 4, imagem 1 %32 Logitech WiLife and LukWerks Outdoor Security Camera Capacitor replacement: passo 4, imagem 2 %32
    • Flip the camera so the top is right-side up.

    • Remove the top of the case.

    • Notice the four damaged capacitors C26, C27, C31 and C32 (red highlight).

  5. Logitech WiLife and LukWerks Outdoor Security Camera Capacitor replacement: passo 5, imagem 1 %32
    • Unscrew all four phillips head screws in each corner (green highlight).

    • Disconnect power cable (yellow highlight).

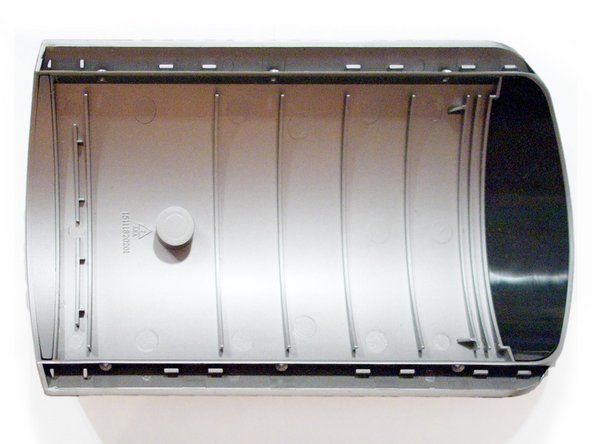
    • Lift and remove the clear front plastic lens cover.

    • Lift the circuit board and camera assebly out of the case.

    • Carefully separate the LED assembly from the four small connectors (highlighted in blue). Note: This step is not required for this repair. However, it reduces the possibility of inadvertent damage during the process.

  6. Logitech WiLife and LukWerks Outdoor Security Camera Capacitor replacement: passo 6, imagem 1 %32 Logitech WiLife and LukWerks Outdoor Security Camera Capacitor replacement: passo 6, imagem 2 %32 Logitech WiLife and LukWerks Outdoor Security Camera Capacitor replacement: passo 6, imagem 3 %32
    • Desolder and remove the four capacitors (red highlight).

    • Suggestion: Mark the capacitors on top and on the bottom of the board to avoid damaging another component.

  7. Logitech WiLife and LukWerks Outdoor Security Camera Capacitor replacement: passo 7, imagem 1 %32
    • Clean and remove remaining solder or debris from the area.

    • Cut leads on new capacitors to fit.

    • Solder the four new capacitors in place.

    • Notice: Pay attention to the polarity of the capacitors.

    • Insulate the leads and gently bend the capacitors to fit.

  8. Logitech WiLife and LukWerks Outdoor Security Camera Capacitor replacement: passo 8, imagem 1 %32
    • Suggestion: Before full reassembly, reattach the LED module, place the board and camera module into the case and reconnect the A/C cable to ensure proper operation.

    • Caution: Be mindful of the dangerous high voltage that exist in this device when powered and for a short time afterward.

Conclusão

To reassemble your device, follow these instructions in reverse order.

6 outras pessoas executaram este guia.

Um comentário

I did the repair worked for 5 min's then starts acting up. Before the fix wouldn't work at all. Is there anymore suggestions?

martin - Responder

Adicione um comentário

Exibir estatísticas:

Últimas 24 horas: 0

Últimos 7 dias: 3

Últimos 30 dias: 48

Duração total: 9,563