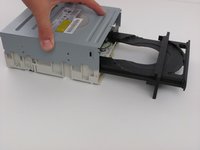
Ir para o conteúdo principal

Lite-On LightScribe SHM-165H6S Drive Belt Replacement

O que você precisa

  1. Lite-On LightScribe SHM-165H6S Drive Belt Replacement, Chassis: passo 1, imagem 1 %32 Lite-On LightScribe SHM-165H6S Drive Belt Replacement, Chassis: passo 1, imagem 2 %32
    • Insert an open paper clip into the small hole on the left side of the faceplate.

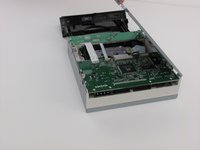
    • After the tray opens, extend it fully.
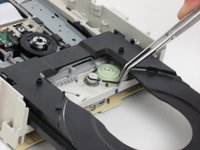
  2. Lite-On LightScribe SHM-165H6S Drive Belt Replacement: passo 2, imagem 1 %32 Lite-On LightScribe SHM-165H6S Drive Belt Replacement: passo 2, imagem 2 %32 Lite-On LightScribe SHM-165H6S Drive Belt Replacement: passo 2, imagem 3 %32
    • Use an opening device to push in the black tabs on the left, right and bottom of the outer chassis to unhook the faceplate.

  3. Lite-On LightScribe SHM-165H6S Drive Belt Replacement: passo 3, imagem 1 %32
    • Pull the faceplate away from the main chassis.

  4. Lite-On LightScribe SHM-165H6S Drive Belt Replacement: passo 4, imagem 1 %32
    • Unscrew the four 8.5 mm screws on the bottom chassis using a Philips #2 screwdriver.

  5. Lite-On LightScribe SHM-165H6S Drive Belt Replacement: passo 5, imagem 1 %32 Lite-On LightScribe SHM-165H6S Drive Belt Replacement: passo 5, imagem 2 %32
    • Lift the top and bottom chassis straight up in order to remove them.

  6. Lite-On LightScribe SHM-165H6S Drive Belt Replacement, Drive Belt: passo 6, imagem 1 %32 Lite-On LightScribe SHM-165H6S Drive Belt Replacement, Drive Belt: passo 6, imagem 2 %32
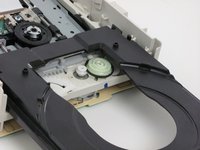
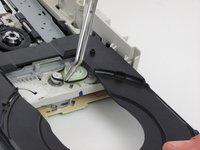
    • Extend the tray so that the belt is accessible.

    • Remove the old belt using tweezers.

  7. Lite-On LightScribe SHM-165H6S Drive Belt Replacement: passo 7, imagem 1 %32 Lite-On LightScribe SHM-165H6S Drive Belt Replacement: passo 7, imagem 2 %32
    • Carefully replace with the new belt by wrapping it around the larger gear first, followed by the smaller gear.

Conclusão

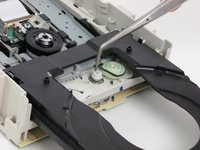
To reassemble your device, follow these instructions in reverse order.

5 outras pessoas executaram este guia.

James Biggs

Membro desde: 10/12/11

596 Reputação

Autoria de 3 guias

Equipe

Cal Poly, Team 6-5, Regan Fall 2011 Membro de Cal Poly, Team 6-5, Regan Fall 2011

CPSU-REGAN-F11S6G5

Membros da 2

Autoria de 6 guias

Um comentário

In case anyone is interested, I used a 11/16” OD x 9/16” I.D. x 1/16” wall, for this exact drive (was a tight fit) and seems to work perfect.

I was so tired of replacing rubber bands every few months!

And yes this is an “O-ring”  it should be less than a buck five eighty at your local big box hardware store.

Jim Mccalb - Responder

Adicione um comentário

Exibir estatísticas:

Últimas 24 horas: 0

Últimos 7 dias: 2

Últimos 30 dias: 7

Duração total: 6,510