Ir para o conteúdo principal

Lenovo Yoga 710-14IKB SSD Replacement

O que você precisa

  1. Lenovo Yoga 710-14IKB SSD Replacement, Back Cover: passo 1, imagem 1 %32
    • Ensure your device is completely OFF before starting this guide.

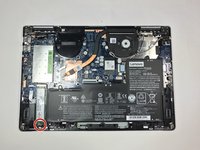
    • Use a Torx T4 screwdriver to unscrew the nine 5 mm screws holding the cover in place.

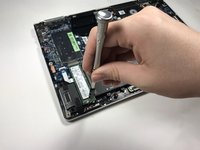
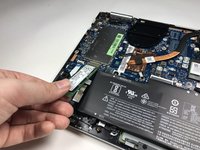
    • Use a Torx T4 screwdriver to unscrew the 8 mm screw in the center.

    • When, reassembling, make sure not to tighten the screws too much or you may risk cracking the plastic cover.

  2. Lenovo Yoga 710-14IKB SSD Replacement: passo 2, imagem 1 %32 Lenovo Yoga 710-14IKB SSD Replacement: passo 2, imagem 2 %32 Lenovo Yoga 710-14IKB SSD Replacement: passo 2, imagem 3 %32
    • Use the plastic opening tool to pry the cover up and away from the laptop, starting at one end and working your way around the cover.

    • The cover is large and flat and made of thin plastic. It cracks easily, so make sure not to pry too hard.

  3. Lenovo Yoga 710-14IKB SSD Replacement, SSD: passo 3, imagem 1 %32 Lenovo Yoga 710-14IKB SSD Replacement, SSD: passo 3, imagem 2 %32
    • Use a Phillips #00 screwdriver to remove the 3mm screw on the SSD.

  4. Lenovo Yoga 710-14IKB SSD Replacement: passo 4, imagem 1 %32 Lenovo Yoga 710-14IKB SSD Replacement: passo 4, imagem 2 %32
    • Use your fingers to lift up the SSD and pull away from the socket removing it from the laptop.

Conclusão

To reassemble your device, follow these instructions in reverse order.

7 outras pessoas executaram este guia.

Grant Doerksen

Membro desde: 04/17/17

1.005 Reputação

Autoria de 5 guias

Equipe

Cal Poly, Team S14-G5, Banghart Spring 2017 Membro de Cal Poly, Team S14-G5, Banghart Spring 2017

CPSU-BANGHART-S17S14G5

Membros da 4

Autoria de 21 guias

0 comentários

Adicione um comentário

Exibir estatísticas:

Últimas 24 horas: 3

Últimos 7 dias: 13

Últimos 30 dias: 61

Duração total: 11,209