Ir para o conteúdo principal

Lenovo Yoga 710-11ISK SSD Replacement

O que você precisa

  1. Lenovo Yoga 710-11ISK SSD Replacement, Back Panel: passo 1, imagem 1 %32 Lenovo Yoga 710-11ISK SSD Replacement, Back Panel: passo 1, imagem 2 %32
    • Make sure back panel is facing up.

    • Remove eleven 5mm screws with the T5 Torx Screwdriver.

  2. Lenovo Yoga 710-11ISK SSD Replacement: passo 2, imagem 1 %32
    • Lift back panel carefully.

    • You can now replace back cover, making sure to match screw holes and placement of the original.

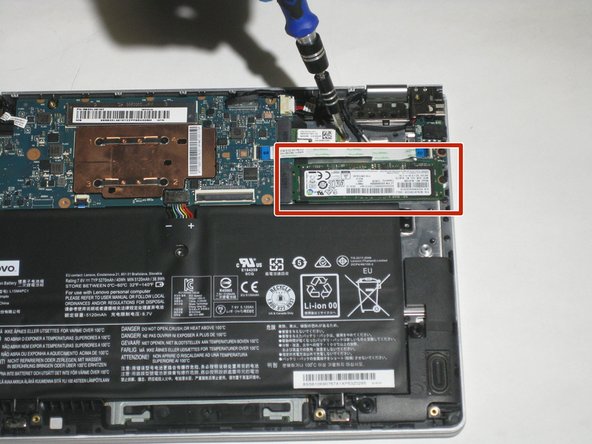
  3. Lenovo Yoga 710-11ISK SSD Replacement, SSD: passo 3, imagem 1 %32 Lenovo Yoga 710-11ISK SSD Replacement, SSD: passo 3, imagem 2 %32
    • Use a Phillips #00 screwdriver to remove the single 3 mm screw on the right of the SSD.

  4. Lenovo Yoga 710-11ISK SSD Replacement: passo 4, imagem 1 %32
    • Disconnect and pull the SSD out of the motherboard.

Conclusão

To reassemble your device, follow these instructions in reverse order.

0 comentários

Adicione um comentário

Exibir estatísticas:

Últimas 24 horas: 0

Últimos 7 dias: 0

Últimos 30 dias: 7

Duração total: 309