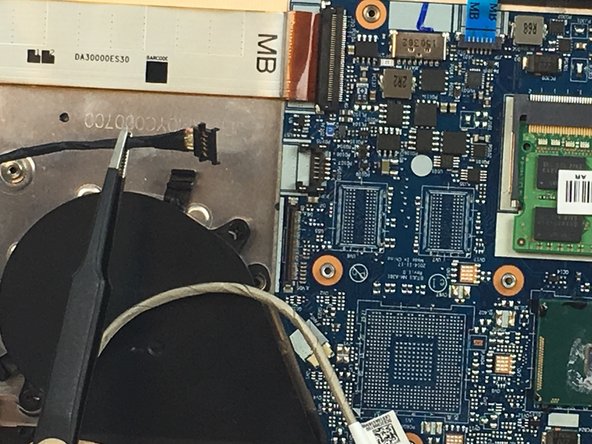
Ir para o conteúdo principal

Lenovo Yoga 3 14 Motherboard Replacement

O que você precisa

  1. Lenovo Yoga 3 14 Motherboard Replacement, Back Case: passo 1, imagem 1 %32
    • Remove the eleven 6mm T5 Torx screws from the back case.

  2. Lenovo Yoga 3 14 Motherboard Replacement: passo 2, imagem 1 %32 Lenovo Yoga 3 14 Motherboard Replacement: passo 2, imagem 2 %32 Lenovo Yoga 3 14 Motherboard Replacement: passo 2, imagem 3 %32
    • Insert the plastic opening tool into the long side of the case backing and slide it the entire length of the laptop.

    • Gently lift the backing off the laptop.

  3. Lenovo Yoga 3 14 Motherboard Replacement, Battery: passo 3, imagem 1 %32
    • Remove the four 3mm PH#0 screws surrounding the battery.

  4. Lenovo Yoga 3 14 Motherboard Replacement: passo 4, imagem 1 %32 Lenovo Yoga 3 14 Motherboard Replacement: passo 4, imagem 2 %32 Lenovo Yoga 3 14 Motherboard Replacement: passo 4, imagem 3 %32
    • Gently lift the battery and use the plastic opening tool to remove the battery's connection to the laptop.

  5. Lenovo Yoga 3 14 Motherboard Replacement, Cooling Fan: passo 5, imagem 1 %32 Lenovo Yoga 3 14 Motherboard Replacement, Cooling Fan: passo 5, imagem 2 %32
    • Remove the two 3mm screws using the PH#0 screwdriver head.

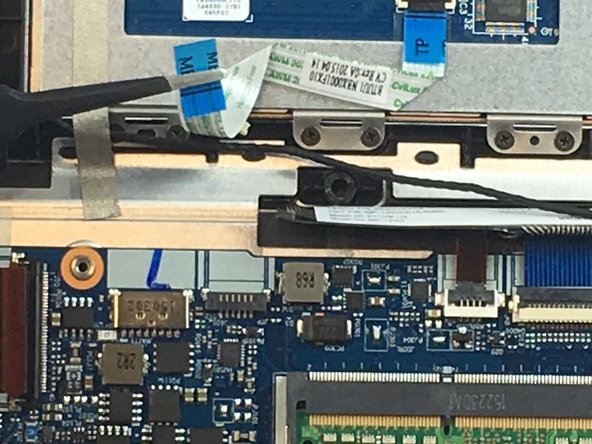
    • Unscrew the three 4mm screws using PH#1 (the larger screws do not come off the are attached to the housing unit of the cooling fan).

  6. Lenovo Yoga 3 14 Motherboard Replacement: passo 6, imagem 1 %32 Lenovo Yoga 3 14 Motherboard Replacement: passo 6, imagem 2 %32 Lenovo Yoga 3 14 Motherboard Replacement: passo 6, imagem 3 %32
    • Use tweezers to disconnect the fan.

    • Unwrap the white and black wires from around the fan case.

  7. Lenovo Yoga 3 14 Motherboard Replacement: passo 7, imagem 1 %32
    • Gently lift the fan out of the laptop.

  8. Lenovo Yoga 3 14 Motherboard Replacement, Motherboard: passo 8, imagem 1 %32
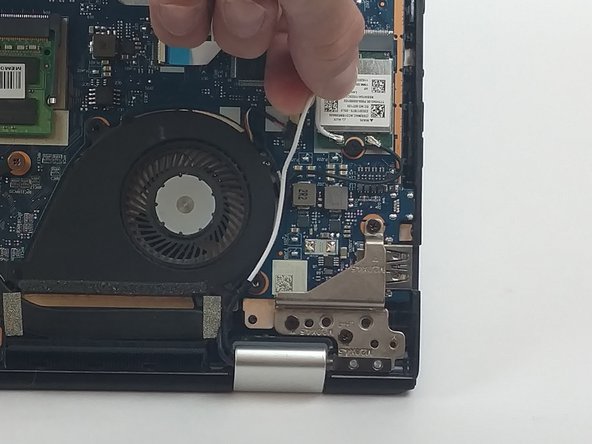
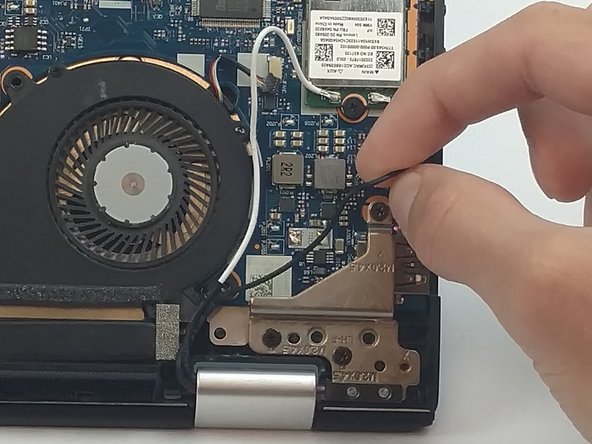
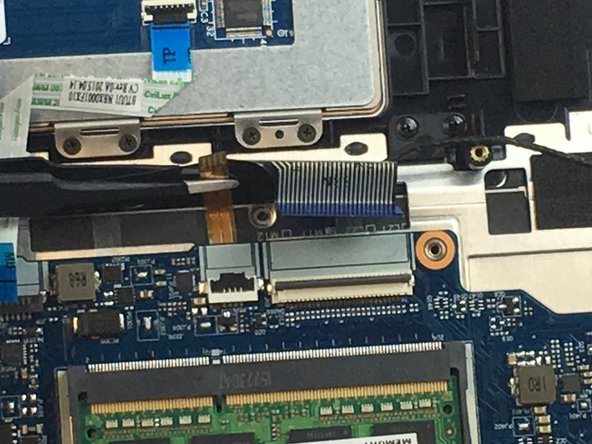
    • Unscrew the three 3mm screws from the bottom right hinge using a PH0 screwdriver.

    • Remove the one 4mm screw that connects the hinge to the motherboard.

  9. Lenovo Yoga 3 14 Motherboard Replacement: passo 9, imagem 1 %32 Lenovo Yoga 3 14 Motherboard Replacement: passo 9, imagem 2 %32
    • Using the tweezers, disconnect the white and black cables connecting the motherboard to the screen.

  10. Lenovo Yoga 3 14 Motherboard Replacement: passo 10, imagem 1 %32 Lenovo Yoga 3 14 Motherboard Replacement: passo 10, imagem 2 %32
    • Using tweezers, disconnect the second cable connecting the screen to the motherboard.

  11. Lenovo Yoga 3 14 Motherboard Replacement: passo 11, imagem 1 %32 Lenovo Yoga 3 14 Motherboard Replacement: passo 11, imagem 2 %32
    • Lift the plastic clip connecting the USB port cable to the motherboard.

    • Gently use tweezers to remove the cable.

  12. Lenovo Yoga 3 14 Motherboard Replacement: passo 12, imagem 1 %32 Lenovo Yoga 3 14 Motherboard Replacement: passo 12, imagem 2 %32
    • Using tweezers, undo the plastic clip holding the ribbon in place and gently pull the ribbon to remove it.

  13. Lenovo Yoga 3 14 Motherboard Replacement: passo 13, imagem 1 %32 Lenovo Yoga 3 14 Motherboard Replacement: passo 13, imagem 2 %32
    • Gently lift the clip holding down the blue ribbon connection the touch pad to the motherboard. Use tweezers to disconnect the ribbon.

  14. Lenovo Yoga 3 14 Motherboard Replacement: passo 14, imagem 1 %32 Lenovo Yoga 3 14 Motherboard Replacement: passo 14, imagem 2 %32
    • Undo the clips holding the blue and brown ribbon to the motherboard. Use tweezers to gently remove both ribbons.

  15. Lenovo Yoga 3 14 Motherboard Replacement: passo 15, imagem 1 %32
    • Place one hand on the hard drive and gently gripping the black connector, pull it away from the hard drive to disconnect.

    • Our laptop did not have the hard drive with it, but this is where it would be located.

  16. Lenovo Yoga 3 14 Motherboard Replacement: passo 16, imagem 1 %32
    • Carefully lift the motherboard away from the laptop.

Conclusão

To reassemble your device, follow these instructions in reverse order.

4 outras pessoas executaram este guia.

Mohammed

Membro desde: 09/28/16

101 Reputação

Autoria de 1 guia

Equipe

USF Tampa, Team 3-2, Passmore Fall 2016 Membro de USF Tampa, Team 3-2, Passmore Fall 2016

USFT-PASSMORE-F16S3G2

Membros da 4

Autoria de 7 guias

7 comentários

Hi, Is the i7 motherboard version is the same size ,ports and screws as i5 ??

Is there any issue if i replace my old i5 with i7 ? ignoring battery performance.

please advice.

ahmedbazy - Responder

Did you replace your i5 motherboard for an i7? Was everything ok?

I’m thinking about doing the same…

rsoares -

One assumes new thermal paste is required when re-attach the van?

Chris Rivers - Responder

Do you mean the fan? If I remember correctly, there was no thermal paste attaching the fan to the motherboard or the surrounding components. It was just housed within the casing attached via screws as shown in the images.

Ryan Bump -

Ryan,

Thank you for your reply.

Yes I mean the fan, sorry. Step 5 you remove the 3 screws for what I assume is the heat sink. I was asking about that as it looks like the the processor is under there and seems to have thermal paste on the top.

Chris Rivers -

Adicione um comentário

Exibir estatísticas:

Últimas 24 horas: 1

Últimos 7 dias: 3

Últimos 30 dias: 16

Duração total: 8,425