Ir para o conteúdo principal

Lenovo Yoga 2 11" Screen Replacement

O que você precisa

  1. Lenovo Yoga 2 11" Screen Replacement, Screen: passo 1, imagem 1 %32 Lenovo Yoga 2 11" Screen Replacement, Screen: passo 1, imagem 2 %32 Lenovo Yoga 2 11" Screen Replacement, Screen: passo 1, imagem 3 %32
    • Make sure to unplug the device and disconnect the battery to avoid injury.

    • Locate the small rubber rectangles on either side of the computer, under the screen.

    • Underneath each of these rectangles is a 3mm screw. Using a Philips 00 screwdriver, take out these screws.

  2. Lenovo Yoga 2 11" Screen Replacement: passo 2, imagem 1 %32 Lenovo Yoga 2 11" Screen Replacement: passo 2, imagem 2 %32
    • Flip keyboard under the screen for ease of repair.

    • Using a plastic opening tool, carefully remove the small plastic piece at the bottom of the screen.

  3. Lenovo Yoga 2 11" Screen Replacement: passo 3, imagem 1 %32
    • Using a Philips 00 Screwdriver, remove the nine screws of varying sizes that connect the screen to the rest of the computer (four near each of the hinges, one in the center)

  4. Lenovo Yoga 2 11" Screen Replacement: passo 4, imagem 1 %32
    • Use caution when removing the screen from its back, as the screen is pretty fragile.

    • Open the computer and move the hinges up, then move the screen down. Hinges have to be up before you try to remove the screen.

    • Hold the back side of the display panel firmly in place, and slide the screen up to unlock plastic tabs on the two halves of the display.

    • Note the open end of the hole where the screws are removed.

    • On some models, if you try to pry the two halves apart instead of sliding, it will break most of the tabs and the screen will not hold together when reassembled.

  5. Lenovo Yoga 2 11" Screen Replacement: passo 5, imagem 1 %32 Lenovo Yoga 2 11" Screen Replacement: passo 5, imagem 2 %32 Lenovo Yoga 2 11" Screen Replacement: passo 5, imagem 3 %32
    • Using a Philips 00 Screwdriver, remove the four screws of varying sizes that connect the screen to other components of the computer.

    • Once the screws have been removed, take out the components of the computer that are connected with wires.

  6. Lenovo Yoga 2 11" Screen Replacement: passo 6, imagem 1 %32
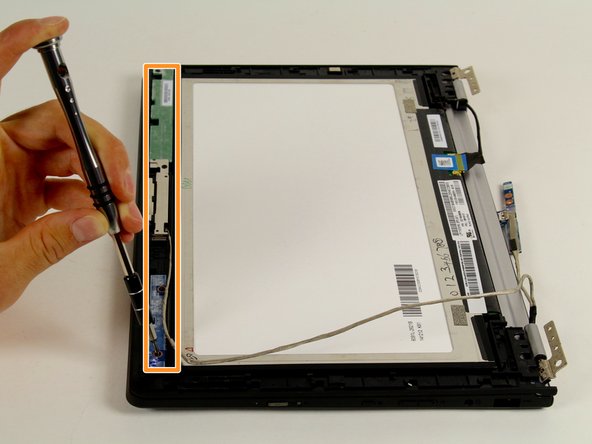
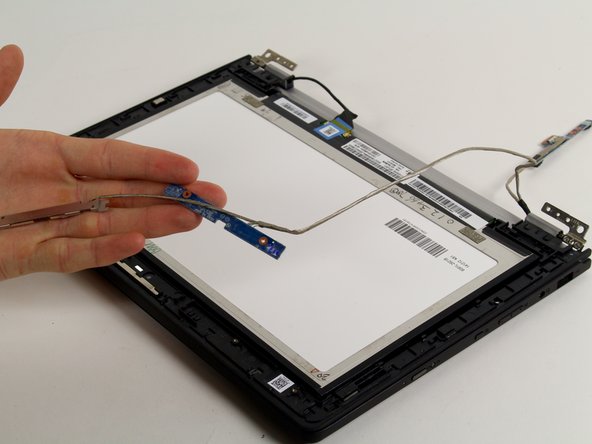
    • Once the screen is completely free from the rest of the computer, you are able to remove and replace it.

    Brilliant guide, pretty much fool proof to remove a cracker screen and much easier than I feared before reading this article! thank you very much

    higart23 - Responder

    The author did not include a step on how to remove the display cable from the screen. Without doing so, when trying to remove the screen with the cable attached, one may damage the screen, the cable or even the computer.

    senddarrenmail - Responder

Conclusão

To reassemble your device, follow these instructions in reverse order.

8 outras pessoas executaram este guia.

Peyton Leeson

Membro desde: 10/01/15

939 Reputação

Autoria de 4 guias

Equipe

Cal Poly, Team 4-3, Maness Fall 2015 Membro de Cal Poly, Team 4-3, Maness Fall 2015

CPSU-MANESS-F15S4G3

Membros da 4

Autoria de 5 guias

3 comentários

Where is the best place to order the replacement screen from?

Christopher Culligan - Responder

Tech hanging program how to resolve?

Supportwin X - Responder

Thank you for this guide.

I found it easy to follow, but the screen sliding up bit got me a bit confused.

However, after carefully reading it again and trying, it makes perfect sense.

Putting the new screen in was a bit fiddly and I couldn't slide it all the way down so the outside edge screws went in.

But, after perseverance, I was able to replace my screen!

Kevin Gill - Responder

Adicione um comentário

Exibir estatísticas:

Últimas 24 horas: 1

Últimos 7 dias: 2

Últimos 30 dias: 20

Duração total: 5,393