Ir para o conteúdo principal

Lenovo V14-ADA Back Panel Replacement

O que você precisa

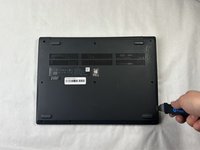
  1. Lenovo V14-ADA Back Panel Replacement, Back Panel: passo 1, imagem 1 %32
    • Turn off the laptop.

    • Disconnect the charging cable from the laptop.

    • Failure to unplug the cable could result in electric shock.

    • Flip the laptop upside down.

  2. Lenovo V14-ADA Back Panel Replacement: passo 2, imagem 1 %32
    • Remove all ten 5 mm screws from the back panel using a JIS #0 screwdriver.

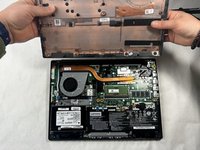
  3. Lenovo V14-ADA Back Panel Replacement: passo 3, imagem 1 %32 Lenovo V14-ADA Back Panel Replacement: passo 3, imagem 2 %32
    • Place the Jimmy in the small crack between the back panel and the keyboard and push down.

    • Repeat this until the panel pops off.

Conclusão

To reassemble your device, follow these instructions in reverse order.

Kristen Gismondi

Membro desde: 11/12/14

92.276 Reputação

Autoria de 241 guias

Equipe

iFixit Membro de iFixit

Staff

118 Membros

Autoria de 19.537 guias

0 comentários

Comentar

Exibir estatísticas:

Últimas 24 horas: 0

Últimos 7 dias: 14

Últimos 30 dias: 48

Ao todo: 134