Ir para o conteúdo principal

Lenovo ThinkPad X1 Yoga Webcam Replacement

O que você precisa

  1. Lenovo ThinkPad X1 Yoga Webcam Replacement, Introduction: passo 1, imagem 1 %32 Lenovo ThinkPad X1 Yoga Webcam Replacement, Introduction: passo 1, imagem 2 %32 Lenovo ThinkPad X1 Yoga Webcam Replacement, Introduction: passo 1, imagem 3 %32
    • Here we have the screen as just removed from our Thinkpad.

    • In the lower corners you will find two rubber caps with hidden screws.

    • Remove the caps and unscrew the first screw.

  2. Lenovo ThinkPad X1 Yoga Webcam Replacement, Display screws: passo 2, imagem 1 %32 Lenovo ThinkPad X1 Yoga Webcam Replacement, Display screws: passo 2, imagem 2 %32 Lenovo ThinkPad X1 Yoga Webcam Replacement, Display screws: passo 2, imagem 3 %32
    • You have to remove the screws on the right and left side to proceed.

  3. Lenovo ThinkPad X1 Yoga Webcam Replacement, Screen cover: passo 3, imagem 1 %32 Lenovo ThinkPad X1 Yoga Webcam Replacement, Screen cover: passo 3, imagem 2 %32 Lenovo ThinkPad X1 Yoga Webcam Replacement, Screen cover: passo 3, imagem 3 %32
    • The screws secured this rubbery, bendy cover which is removed easily by using your fingernails or a spudger.

    • When you have removed the cover store it away somewhere safe.

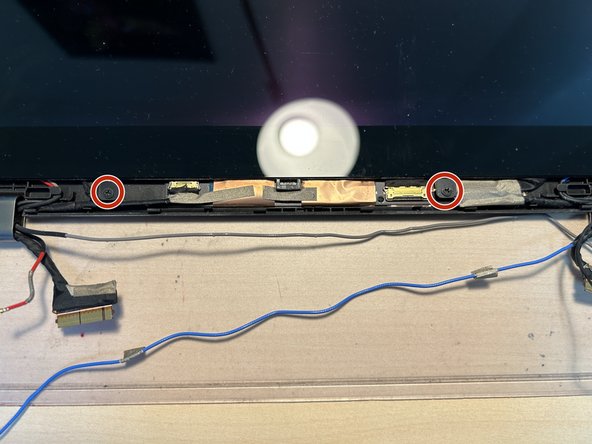
    • Remove the two PH1 screws marked with red circles.

  4. Lenovo ThinkPad X1 Yoga Webcam Replacement, Hinges and wiring: passo 4, imagem 1 %32 Lenovo ThinkPad X1 Yoga Webcam Replacement, Hinges and wiring: passo 4, imagem 2 %32 Lenovo ThinkPad X1 Yoga Webcam Replacement, Hinges and wiring: passo 4, imagem 3 %32
    • Flip the display on the side. This way it is easier to pull out the plastic caps holding the display wires in place.

    • Use some tweezers to lever out the plastic cap and store it somewhere safe.

    • Gently pull out the cables from the hinge.

  5. Lenovo ThinkPad X1 Yoga Webcam Replacement, Right display hinge: passo 5, imagem 1 %32 Lenovo ThinkPad X1 Yoga Webcam Replacement, Right display hinge: passo 5, imagem 2 %32 Lenovo ThinkPad X1 Yoga Webcam Replacement, Right display hinge: passo 5, imagem 3 %32
    • To the right you'll have to repeat the steps.

    • Free the cables from their prison in the hinge.

  6. Lenovo ThinkPad X1 Yoga Webcam Replacement, Rubber frame: passo 6, imagem 1 %32 Lenovo ThinkPad X1 Yoga Webcam Replacement, Rubber frame: passo 6, imagem 2 %32
    • The screen is secured by a rubber frame which is glued onto the display cover.

    • Use a guitar pick or a spuder to lift it off. In my case the glue was not really strong and required no heat.

  7. Lenovo ThinkPad X1 Yoga Webcam Replacement, Flex connector and removal: passo 7, imagem 1 %32 Lenovo ThinkPad X1 Yoga Webcam Replacement, Flex connector and removal: passo 7, imagem 2 %32 Lenovo ThinkPad X1 Yoga Webcam Replacement, Flex connector and removal: passo 7, imagem 3 %32
    • One flex connector is reachable for us. Lift up the brass clip.

    • With the screws removed and the clip detached the display is now free

    • Be careful not to rip the other flex connector, we have to detach in the next steps.

  8. Lenovo ThinkPad X1 Yoga Webcam Replacement, Disconnecting the display: passo 8, imagem 1 %32 Lenovo ThinkPad X1 Yoga Webcam Replacement, Disconnecting the display: passo 8, imagem 2 %32 Lenovo ThinkPad X1 Yoga Webcam Replacement, Disconnecting the display: passo 8, imagem 3 %32
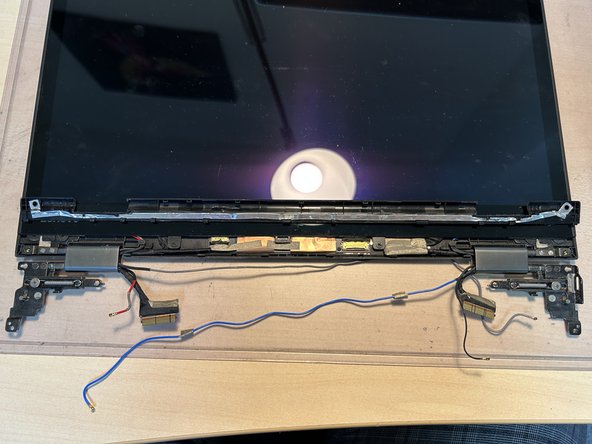
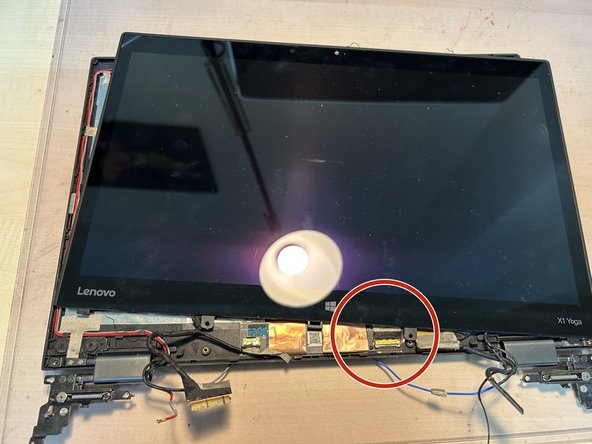
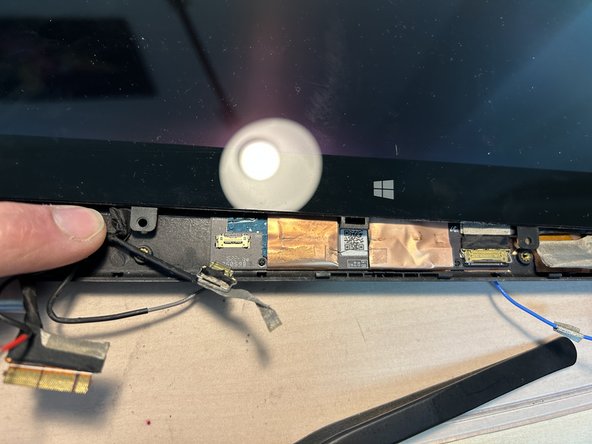
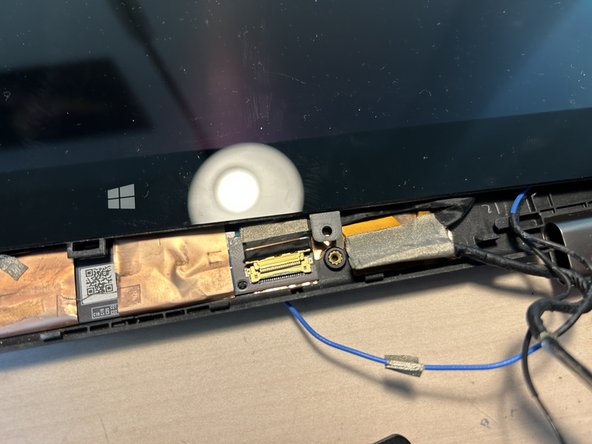
    • Pull the display up about an inch just so that you can detach the flex cables with the levers / clips.

  9. Lenovo ThinkPad X1 Yoga Webcam Replacement, Disconnect pt.2: passo 9, imagem 1 %32 Lenovo ThinkPad X1 Yoga Webcam Replacement, Disconnect pt.2: passo 9, imagem 2 %32 Lenovo ThinkPad X1 Yoga Webcam Replacement, Disconnect pt.2: passo 9, imagem 3 %32
    • With all reachable connectors detached you can now lift up the screen from the cover but we're not quite there yet.

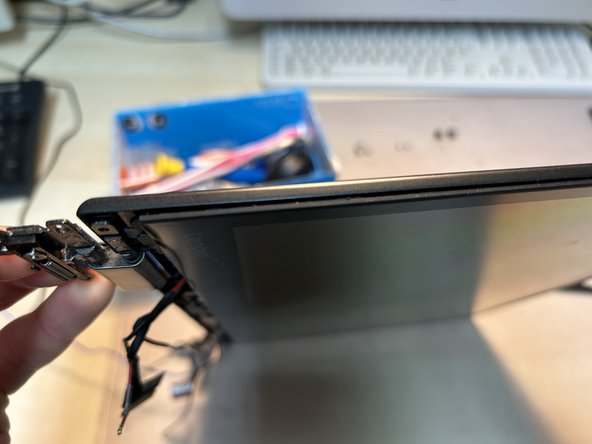
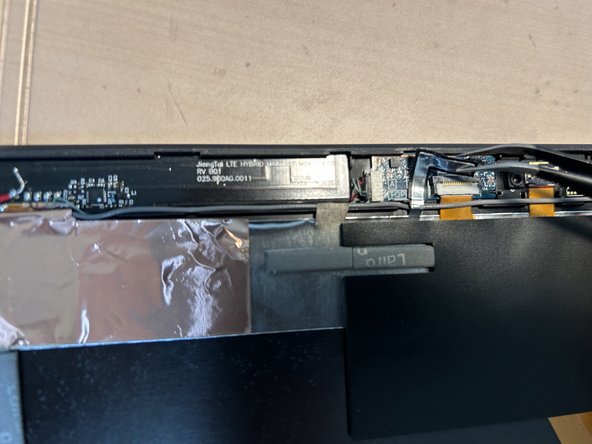
    • Flip over the screen like seen in the second picture.

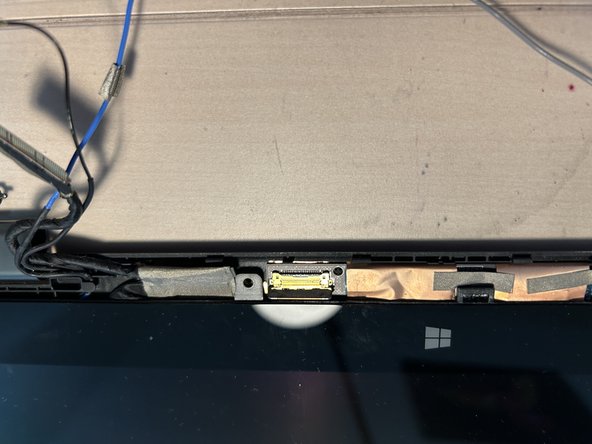
    • Detach the last connector between cover and screen.

  10. Lenovo ThinkPad X1 Yoga Webcam Replacement, Done!: passo 10, imagem 1 %32 Lenovo ThinkPad X1 Yoga Webcam Replacement, Done!: passo 10, imagem 2 %32
    • With the last connector removed you're done!

    • You could now replace the screen or continue the disassambly.

  11. Lenovo ThinkPad X1 Yoga Webcam Replacement, Let's go: passo 11, imagem 1 %32 Lenovo ThinkPad X1 Yoga Webcam Replacement, Let's go: passo 11, imagem 2 %32 Lenovo ThinkPad X1 Yoga Webcam Replacement, Let's go: passo 11, imagem 3 %32
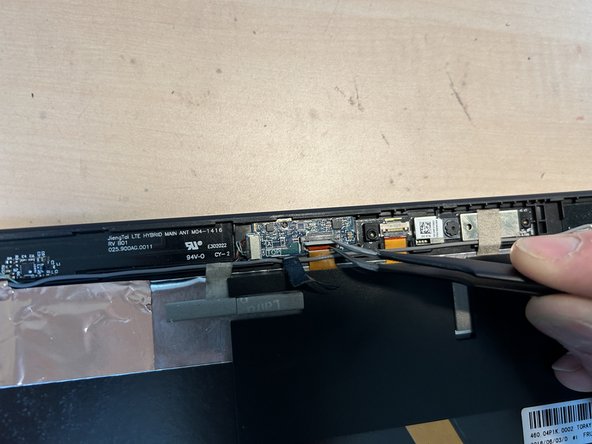
    • The webcam is located in the upper part of the A-cover.

    • First remove the glue strip and then proceed to open the clips holding down the ribbon cables.

  12. Lenovo ThinkPad X1 Yoga Webcam Replacement, Ribbon cables: passo 12, imagem 1 %32 Lenovo ThinkPad X1 Yoga Webcam Replacement, Ribbon cables: passo 12, imagem 2 %32 Lenovo ThinkPad X1 Yoga Webcam Replacement, Ribbon cables: passo 12, imagem 3 %32
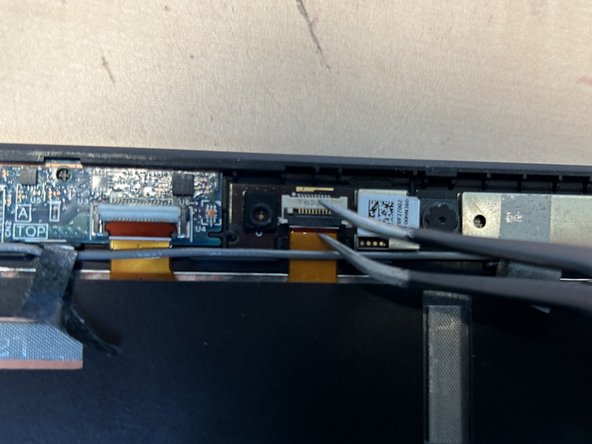
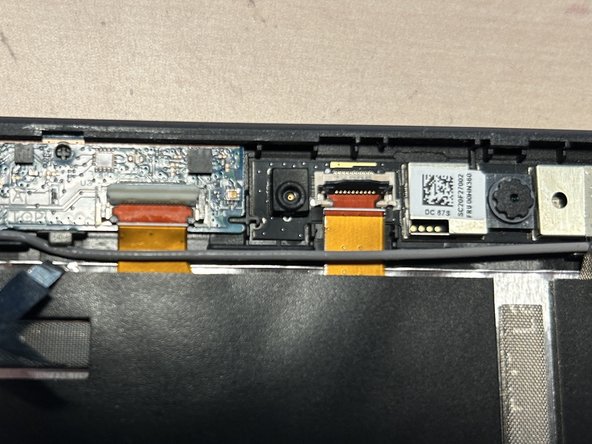
    • Flip up the clips (red boxes) holding the cables in place. Also peel of the glue strip (green box).

    • The cables can only be safely removed when the clip is released completely.

  13. Lenovo ThinkPad X1 Yoga Webcam Replacement, Daughter board cable: passo 13, imagem 1 %32 Lenovo ThinkPad X1 Yoga Webcam Replacement, Daughter board cable: passo 13, imagem 2 %32
    • This step is optional if you just want to replace the webcam.

    • Use a pair of tweezers to remove the black connector to the daughter board.

  14. Lenovo ThinkPad X1 Yoga Webcam Replacement, Remove the webcam: passo 14, imagem 1 %32 Lenovo ThinkPad X1 Yoga Webcam Replacement, Remove the webcam: passo 14, imagem 2 %32
    • The webcam is not held in by screws, only tape and pressed onto the plastic.

    • With the tape and ribbon cable removed you can pull it out quite easily.

    • If you just want to replace the webcam you're done now. If you want to replace the cables as well proceed in the next steps.

  15. Lenovo ThinkPad X1 Yoga Webcam Replacement, Daughter board and rubber mat: passo 15, imagem 1 %32 Lenovo ThinkPad X1 Yoga Webcam Replacement, Daughter board and rubber mat: passo 15, imagem 2 %32 Lenovo ThinkPad X1 Yoga Webcam Replacement, Daughter board and rubber mat: passo 15, imagem 3 %32
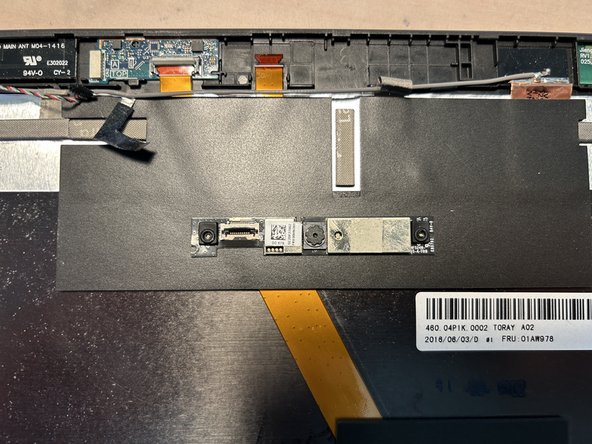
    • You can remove the daughter board if you suspect it to be faulty. It is also only pressed into place.

    • To remove the ribbon cables from the cover you have to remove the rubber mats on top.

    • Gently pull them up and be sure to hold down the ribbon cables simultaneously.

  16. Lenovo ThinkPad X1 Yoga Webcam Replacement, More rubber mats: passo 16, imagem 1 %32 Lenovo ThinkPad X1 Yoga Webcam Replacement, More rubber mats: passo 16, imagem 2 %32 Lenovo ThinkPad X1 Yoga Webcam Replacement, More rubber mats: passo 16, imagem 3 %32
    • There are two rubber mats left.

    • Proceed as before while holding down the ribbon cables to avoid damage.

    • Especially the right cables could easily rip.

  17. Lenovo ThinkPad X1 Yoga Webcam Replacement, right ribbon cable: passo 17, imagem 1 %32 Lenovo ThinkPad X1 Yoga Webcam Replacement, right ribbon cable: passo 17, imagem 2 %32 Lenovo ThinkPad X1 Yoga Webcam Replacement, right ribbon cable: passo 17, imagem 3 %32
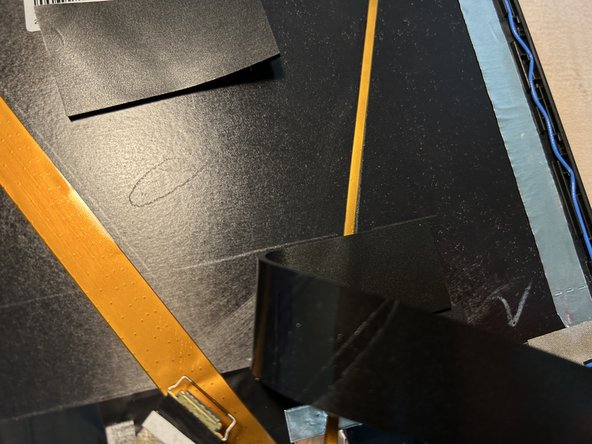
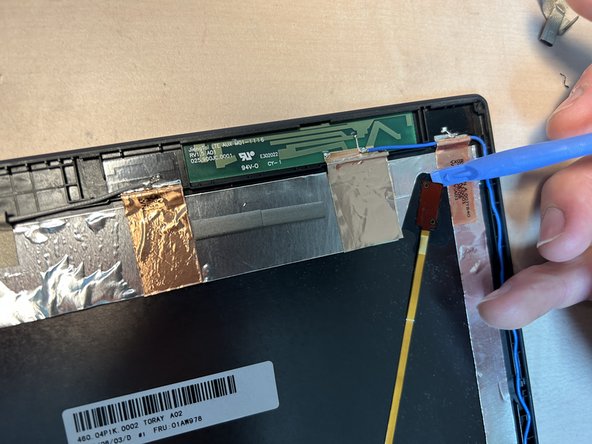
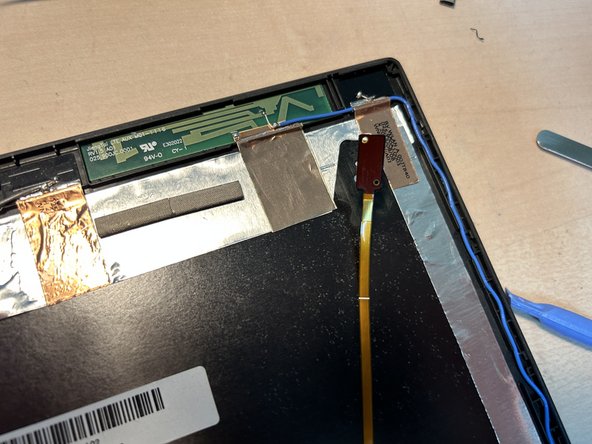
    • I am not quite sure what the bit at the end of the right cable is but it has to go.

    • Use a spudger to lift it up from unterneath.

    • Slowly pull the ribbon cable from the cover when you're done.

  18. Lenovo ThinkPad X1 Yoga Webcam Replacement, Final step: passo 18, imagem 1 %32 Lenovo ThinkPad X1 Yoga Webcam Replacement, Final step: passo 18, imagem 2 %32 Lenovo ThinkPad X1 Yoga Webcam Replacement, Final step: passo 18, imagem 3 %32
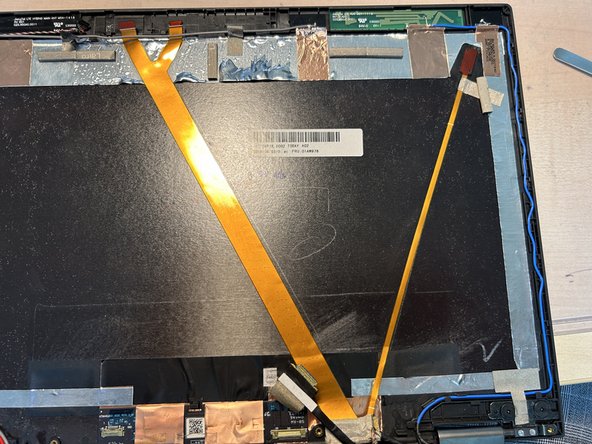
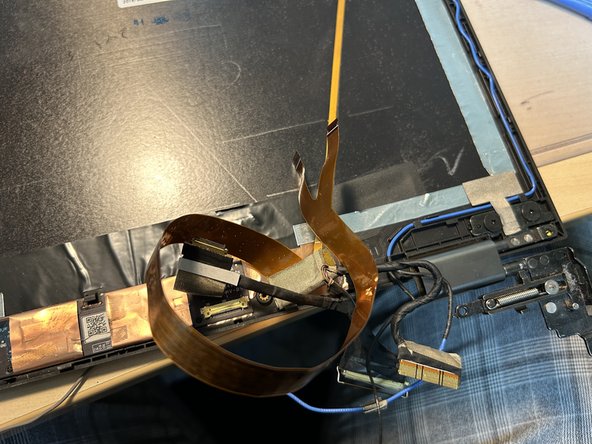
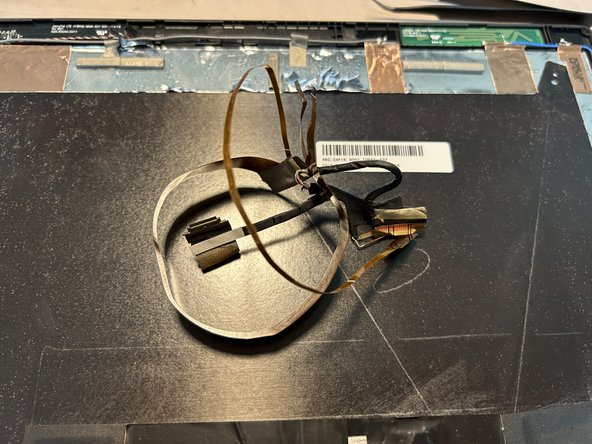
    • The larger ribbon cable can be pulled off the cover as well.

    • There you have it - you successfully removed all cables from the cover - except for the antennae.

Conclusão

To reassemble your device, follow these instructions in reverse order.

0 comentários

Adicione um comentário

Exibir estatísticas:

Últimas 24 horas: 1

Últimos 7 dias: 4

Últimos 30 dias: 48

Duração total: 703