Ir para o conteúdo principal

Lenovo ThinkPad X1 Yoga Display assembly Replacement

O que você precisa

  1. Lenovo ThinkPad X1 Yoga Display assembly Replacement, Opening: passo 1, imagem 1 %32 Lenovo ThinkPad X1 Yoga Display assembly Replacement, Opening: passo 1, imagem 2 %32 Lenovo ThinkPad X1 Yoga Display assembly Replacement, Opening: passo 1, imagem 3 %32
    • Start by flipping over the notebook and loosen all of the nine screws. They should remain in the backcover though.

    • Remove your stylus if not already done.

    • Remove the cover from the upper corner by using a spudger.

  2. Lenovo ThinkPad X1 Yoga Display assembly Replacement, Unplug the battery: passo 2, imagem 1 %32 Lenovo ThinkPad X1 Yoga Display assembly Replacement, Unplug the battery: passo 2, imagem 2 %32 Lenovo ThinkPad X1 Yoga Display assembly Replacement, Unplug the battery: passo 2, imagem 3 %32
    • In the following steps we will work on the notebook as shown in the first picture.

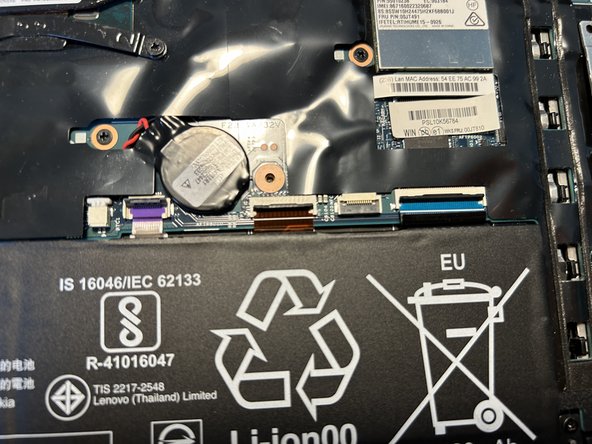
    • But before we do anything else the battery must be unplugged first.

    • Use a pair of tweezers or a spudger to lift off the battery connector from the mainboard.

  3. Lenovo ThinkPad X1 Yoga Display assembly Replacement, Left display connector: passo 3, imagem 1 %32 Lenovo ThinkPad X1 Yoga Display assembly Replacement, Left display connector: passo 3, imagem 2 %32 Lenovo ThinkPad X1 Yoga Display assembly Replacement, Left display connector: passo 3, imagem 3 %32
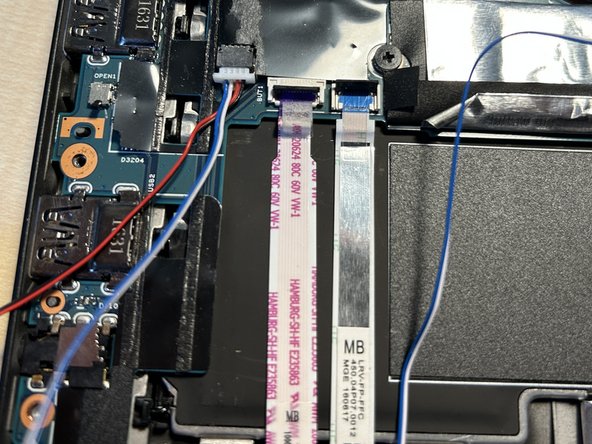
    • On the upper left corner you will find a ribbon connector which must be removed.

    • Flip up the lever completely and pull out the cable.

  4. Lenovo ThinkPad X1 Yoga Display assembly Replacement, Right display connector: passo 4, imagem 1 %32 Lenovo ThinkPad X1 Yoga Display assembly Replacement, Right display connector: passo 4, imagem 2 %32 Lenovo ThinkPad X1 Yoga Display assembly Replacement, Right display connector: passo 4, imagem 3 %32
    • Another display connector like the left is located in the right.

    • Do as you did before - flip up the lever and pull out the ribbon cable.

  5. Lenovo ThinkPad X1 Yoga Display assembly Replacement, LTE card (optional): passo 5, imagem 1 %32 Lenovo ThinkPad X1 Yoga Display assembly Replacement, LTE card (optional): passo 5, imagem 2 %32 Lenovo ThinkPad X1 Yoga Display assembly Replacement, LTE card (optional): passo 5, imagem 3 %32
    • You could unscrew the display hinge screw now if you want.

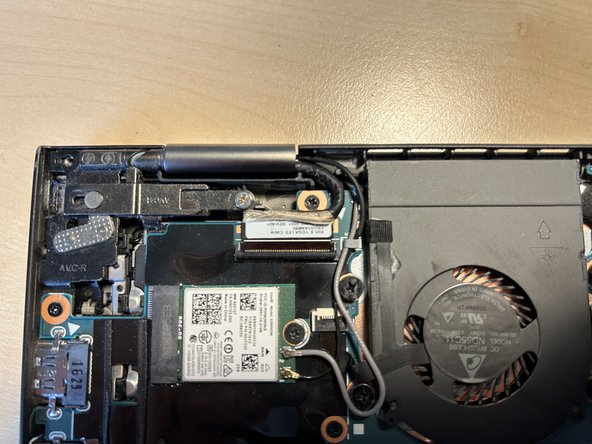
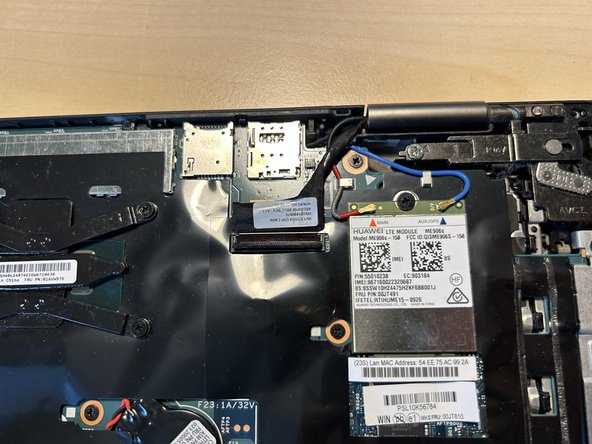
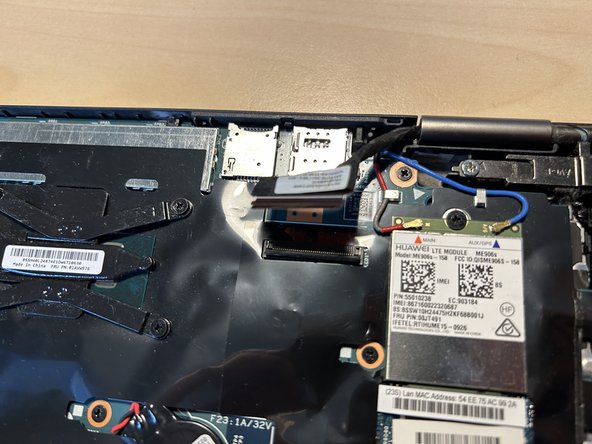
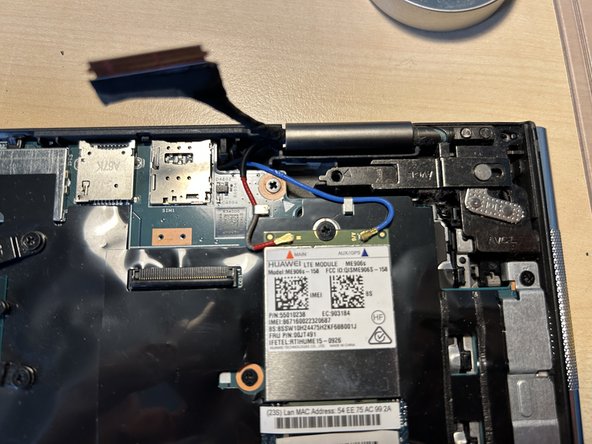
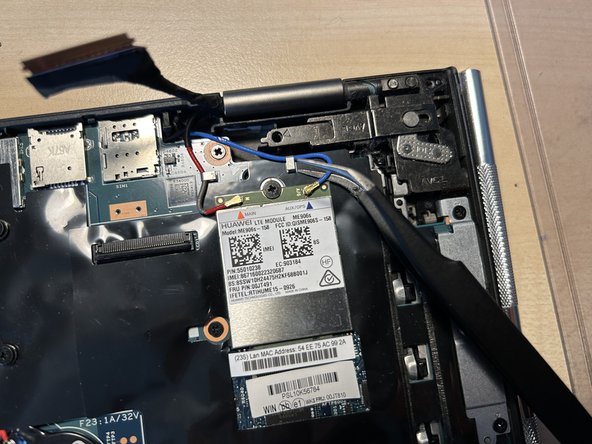
    • If you have a LTE card installed like me unplug the two connectors with a pair of tweezers but make sure not to damage cables nor connectors.

  6. Lenovo ThinkPad X1 Yoga Display assembly Replacement, Unplug the Wi-Fi card: passo 6, imagem 1 %32 Lenovo ThinkPad X1 Yoga Display assembly Replacement, Unplug the Wi-Fi card: passo 6, imagem 2 %32 Lenovo ThinkPad X1 Yoga Display assembly Replacement, Unplug the Wi-Fi card: passo 6, imagem 3 %32
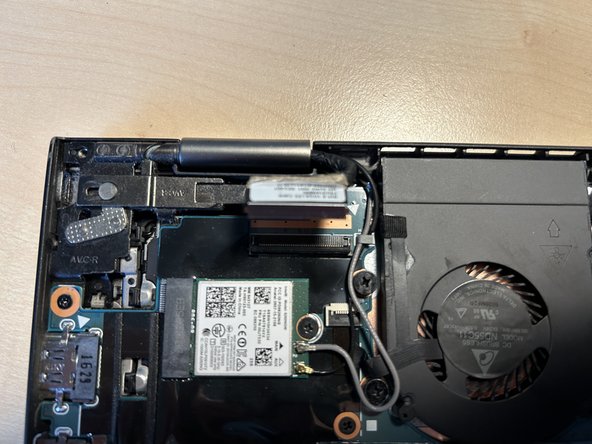
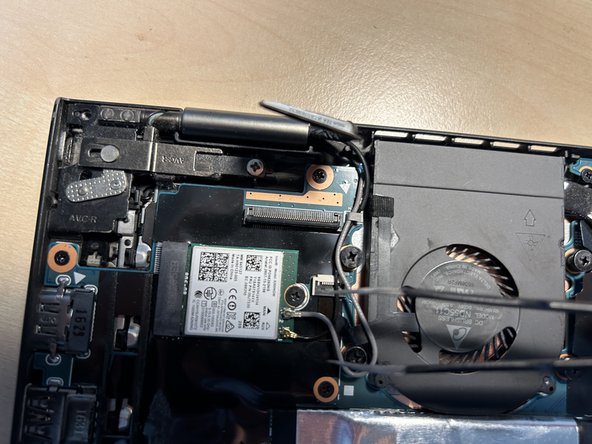
    • The wi-fi card is located on the left side and also uses two antenna connectors.

    • Gently unplug the connectors as you did before with the LTE card.

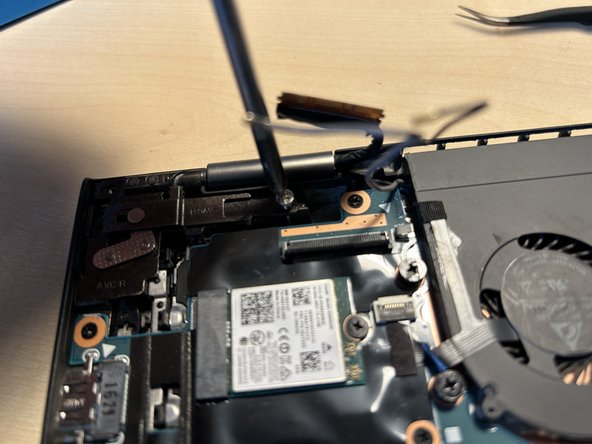
    • While you're here you could unscrew the left hinge if you like.

  7. Lenovo ThinkPad X1 Yoga Display assembly Replacement, Ribbon cables: passo 7, imagem 1 %32 Lenovo ThinkPad X1 Yoga Display assembly Replacement, Ribbon cables: passo 7, imagem 2 %32
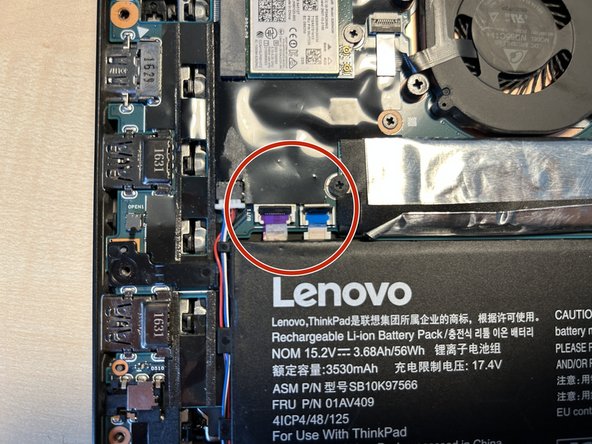
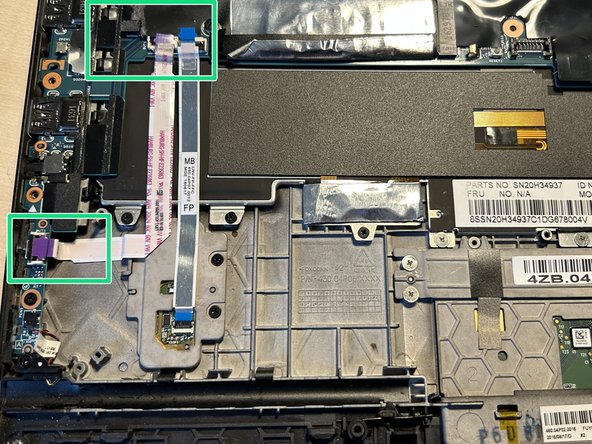
    • There are ribbon cables above the battery. Unplug them in the same manner as you already did before.

  8. Lenovo ThinkPad X1 Yoga Display assembly Replacement, Remove all the screws: passo 8, imagem 1 %32 Lenovo ThinkPad X1 Yoga Display assembly Replacement, Remove all the screws: passo 8, imagem 2 %32
    • Before we move on we should just unscrew all screws marked with red circles.

    • There is a metal shield holding down the mainboard to the right side which has to be removed as well.

    • Make sure to keep track of the screw locations when removing them as they have different lengths.

  9. Lenovo ThinkPad X1 Yoga Display assembly Replacement, More ribbon cables: passo 9, imagem 1 %32 Lenovo ThinkPad X1 Yoga Display assembly Replacement, More ribbon cables: passo 9, imagem 2 %32
    • Left to the battery are more ribbon connectors to unplug.

  10. Lenovo ThinkPad X1 Yoga Display assembly Replacement, Right speaker: passo 10, imagem 1 %32 Lenovo ThinkPad X1 Yoga Display assembly Replacement, Right speaker: passo 10, imagem 2 %32
    • If not already done unscrew the two screws holding the right speaker.

  11. Lenovo ThinkPad X1 Yoga Display assembly Replacement, Left speaker and battery: passo 11, imagem 1 %32 Lenovo ThinkPad X1 Yoga Display assembly Replacement, Left speaker and battery: passo 11, imagem 2 %32 Lenovo ThinkPad X1 Yoga Display assembly Replacement, Left speaker and battery: passo 11, imagem 3 %32
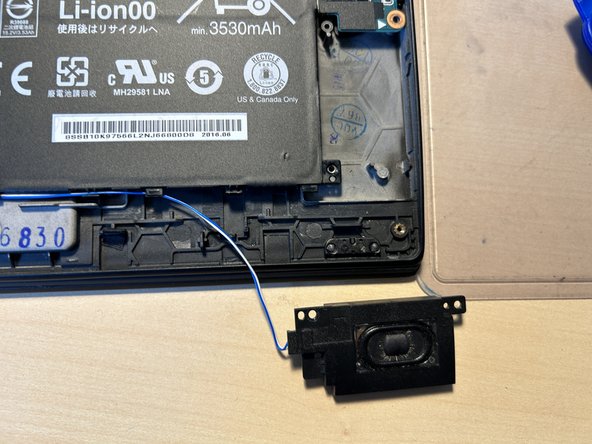
    • The left speaker is secured with two screws as well.

    • When removed the battery should come out as well.

    • Note that the right speaker is attached to the battery by its wiring. You do not need to untangle them though.

  12. Lenovo ThinkPad X1 Yoga Display assembly Replacement, Unplug speakers: passo 12, imagem 1 %32 Lenovo ThinkPad X1 Yoga Display assembly Replacement, Unplug speakers: passo 12, imagem 2 %32 Lenovo ThinkPad X1 Yoga Display assembly Replacement, Unplug speakers: passo 12, imagem 3 %32
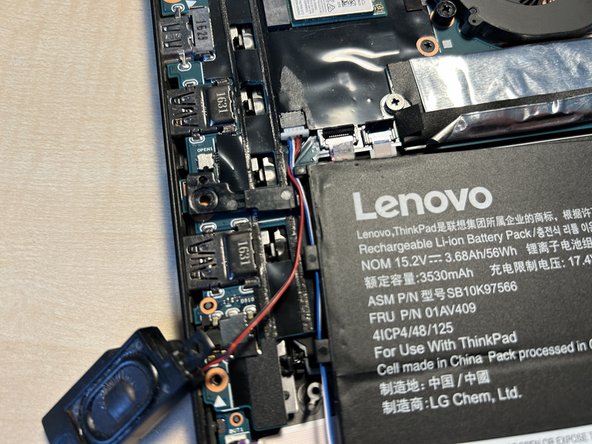
    • I did separate battery and wiring which is not mandatory though.

    • Use a spudger or your fingernails to pull out the speaker plug from the mainboard by the white plastic - not the cable!

    • With the speakers, wires, ribbon cables and all screws removed you can go ahead and finally remove the mainboard.

  13. Lenovo ThinkPad X1 Yoga Display assembly Replacement, Mainboard removal: passo 13, imagem 1 %32
    • After removing the battery, unscrewing all the screws and disconnecting all ribbon connectors the mainboard can be lifted out from the left to the right.

  14. Lenovo ThinkPad X1 Yoga Display assembly Replacement, Remove display screws (optional): passo 14, imagem 1 %32 Lenovo ThinkPad X1 Yoga Display assembly Replacement, Remove display screws (optional): passo 14, imagem 2 %32 Lenovo ThinkPad X1 Yoga Display assembly Replacement, Remove display screws (optional): passo 14, imagem 3 %32
    • If not already done in a preceding step you will find two silver PH1 screws in the upper left and right corners by the display hinges.

    • Remove both of them to separate the display assembly from the C-Cover.

  15. Lenovo ThinkPad X1 Yoga Display assembly Replacement, Antenna wiring: passo 15, imagem 1 %32 Lenovo ThinkPad X1 Yoga Display assembly Replacement, Antenna wiring: passo 15, imagem 2 %32 Lenovo ThinkPad X1 Yoga Display assembly Replacement, Antenna wiring: passo 15, imagem 3 %32
    • Do not just rip off the display assembly yet, you still have to manage the antenna wiring

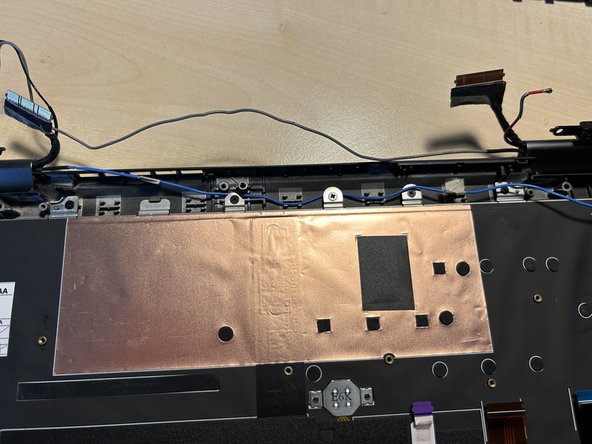
    • Depending on your configuration you have one or two wires tucked in the upper area of the device

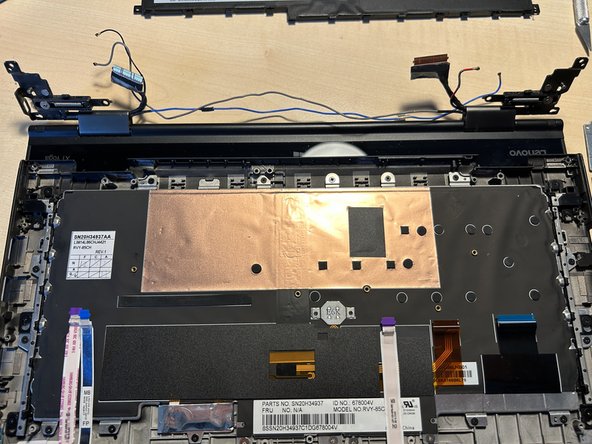
    • When you have removed all wiring from the C-Cover you may flip up the hinges carefully and remove the screen.

Conclusão

To reassemble your device, follow these instructions in reverse order.

Uma outra pessoa concluiu este guia.

0 comentários

Adicione um comentário

Exibir estatísticas:

Últimas 24 horas: 4

Últimos 7 dias: 33

Últimos 30 dias: 160

Duração total: 1,747