Introdução
In the event that the screen on your Lenovo ThinkPad X1 Yoga 2nd Generation gets cracked, has a distorted display, or fails to turn on entirely, use this guide to disconnect and replace the screen.
Replacing the screen requires taking out the majority of components from your laptop, so it’s advised that you keep every piece you take out as organized as possible to make for an efficient reassembly.
To stay safe and maintain the quality of your components, do not bend or hit the screen with too much force, as it is a fragile piece that will break under the wrong conditions.
O que você precisa
-
-
Follow the ribbon cable that runs from the left speaker to the motherboard.
-
Pull the black connector up and release the cable wire by hand.
-
-
-
Use a spudger to pop the ribbon cable that runs from the upper-middle portion of the battery to the motherboard out of the motherboard.
-
-
-
-
Lift up the small, metal tab using a spudger.
-
Gently lift the ribbon cable from its socket using nylon-tipped reverse tweezers.
-
-
-
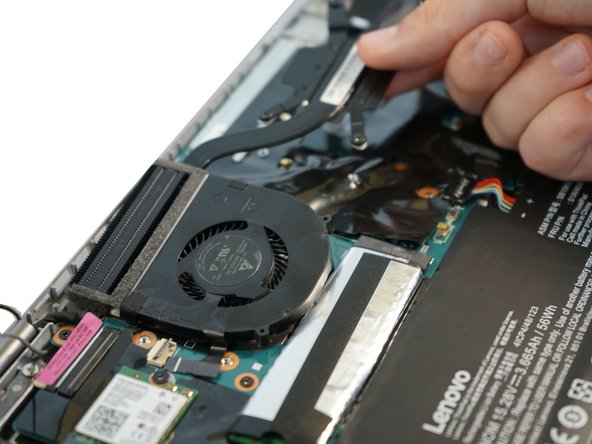
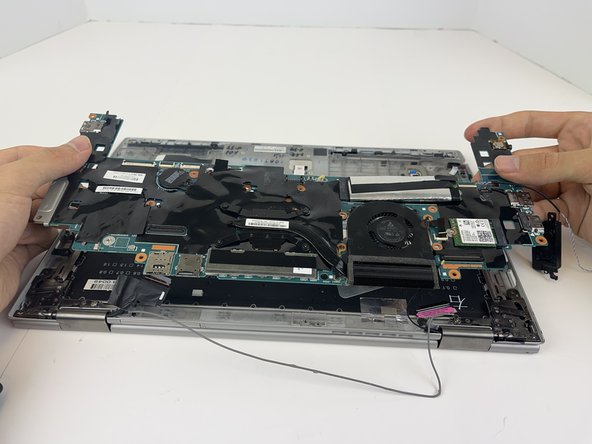
Using a Phillips #0 screwdriver, remove all 16 of the 6 mm screws connecting the motherboard to the computer.
-
-
-
Using a Phillips #0 Screwdriver, remove the two screws securing the hinges to the back panel.
-


To reassemble your device, follow these instructions in reverse order.
To reassemble your device, follow these instructions in reverse order.
Cancelar: não concluí este guia.
Uma outra pessoa concluiu este guia.
Equipe

The Citadel Military College of South Carolina, Team S2-G16, Eggleston Spring 2021 Membro de The Citadel Military College of South Carolina, Team S2-G16, Eggleston Spring 2021
CMCSC-EGGLESTON-S21S2G16
Membros da 3
Autoria de 3 guias