Ir para o conteúdo principal

Lenovo ThinkPad T530 Hard Drive Replacement

O que você precisa

  1. Lenovo ThinkPad T530 Hard Drive Replacement, Place your laptop upside down: passo 1, imagem 1 %32 Lenovo ThinkPad T530 Hard Drive Replacement, Place your laptop upside down: passo 1, imagem 2 %32
    • Ensure that the laptop is disconnected from the wall charger, and that the laptop is entirely powered off before following any of the steps below.

    • Flip your laptop upside down, so that the keyboard is facing down.

  2. Lenovo ThinkPad T530 Hard Drive Replacement, Unlock Battery: passo 2, imagem 1 %32 Lenovo ThinkPad T530 Hard Drive Replacement, Unlock Battery: passo 2, imagem 2 %32
    • Locate the latch located on the battery near the top of the laptop.

    • Using your finger, slide the latch to the right-most (Unlocked) position.

    • None of this should require an exhuberant amount of force.

  3. Lenovo ThinkPad T530 Hard Drive Replacement, Remove the Battery: passo 3, imagem 1 %32 Lenovo ThinkPad T530 Hard Drive Replacement, Remove the Battery: passo 3, imagem 2 %32
    • You can now pull the battery away from the laptop. When pulling the battery out, ensure to pull it out straight.

  4. Lenovo ThinkPad T530 Hard Drive Replacement, Opening Storage Drive Door: passo 4, imagem 1 %32 Lenovo ThinkPad T530 Hard Drive Replacement, Opening Storage Drive Door: passo 4, imagem 2 %32 Lenovo ThinkPad T530 Hard Drive Replacement, Opening Storage Drive Door: passo 4, imagem 3 %32
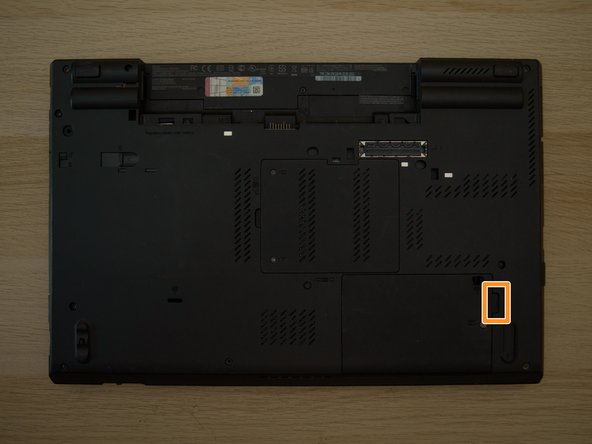
    • Using a Phillips #00 screwdriver, remove the bottom screw to unlock the storage drive cover.

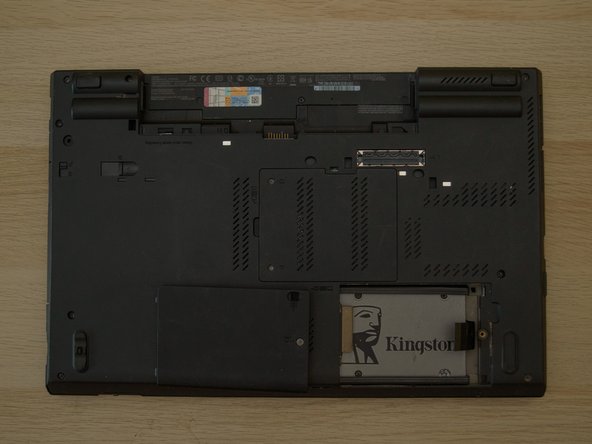
    • Lift up the storage drive cover from the lip highlighted in orange. Put it aside.

  5. Lenovo ThinkPad T530 Hard Drive Replacement, Removing Storage Drive: passo 5, imagem 1 %32 Lenovo ThinkPad T530 Hard Drive Replacement, Removing Storage Drive: passo 5, imagem 2 %32
    • Pull the storage drive out of the slot from the tab.

    • Pull the drive at an angle, and not directly up as this could cause damage to the sata connector.

  6. Lenovo ThinkPad T530 Hard Drive Replacement, Removing Drive Spacers: passo 6, imagem 1 %32 Lenovo ThinkPad T530 Hard Drive Replacement, Removing Drive Spacers: passo 6, imagem 2 %32
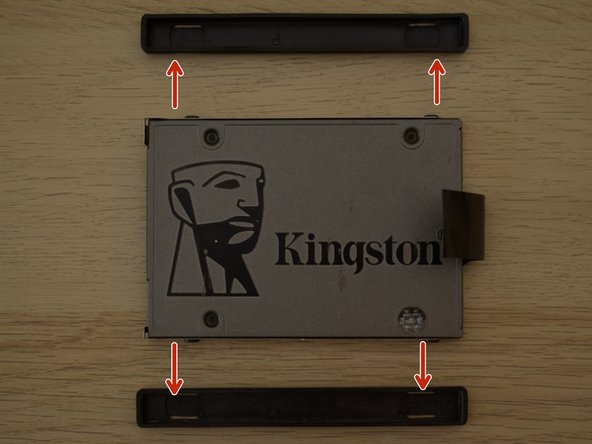
    • Grab the rubber spacers highlighted in red, and pull them away from the drive.

  7. Lenovo ThinkPad T530 Hard Drive Replacement, Removing the Drive from the Caddy: passo 7, imagem 1 %32 Lenovo ThinkPad T530 Hard Drive Replacement, Removing the Drive from the Caddy: passo 7, imagem 2 %32
    • Using a Phillips #00 screwdriver, unscrew the four screws, two on each of the left, and right side of the drive.

Conclusão

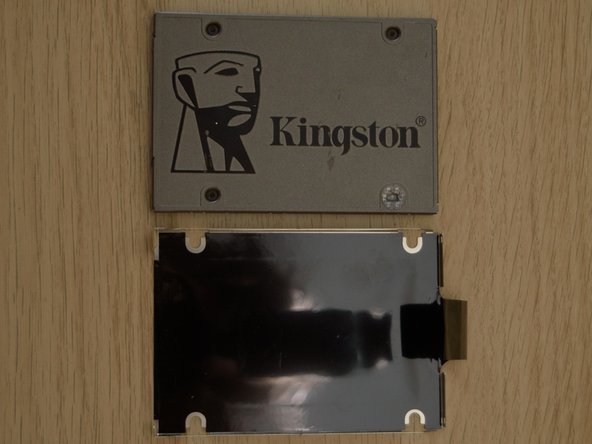
To reassemble your device, follow these instructions in reverse order.

Uma outra pessoa concluiu este guia.

Albert Stoynov

Membro desde: 09/11/23

1.198 Reputação

Autoria de 10 guias

0 comentários

Adicione um comentário

Exibir estatísticas:

Últimas 24 horas: 0

Últimos 7 dias: 2

Últimos 30 dias: 17

Duração total: 93