Esta versão pode conter edições incorretas. Mude para o último instantâneo verificado.
O que você precisa
-
Este passo não foi traduzido. Ajude a traduzi-lo
-
Remove the Phillips #0-6mm screw.
-
Lift up the back cover to the RAM cards.
-
-
Este passo não foi traduzido. Ajude a traduzi-lo
-
Pull the lock for the baterry to the left to unlock.
-
While holding the tab in the unlocked position, remove the battery.
-
-
Este passo não foi traduzido. Ajude a traduzi-lo
-
Remove the three Phillips #0-6mm screws on the back panel.
-
-
Este passo não foi traduzido. Ajude a traduzi-lo
-
Turn the computer over and open the lid.
-
Wedge the small metal spudger between the palm rest and the keyboard.
-
-
Este passo não foi traduzido. Ajude a traduzi-lo
-
Lift up the keyboard, but be careful not to completely remove.
-
Wedge the small plastic opening tool underneath copper band and tilt back.
-
Remove keyboard to replace.
-
-
-
Este passo não foi traduzido. Ajude a traduzi-lo
-
Remove the SSD/HDD cover from the lower right corner of the laptop.
-
-
Este passo não foi traduzido. Ajude a traduzi-lo
-
Remove the nine Phillips #0-6mm screws on the back panel.
-
-
Este passo não foi traduzido. Ajude a traduzi-lo
-
Pull up on the unlock button while pushing left on the sliding tab.
-
-
Este passo não foi traduzido. Ajude a traduzi-lo
-
Use the plastic opening tool to lift the black tab up and remove the palm rest connection.
-
Remove the palm rest by lifting the side nearest to you.
-
-
Este passo não foi traduzido. Ajude a traduzi-lo
-
Rotate the laptop 90 degrees counter-clockwise.
-
Remove the safety screw on the bottom corner of the laptop by holding the gold cap in place with the tweezers and unscrewing the Phillips screw with the other hand.
-
-
Este passo não foi traduzido. Ajude a traduzi-lo
-
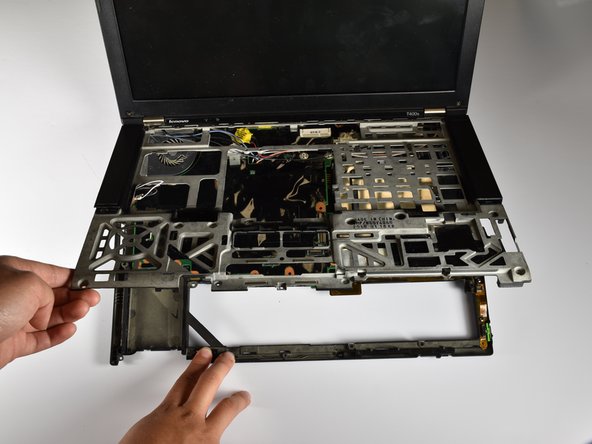
Flip the computer over and open the lid. Unscrew the seven Phillips#0-4mm screws.
-
Lift the frame up by the front and pull towards you to remove.
-
-
Este passo não foi traduzido. Ajude a traduzi-lo
-
Remove the two Phillips #0-6.5mm screws from the back side of the laptop to detach the screen.
-
Lift the laptop down facing you, and place the screen down flat behind the laptop.
-
-
Este passo não foi traduzido. Ajude a traduzi-lo
-
Remove the eight Phillips #0-3mm screws.
-
Remove the two Phillips #0-6mm screws.
-
-
Este passo não foi traduzido. Ajude a traduzi-lo
-
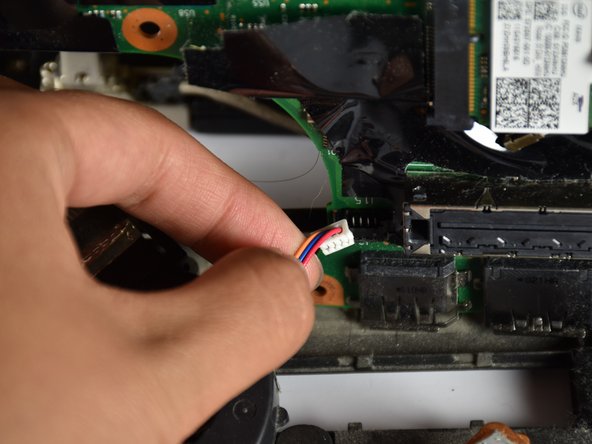
Tilt up the circuit board to access the heatsink and fan.
-
Disconnect the white connector to remove.
-


Cancelar: não concluí este guia.
3 outras pessoas executaram este guia.

Equipe

Cal Poly, Team 6-18, Maness Spring 2015 Membro de Cal Poly, Team 6-18, Maness Spring 2015
CPSU-MANESS-S15S6G18
Membros da 4
Autoria de 5 guias