Esta versão pode conter edições incorretas. Mude para o último instantâneo verificado.
O que você precisa
-
Este passo não foi traduzido. Ajude a traduzi-lo
-
Flip the Chromebook so that the bottom is facing up.
-
Use a Phillips #1 screwdriver to remove the six 6.6 mm screws on the bottom.
-
Use a spudger to remove each of the 4 rubber feet.
-
Use a Phillips #1 screwdriver to remove the four additional screws under the rubber feet.
-
-
Este passo não foi traduzido. Ajude a traduzi-lo
-
Flip the Chromebook back over and open the screen.
-
Wedge the plastic opening tool between the keyboard and the bottom of the Chromebook.
-
Run the plastic opening tool along the seam between the keyboard and the bottom of the Chromebook until the keyboard moves freely. Several tabs will pop out.
-
-
Este passo não foi traduzido. Ajude a traduzi-lo
-
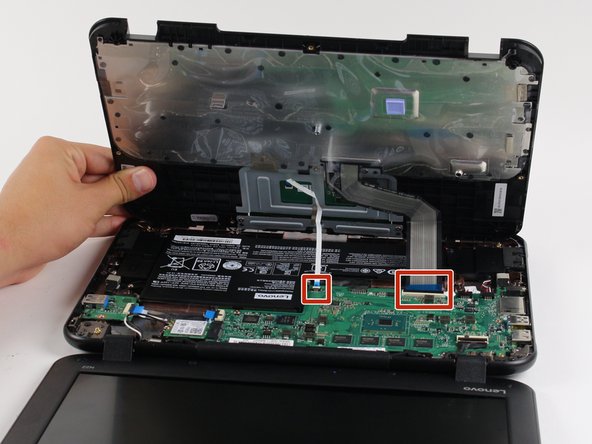
Once the keyboard is released, grab the two top corners closest to the screen and slowly lift the keyboard up.
-
Disconnect the cables by lifting up the retaining flaps on the black ZIF connectors.
-
Slowly pull the cables up and out of the connectors.
-
-
-
Este passo não foi traduzido. Ajude a traduzi-lo
-
Lift the keyboard up and off the back panel, exposing the motherboard and battery.
-
-
Este passo não foi traduzido. Ajude a traduzi-lo
-
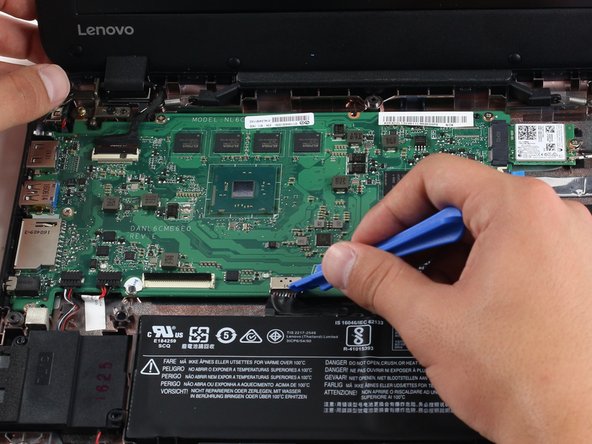
Separate the battery cable from the motherboard by wedging the edge of a plastic opening tool between the black cable connector and the silver socket on the motherboard.
-
Pull the battery cable straight towards you, away from the silver socket.
-
-
Este passo não foi traduzido. Ajude a traduzi-lo
-
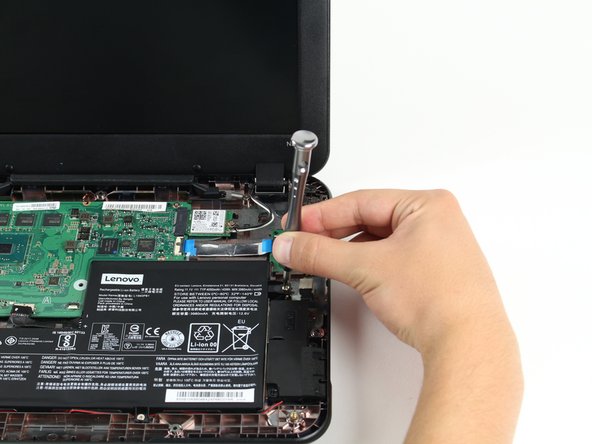
Use a Philips #1 screwdriver to remove the three 4.3 mm screws securing the battery.
-
-
Este passo não foi traduzido. Ajude a traduzi-lo
-
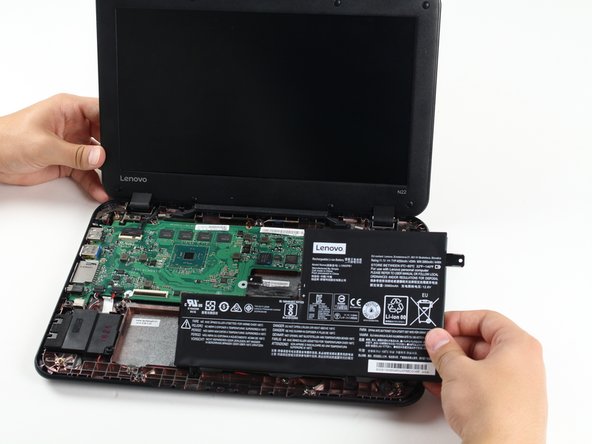
Lift up on the tabs that were held down by the screws to remove the battery.
-
Cancelar: não concluí este guia.
10 outras pessoas executaram este guia.
4 comentários
amazing!! thank you
thanks I needed to take the bottom off so I can take a certain screw
cuck trentxluka
That's way too much just to take the battery out. it was helpful having these steps. Thank you


