Ir para o conteúdo principal

Lenovo N21 Chromebook Screen Replacement

O que você precisa

  1. Lenovo N21 Chromebook Screen Replacement, Keyboard and Trackpad Panel: passo 1, imagem 1 %32 Lenovo N21 Chromebook Screen Replacement, Keyboard and Trackpad Panel: passo 1, imagem 2 %32
    • Power down the Chromebook before starting any repair.

    • Opening up your Chromebook voids the manufacturer warranty.

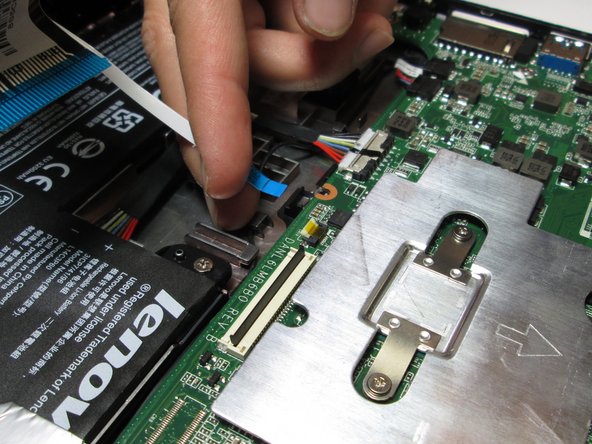
    • Use a screwdriver to remove the six 5.0mm Phillips screws from the bottom housing of the Chromebook.

  2. Lenovo N21 Chromebook Screen Replacement: passo 2, imagem 1 %32 Lenovo N21 Chromebook Screen Replacement: passo 2, imagem 2 %32
    • Use a plastic opening tool to pry off the four rubber pegs from the bottom housing.

  3. Lenovo N21 Chromebook Screen Replacement: passo 3, imagem 1 %32 Lenovo N21 Chromebook Screen Replacement: passo 3, imagem 2 %32
    • Use a screwdriver to remove the four 5.0mm Phillips screws located under the rubber soles.

  4. Lenovo N21 Chromebook Screen Replacement: passo 4, imagem 1 %32 Lenovo N21 Chromebook Screen Replacement: passo 4, imagem 2 %32 Lenovo N21 Chromebook Screen Replacement: passo 4, imagem 3 %32
    • Flip the laptop over and open the screen.

    • Gently pry the keyboard and trackpad panel away from the bottom housing using a plastic opening tool.

    • Once completely separated, do not immediately pull the panel completely away from the bottom housing. There are wires that are still connecting the panel to the rest of the internals of the Chromebook.

  5. Lenovo N21 Chromebook Screen Replacement: passo 5, imagem 1 %32 Lenovo N21 Chromebook Screen Replacement: passo 5, imagem 2 %32
    • Disconnect the keyboard ribbon cable by lifting the ZIF connector lock with a plastic opening tool or fingernail and gently pulling the ribbon cable straight out of its socket.

  6. Lenovo N21 Chromebook Screen Replacement: passo 6, imagem 1 %32 Lenovo N21 Chromebook Screen Replacement: passo 6, imagem 2 %32 Lenovo N21 Chromebook Screen Replacement: passo 6, imagem 3 %32
    • Disconnect the trackpad ribbon cable by lifting the ZIF connector lock with a small prying tool or fingernail and gently pulling the ribbon cable straight out of its socket.

  7. Lenovo N21 Chromebook Screen Replacement: passo 7, imagem 1 %32
    • Remove the keyboard and trackpad panel away from the device.

  8. Lenovo N21 Chromebook Screen Replacement, Screen: passo 8, imagem 1 %32 Lenovo N21 Chromebook Screen Replacement, Screen: passo 8, imagem 2 %32
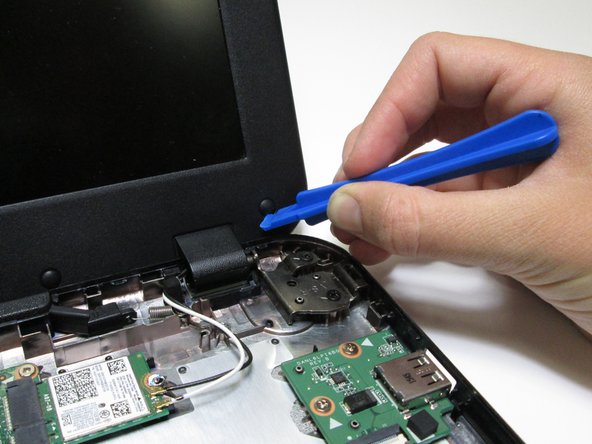
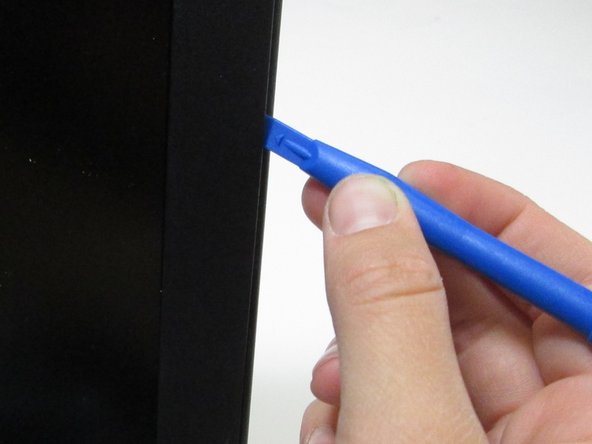
    • Carefully pry off the six small rubber pads around the screen with a plastic opening tool to expose the screws.

    • There are two rubber pads without screws underneath that do not need to be removed.

  9. Lenovo N21 Chromebook Screen Replacement: passo 9, imagem 1 %32 Lenovo N21 Chromebook Screen Replacement: passo 9, imagem 2 %32
    • Remove the six 4.0mm Phillips screws that are underneath the rubber pads with a screwdriver.

  10. Lenovo N21 Chromebook Screen Replacement: passo 10, imagem 1 %32 Lenovo N21 Chromebook Screen Replacement: passo 10, imagem 2 %32
    • Use a plastic opening tool to carefully pry the thin plastic frame away from the screen.

    • The bottom edge of the frame has adhesive on it, and will take a little more power to peel away. Be careful not to bend the plastic too far or it will snap.

  11. Lenovo N21 Chromebook Screen Replacement: passo 11, imagem 1 %32 Lenovo N21 Chromebook Screen Replacement: passo 11, imagem 2 %32
    • Remove the four 3.0mm Phillips screws symmetrically placed on either side of the screen.

  12. Lenovo N21 Chromebook Screen Replacement: passo 12, imagem 1 %32 Lenovo N21 Chromebook Screen Replacement: passo 12, imagem 2 %32
    • Pull the cable connecting the motherboard to the screen straight out from the back of the screen.

    • The screen is very fragile. When handling it, avoid applying uneven pressure on or bending the screen.

  13. Lenovo N21 Chromebook Screen Replacement: passo 13, imagem 1 %32
    • Remove the screen from the device.

Conclusão

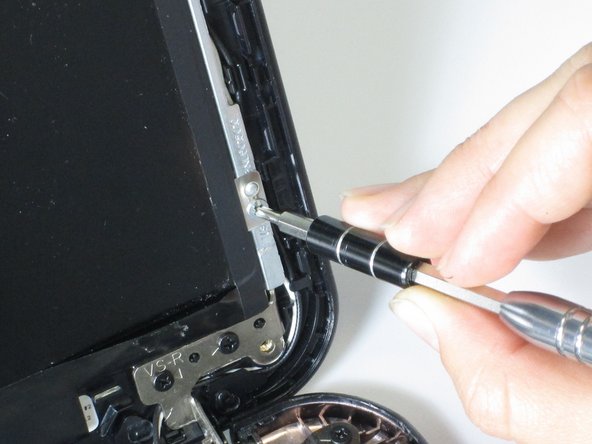
To reassemble your device, follow these instructions in reverse order.

5 outras pessoas executaram este guia.

Lynette Cox

Membro desde: 04/26/17

757 Reputação

Autoria de 2 guias

Equipe

Cal Poly, Team S21-G2, Livingston Spring 2017 Membro de Cal Poly, Team S21-G2, Livingston Spring 2017

CPSU-LIVINGSTON-S17S21G2

Membros da 4

Autoria de 12 guias

0 comentários

Adicione um comentário

Exibir estatísticas:

Últimas 24 horas: 1

Últimos 7 dias: 5

Últimos 30 dias: 30

Duração total: 3,883