Esta versão pode conter edições incorretas. Mude para o último instantâneo verificado.
O que você precisa
-
Este passo não foi traduzido. Ajude a traduzi-lo
-
Locate the lock switch and slide toward the outside edge of the laptop until it clicks into place and the battery unit pops up.
-
Remove the battery unit from the laptop and set it aside.
-
-
Este passo não foi traduzido. Ajude a traduzi-lo
-
Unscrew the three screws on the bottom of the laptop that have small keyboard logos next to them using a PH1 screwdriver. These screws are 5.8mm long.
-
-
Este passo não foi traduzido. Ajude a traduzi-lo
-
Flip the computer over and open the screen.
-
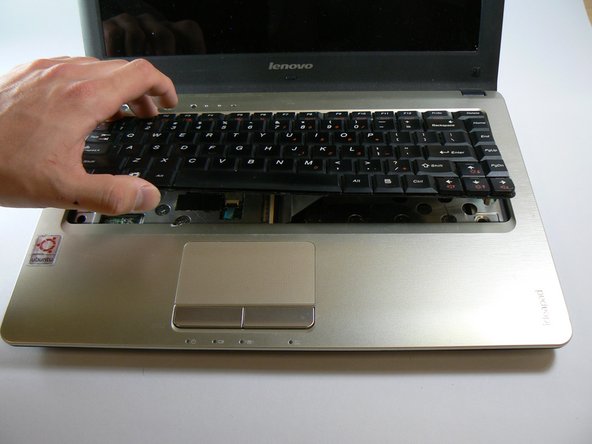
Use a spudger to carefully press in the clip that is found here while prying the keyboard upward from the same side.
-
-
Este passo não foi traduzido. Ajude a traduzi-lo
-
Slightly lift the bottom of the keyboard towards the screen to locate the keyboard's ribbon cable.
-
Use the tip of the spudger to lift the black retaining flap on the ZIF connector.
-
You should now be able to lift out the keyboard easily.
-
-
Este passo não foi traduzido. Ajude a traduzi-lo
-
Unscrew the six screws on the back panel of the laptop using a PH1 Phillips bit.
-
-
Este passo não foi traduzido. Ajude a traduzi-lo
-
Lift the back panel from the side closest to the battery and remove the panel.
-
-
Este passo não foi traduzido. Ajude a traduzi-lo
-
Slide the hard drive to the right, away from the RAM modules.
-
Lift the hard drive from the side closest to the RAM modules.
-
-
Este passo não foi traduzido. Ajude a traduzi-lo
-
Unscrew the nine screws that are around the edge of the laptop using a PH00 screwdriver. These screws are 5.7mm long.
-
Unscrew the remaining two M2.5X3 screws that were under the battery using a PH1 screwdriver. These screws are 3.7mm long.
-
Unscrew the three M2X3 screws that were under the hard drive using a PH1 screwdriver. These screws are 3.7mm long.
-
-
Este passo não foi traduzido. Ajude a traduzi-lo
-
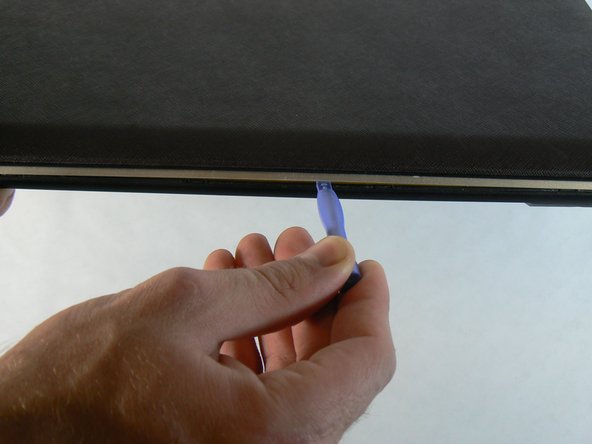
Use the blue plastic opening tool to pry the silver plastic keyboard surround out from the black plastic bottom. You will need to do this around the entire perimeter of the laptop and will hear a pop every time one of the retention clips is unlatched.
-
-
-
Este passo não foi traduzido. Ajude a traduzi-lo
-
Unscrew the two M2X3 screws that were under the keyboard.
-
-
Este passo não foi traduzido. Ajude a traduzi-lo
-
Use the spudger to unlatch the retention clip on the power button and status LEDs ZIF connector.
-
This ribbon cable is glued to the case. Carefully pull up on it from the right side until it is no longer sticking to the case.
-
-
Este passo não foi traduzido. Ajude a traduzi-lo
-
Use the spudger to unlatch the retention clip on the touchpad ZIF connector.
-
Lift the silver plastic keyboard surround away from the base of the laptop. There shouldn't be any resistance.
-
-
Este passo não foi traduzido. Ajude a traduzi-lo
-
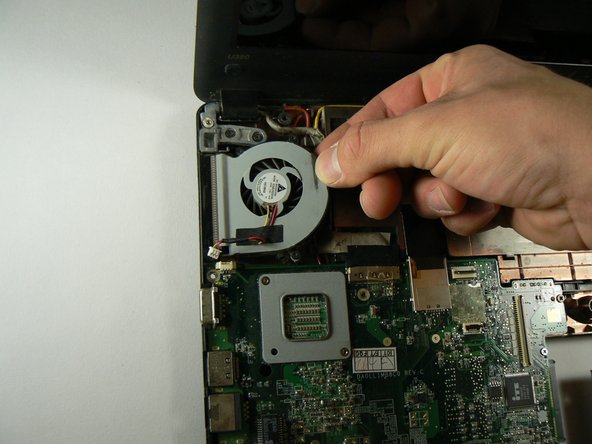
Grip the fan from as far to the right (towards the center of the laptop) as possible and lift up.
-
As soon as the right side of the fan clears the bump in the case where the battery is housed, pull the fan to the right. This should dislodge it from the heatsink.
-
-
Este passo não foi traduzido. Ajude a traduzi-lo
-
Carefully pull the glued plastic tab on the display connector away from the motherboard.
-
Pull the display cable itself out of the connector.
-
-
Este passo não foi traduzido. Ajude a traduzi-lo
-
Use the blue opening tool or spudger to unlatch the indicator LED board ZIF connector.
-
Pull the indicator LED board ribbon cable out of the connector.
-
-
Este passo não foi traduzido. Ajude a traduzi-lo
-
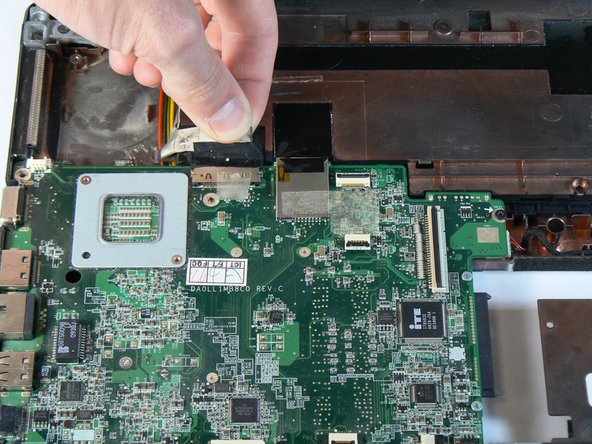
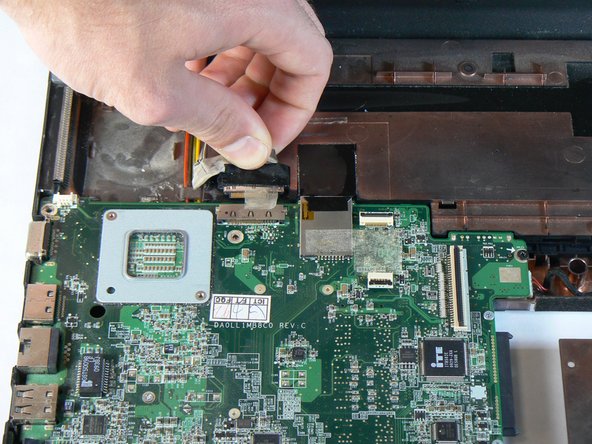
Unplug the I/O daughterboard cable from the motherboard.
-
-
Este passo não foi traduzido. Ajude a traduzi-lo
-
Unscrew the four remaining screws that are holding the motherboard in place using a PH1 bit. The silver screws are 5.6mm long and the black screws are 3.6mm long.
-
-
Este passo não foi traduzido. Ajude a traduzi-lo
-
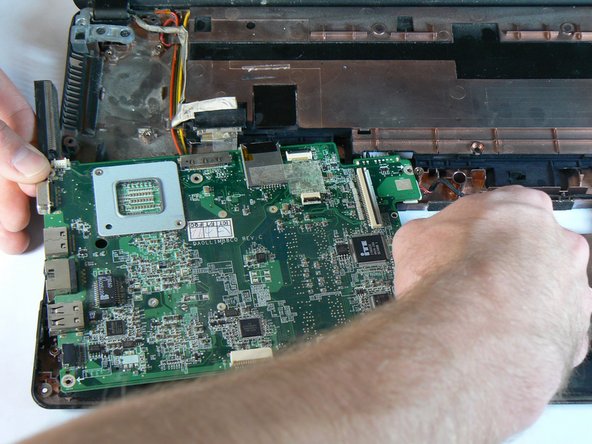
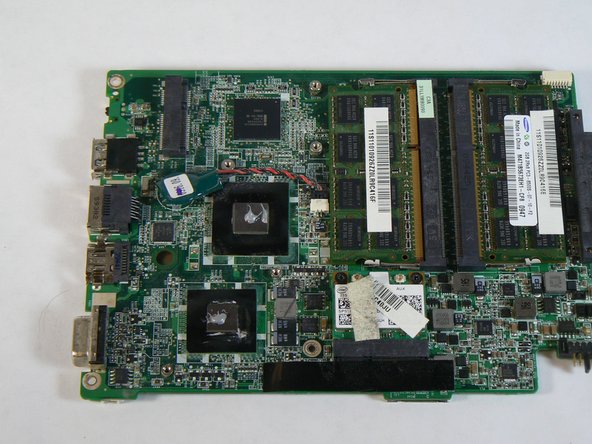
Begin lifting the motherboard out from the top left and bottom right corners.
-
The battery terminal on the top right corner of the motherboard will likely be lodged in the hole leading to the battery compartment. Some wiggling may be necessary in order to free it.
-
-
Este passo não foi traduzido. Ajude a traduzi-lo
-
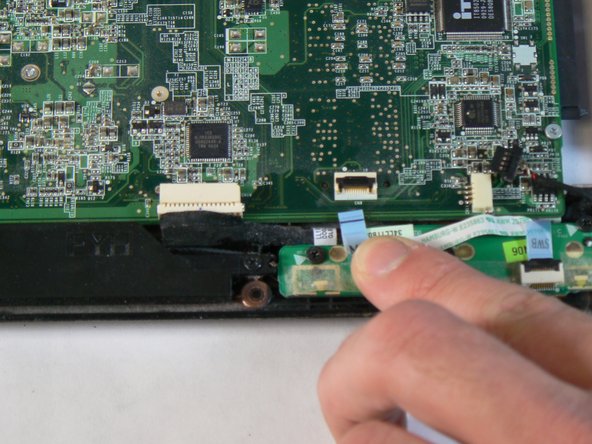
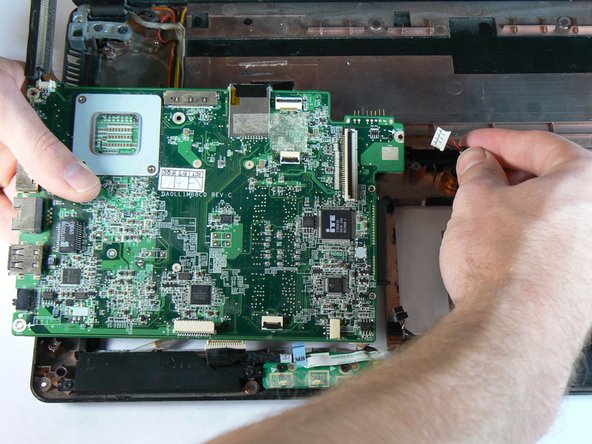
Disconnect the remaining cable on the bottom right corner of the motherboard.
-
-
Este passo não foi traduzido. Ajude a traduzi-lo
-
Unscrew the three heatsink screws using a PH1 bit. These screws are attached to heatsink assembly.
-
-
Este passo não foi traduzido. Ajude a traduzi-lo
-
Clean off the old thermal paste from the bottom of the heatsink. Using rubbing alcohol can make the process easier.
-
-
Este passo não foi traduzido. Ajude a traduzi-lo
-
Clean the old thermal paste off of the CPU and Northbridge dies on the motherboard.
-
-
Este passo não foi traduzido. Ajude a traduzi-lo
-
Apply new, high-quality thermal paste to both dies. Noctua NT-H1 or Arctic Silver 5 are recommended. Only a small bead of thermal paste, roughly the size of a grain of rice, is necessary.
-
-
Este passo não foi traduzido. Ajude a traduzi-lo
-
Carefully place the heatsink back on the dies, attempting to keep it level in order to create an even spread of thermal paste.
-
Tighten all of the heatsink assembly screws.
-


Cancelar: não concluí este guia.
2 outras pessoas executaram este guia.
Equipe

USF Tampa, Team 1-4, Hickman Fall 2014 Membro de USF Tampa, Team 1-4, Hickman Fall 2014
USFT-HICKMAN-F14S1G4
Membros da 3
Autoria de 5 guias