Ir para o conteúdo principal

Lenovo Flex 6-11IGM Speaker Unit Replacement

O que você precisa

  1. Lenovo Flex 6-11IGM Speaker Unit Replacement, Back Panel: passo 1, imagem 1 %32
    • Flip the device over and lay it down with the underside facing upwards.

  2. Lenovo Flex 6-11IGM Speaker Unit Replacement: passo 2, imagem 1 %32 Lenovo Flex 6-11IGM Speaker Unit Replacement: passo 2, imagem 2 %32
    • Remove the ten screws with a Phillips #00 screwdriver.

  3. Lenovo Flex 6-11IGM Speaker Unit Replacement: passo 3, imagem 1 %32
    • Using a plastic opening tool, make your way around the edge of the laptop.

  4. Lenovo Flex 6-11IGM Speaker Unit Replacement: passo 4, imagem 1 %32 Lenovo Flex 6-11IGM Speaker Unit Replacement: passo 4, imagem 2 %32
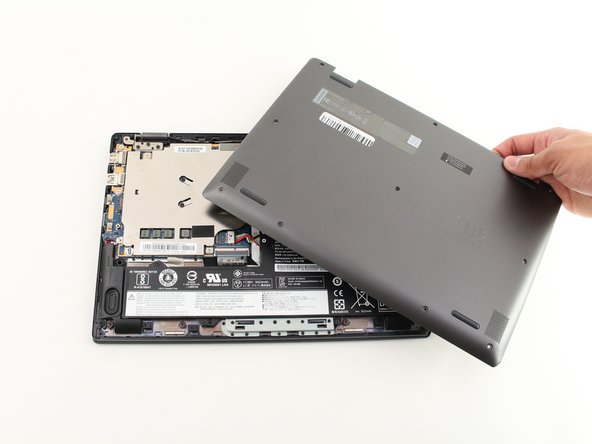
    • After making sure the back panel is completely free from the body, remove the back panel.

  5. Lenovo Flex 6-11IGM Speaker Unit Replacement, Speaker Unit: passo 5, imagem 1 %32 Lenovo Flex 6-11IGM Speaker Unit Replacement, Speaker Unit: passo 5, imagem 2 %32 Lenovo Flex 6-11IGM Speaker Unit Replacement, Speaker Unit: passo 5, imagem 3 %32
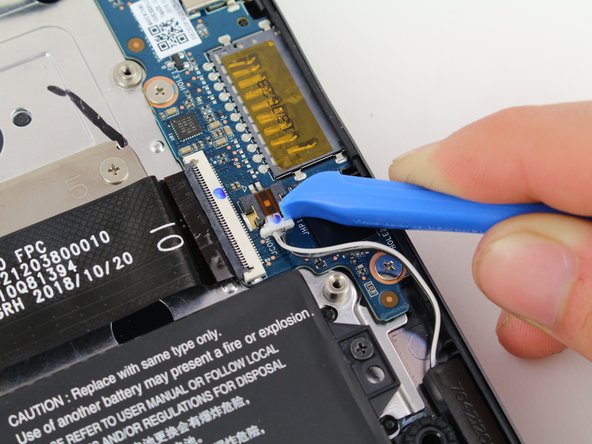
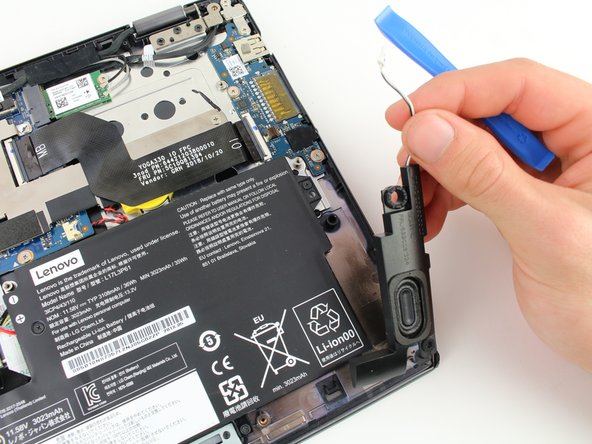
    • For the right speaker, disconnect the wire using the iFixit opening tool.

    • Pull the speaker out.

  6. Lenovo Flex 6-11IGM Speaker Unit Replacement: passo 6, imagem 1 %32 Lenovo Flex 6-11IGM Speaker Unit Replacement: passo 6, imagem 2 %32
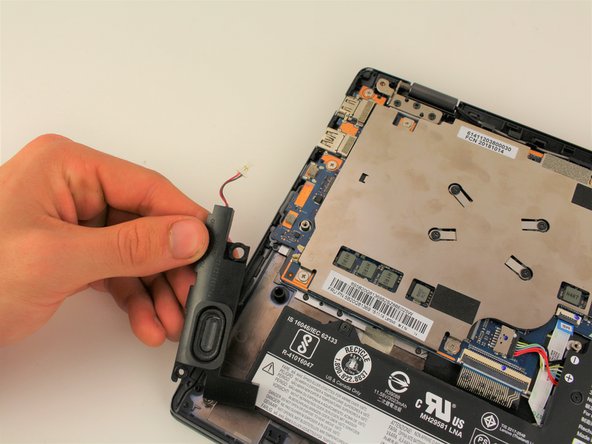
    • For the speaker on the left, disconnect the wire using the iFixit opening tool.

    • Pull the speaker out.

Conclusão

To reassemble your device, follow these instructions in reverse order.

Juan Palominos JR

Membro desde: 01/23/20

217 Reputação

Autoria de 2 guias

Equipe

Cal Poly, Team S2-G4, White Winter 2020 Membro de Cal Poly, Team S2-G4, White Winter 2020

CPSU-WHITE-W20S2G4

Membros da 3

Autoria de 4 guias

0 comentários

Adicione um comentário

Exibir estatísticas:

Últimas 24 horas: 0

Últimos 7 dias: 0

Últimos 30 dias: 0

Duração total: 127