Ir para o conteúdo principal

Lenovo 100e 2nd gen Battery Replacement

Guia arquivado
Este guia é mantido exclusivamente para fins históricos. Use a versão atualizada do guia para executar o reparo.

O que você precisa

  1. Lenovo 100e 2nd gen Battery Replacement, Battery: passo 1, imagem 1 %32 Lenovo 100e 2nd gen Battery Replacement, Battery: passo 1, imagem 2 %32 Lenovo 100e 2nd gen Battery Replacement, Battery: passo 1, imagem 3 %32
    • Before you begin, make sure the laptop is powered off and unplug all cables from the device.

    • Use the Phillips #0 screwdriver to remove the nine 1.2 mm screws on the bottom side of the laptop.

  2. Lenovo 100e 2nd gen Battery Replacement: passo 2, imagem 1 %32 Lenovo 100e 2nd gen Battery Replacement: passo 2, imagem 2 %32 Lenovo 100e 2nd gen Battery Replacement: passo 2, imagem 3 %32
    • Use a plastic opening tool to pry the bottom cover from the laptop.

    • Pry all four sides of the bottom panel to safely remove the bottom panel from the device.

    • Carefully remove the bottom panel and place it to the side.

  3. Lenovo 100e 2nd gen Battery Replacement: passo 3, imagem 1 %32 Lenovo 100e 2nd gen Battery Replacement: passo 3, imagem 2 %32 Lenovo 100e 2nd gen Battery Replacement: passo 3, imagem 3 %32
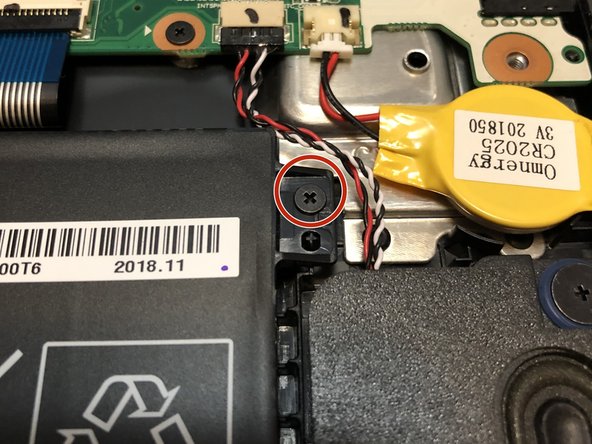
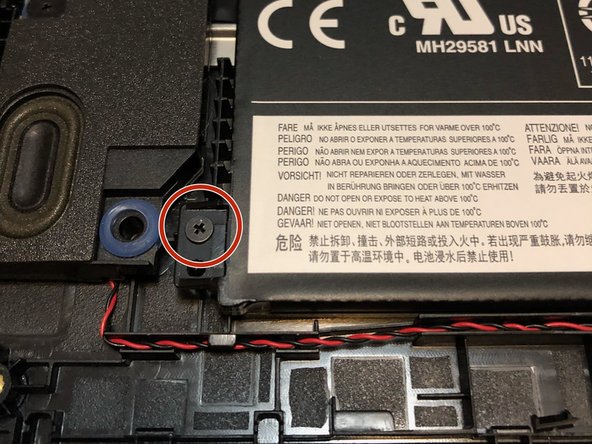
    • Use a Phillips #0 screwdriver to remove the four 1 mm screws that are holding the battery in place.

  4. Lenovo 100e 2nd gen Battery Replacement: passo 4, imagem 1 %32 Lenovo 100e 2nd gen Battery Replacement: passo 4, imagem 2 %32 Lenovo 100e 2nd gen Battery Replacement: passo 4, imagem 3 %32
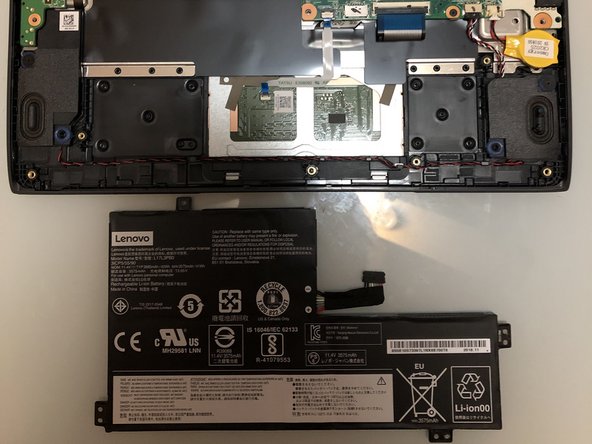
    • Unplug the battery from the motherboard.

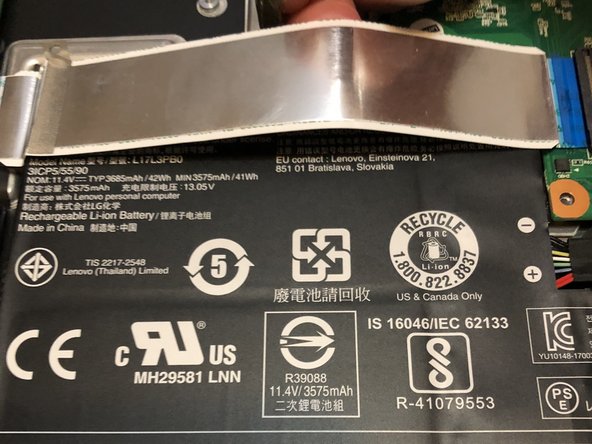
    • Lift the daughterboard ribbon to make it easier to remove the battery safely.

    • Completely remove the old battery and place it to the side.

  5. Lenovo 100e 2nd gen Battery Replacement: passo 5, imagem 1 %32 Lenovo 100e 2nd gen Battery Replacement: passo 5, imagem 2 %32
    • Insert the new battery by connecting the battery to the motherboard.

    • Lift the daughterboard ribbon and place the new battery under the ribbon.

Conclusão

To reassemble your device, follow these instructions in reverse order.

2 outras pessoas executaram este guia.

0 comentários

Adicione um comentário

Exibir estatísticas:

Últimas 24 horas: 0

Últimos 7 dias: 1

Últimos 30 dias: 4

Duração total: 1,022