Ir para o conteúdo principal

LeapFrog LeapPad Ultimate Camera Replacement

O que você precisa

  1. LeapFrog LeapPad Ultimate Camera Replacement, Back Panel: passo 1, imagem 1 %32 LeapFrog LeapPad Ultimate Camera Replacement, Back Panel: passo 1, imagem 2 %32
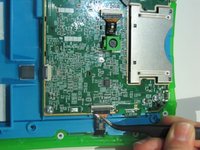
    • Flip over the Pad to its back side to begin the removal of the back panel.

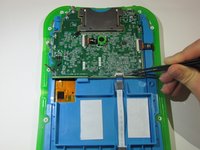
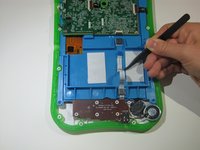
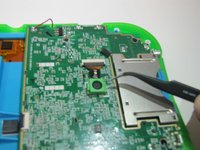
    • Begin by removing the blue rim along the edge of the device. It runs along the green silicone lining.

    • This is very difficult to remove , so do be patient. To help remove the seal, both a metal spudger and plastic opening tool may be used.

    • Remove the pen from its place before starting to avoid tangling.

  2. LeapFrog LeapPad Ultimate Camera Replacement: passo 2, imagem 1 %32 LeapFrog LeapPad Ultimate Camera Replacement: passo 2, imagem 2 %32
    • Once the blue rim is removed, the 12 screws will be visible.

    • Use the Phillips #1 screwdriver to unscrew all 12 screws.

  3. LeapFrog LeapPad Ultimate Camera Replacement, Camera: passo 3, imagem 1 %32
    • Remove the 3 screws on each corner of the motherboard

  4. LeapFrog LeapPad Ultimate Camera Replacement: passo 4, imagem 1 %32 LeapFrog LeapPad Ultimate Camera Replacement: passo 4, imagem 2 %32 LeapFrog LeapPad Ultimate Camera Replacement: passo 4, imagem 3 %32
    • Remove the ribbon on the bottom of the motherboard and the ribbon on the left side of the motherboard.

    • There will be a small black switch on top of the ribbons that you must flip to take them out.

  5. LeapFrog LeapPad Ultimate Camera Replacement: passo 5, imagem 1 %32
    • Remove the 3-pin connector on the top left side of the motherboard.

  6. LeapFrog LeapPad Ultimate Camera Replacement: passo 6, imagem 1 %32 LeapFrog LeapPad Ultimate Camera Replacement: passo 6, imagem 2 %32
    • Flip the motherboard to its back side and pinch the 2 green hooks to remove the camera cover

  7. LeapFrog LeapPad Ultimate Camera Replacement: passo 7, imagem 1 %32
    • Remove the ribbon connecting the camera to the motherboard. You have now taken out the camera and can replace it with a new one.

Conclusão

To reassemble your device, follow these instructions in reverse order.

0 comentários

Adicione um comentário

Exibir estatísticas:

Últimas 24 horas: 0

Últimos 7 dias: 0

Últimos 30 dias: 2

Duração total: 207