Esta versão pode conter edições incorretas. Mude para o último instantâneo verificado.
O que você precisa
-
Este passo não foi traduzido. Ajude a traduzi-lo
-
Remove the two plastic screw covers below the inside phone screen.
-
-
Este passo não foi traduzido. Ajude a traduzi-lo
-
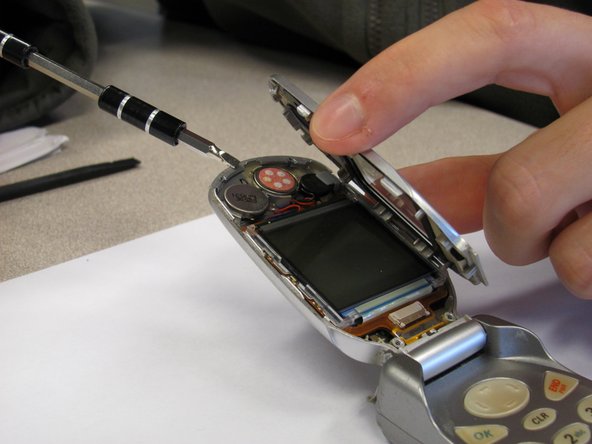
Pry off the screen front cover with a 3mm flathead screwdriver.
-
-
-
Este passo não foi traduzido. Ajude a traduzi-lo
-
Pry off the speaker, which is glued onto the front cover, using a small flathead screwdriver.
-
-
Este passo não foi traduzido. Ajude a traduzi-lo
-
Unsolder the black and red wires of the speaker from where they are attached to the base of the screen.
-
-
Este passo não foi traduzido. Ajude a traduzi-lo
-
Obtain replacement speaker and solder the new black and red wires back to the base of the screen.
-
-
Este passo não foi traduzido. Ajude a traduzi-lo
-
Apply glue to the back of the speaker and place it back in its original position.
-


Cancelar: não concluí este guia.
Uma outra pessoa concluiu este guia.
Equipe

Cal Poly, Team 3-25, Regan Fall 2010 Membro de Cal Poly, Team 3-25, Regan Fall 2010
CPSU-REGAN-F10S3G25
Membros da 4
Autoria de 14 guias