Ir para o conteúdo principal

Esta versão pode conter edições incorretas. Mude para o último instantâneo verificado.

O que você precisa

  1. Este passo não foi traduzido. Ajude a traduzi-lo

    : passo 1, imagem 1 %32
    • Flip the phone over so its backside is facing up

  2. Este passo não foi traduzido. Ajude a traduzi-lo

    : passo 2, imagem 1 %32
    • Push the battery cover from the indentation and slide the battery cover away from phone to remove battery cover

  3. Este passo não foi traduzido. Ajude a traduzi-lo

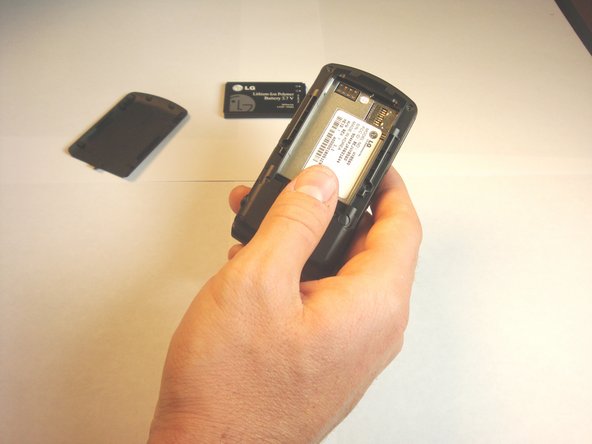
    : passo 3, imagem 1 %32 : passo 3, imagem 2 %32
    • Remove the battery from the phone

  4. Este passo não foi traduzido. Ajude a traduzi-lo

    : passo 4, imagem 1 %32 : passo 4, imagem 2 %32
    • Using a Phillips #00 screwdriver, remove all four screws that are visible along the edge of the phone

  5. Este passo não foi traduzido. Ajude a traduzi-lo

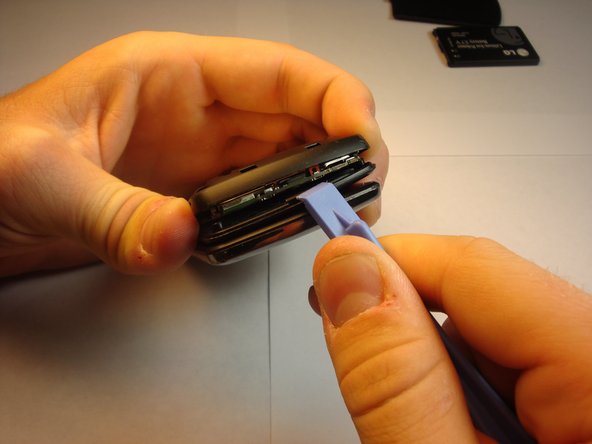
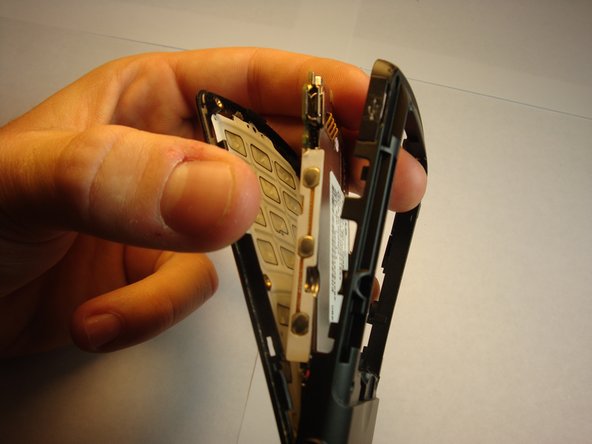
    : passo 5, imagem 1 %32 : passo 5, imagem 2 %32 : passo 5, imagem 3 %32
    • Find the seam between the phone’s keypad cover and back cover, and slide a plastic pry tool along the edge to gently pry the two pieces apart without completely separating them.

    • The motherboard should be visible. Do not separate the two covers. They should be held together by a screw at the axis of the phone.

  6. Este passo não foi traduzido. Ajude a traduzi-lo

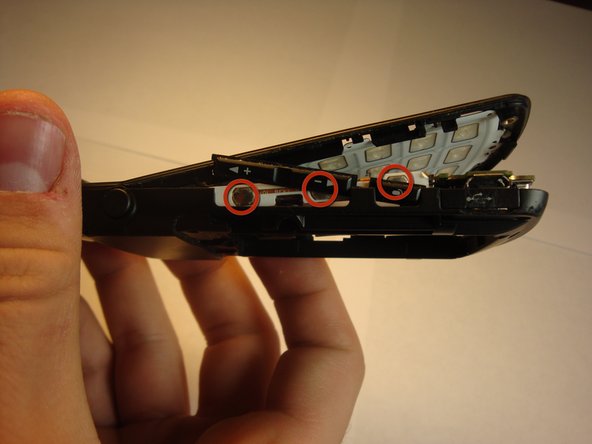
    : passo 6, imagem 1 %32 : passo 6, imagem 2 %32
    • Place the side keys so that they are aligned with the silver circles located on the side of the motherboard.

Linha de Chegada

Uma outra pessoa concluiu este guia.

Kevin

Membro desde: 04/18/13

7 Reputação

Autoria de 2 guias

Equipe

Cal Poly, Team 13-62, Johann Spring 2013 Membro de Cal Poly, Team 13-62, Johann Spring 2013

CPSU-JOHANN-S13S13G62

Membros da 4

Autoria de 12 guias

0 comentários

Adicione um comentário

Exibir estatísticas:

Últimas 24 horas: 2

Últimos 7 dias: 6

Últimos 30 dias: 27

Duração total: 238