Ir para o conteúdo principal

Este guia tem alterações mais recentes. Mudar para a última versão não verificada.

LG Optimus V Camera Replacement

O que você precisa

  1. LG Optimus V Camera Replacement, Battery: passo 1, imagem 1 %32
    • Turn the LG Optimus V over, so that the back cover is facing upward.

  2. LG Optimus V Camera Replacement: passo 2, imagem 1 %32
    • Locate the opening above the camera.

    • Use a spudger to detach the back cover.

  3. LG Optimus V Camera Replacement: passo 3, imagem 1 %32 LG Optimus V Camera Replacement: passo 3, imagem 2 %32 LG Optimus V Camera Replacement: passo 3, imagem 3 %32
    • Gently remove the battery with your spudger.

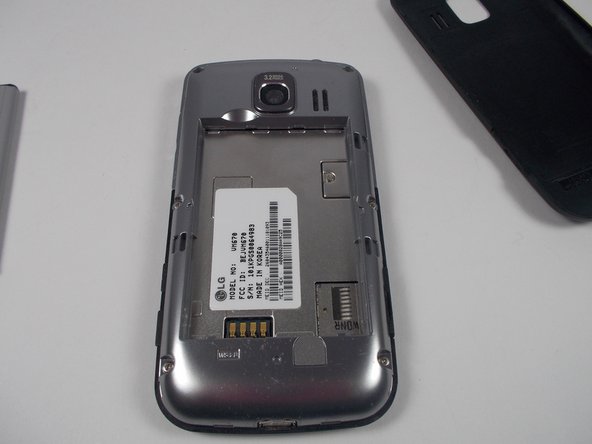
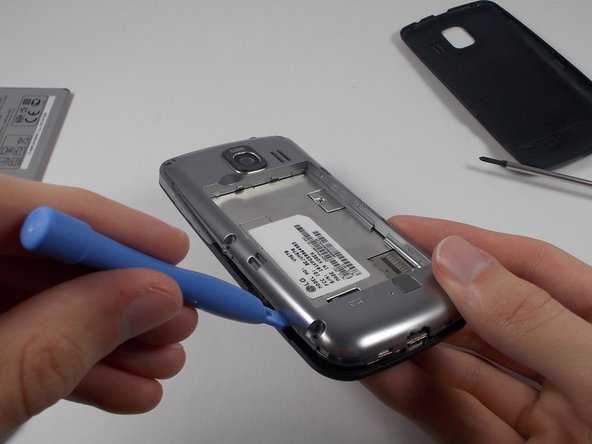
  4. LG Optimus V Camera Replacement, Camera: passo 4, imagem 1 %32 LG Optimus V Camera Replacement, Camera: passo 4, imagem 2 %32
    • Remove the six screws on the silver casing.

    • Use the plastic opening tool to remove the silver casing.

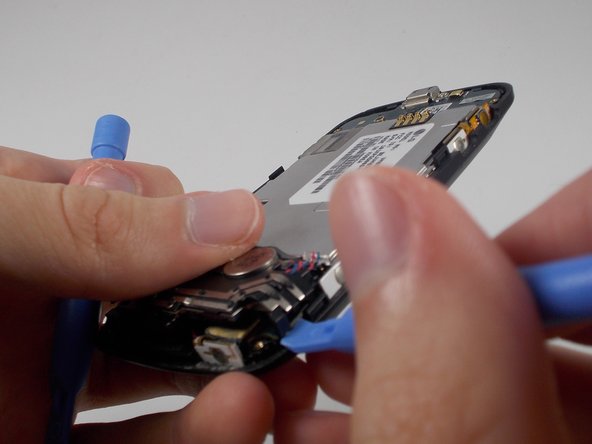
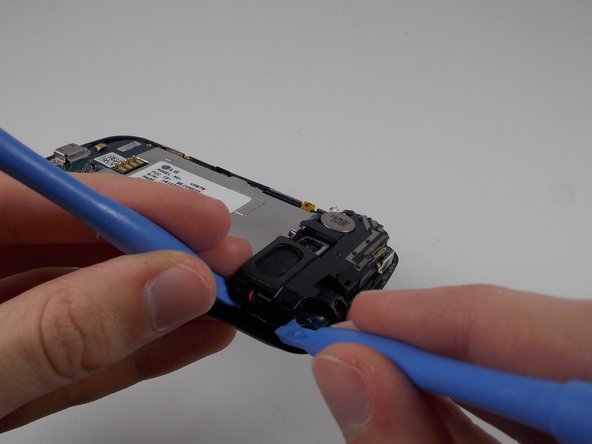
  5. LG Optimus V Camera Replacement: passo 5, imagem 1 %32 LG Optimus V Camera Replacement: passo 5, imagem 2 %32 LG Optimus V Camera Replacement: passo 5, imagem 3 %32
    • Use a plastic opening tool to remove each area holding the parts together.

  6. LG Optimus V Camera Replacement: passo 6, imagem 1 %32 LG Optimus V Camera Replacement: passo 6, imagem 2 %32
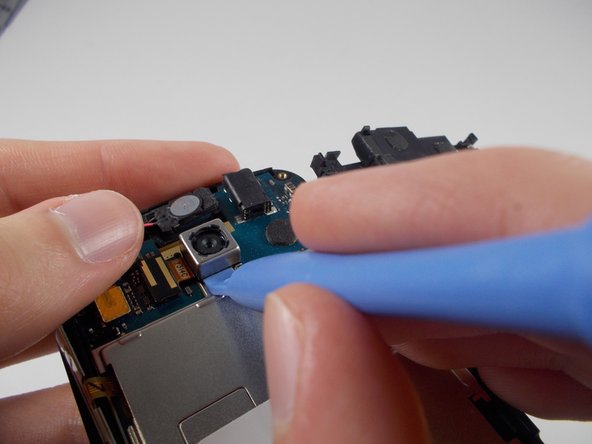
    • Use a plastic opening tool to remove the small black and yellow piece that reads Y3114C.

    • Use a plastic opening tool to pry off the camera.

Conclusão

To reassemble your device, follow these instructions in reverse order.

Uma outra pessoa concluiu este guia.

Equipe

UMass Dartmouth, Team 1-2, Shastany Fall 2013 Membro de UMass Dartmouth, Team 1-2, Shastany Fall 2013

UMASSD-SHASTANY-F13S1G2

Membros da 3

Autoria de 5 guias

0 comentários

Adicione um comentário

Exibir estatísticas:

Últimas 24 horas: 0

Últimos 7 dias: 0

Últimos 30 dias: 1

Duração total: 523