Ir para o conteúdo principal

LG Optimus Fuel Camera Replacement

O que você precisa

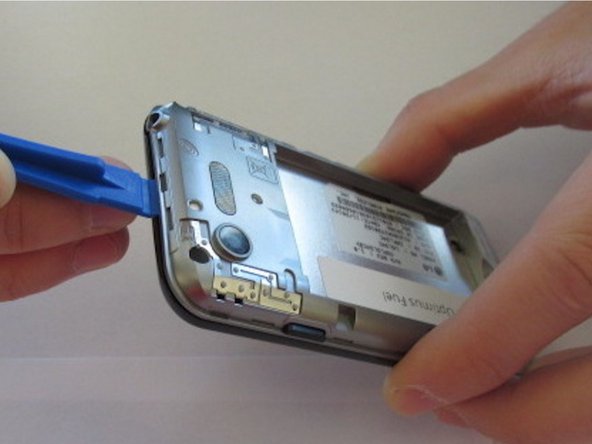
  1. LG Optimus Fuel Camera Replacement, Battery: passo 1, imagem 1 %32 LG Optimus Fuel Camera Replacement, Battery: passo 1, imagem 2 %32
    • Use the opening on the right side of the phone to pull off the plastic back cover.

  2. LG Optimus Fuel Camera Replacement: passo 2, imagem 1 %32 LG Optimus Fuel Camera Replacement: passo 2, imagem 2 %32 LG Optimus Fuel Camera Replacement: passo 2, imagem 3 %32
    • Use the curved opening at the center-bottom of the battery to carefully remove the old battery.

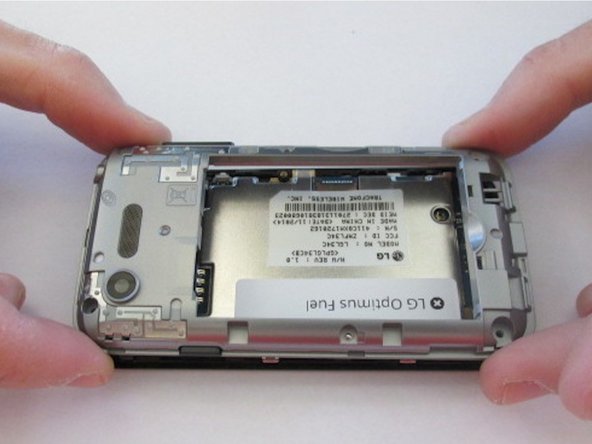
  3. LG Optimus Fuel Camera Replacement, Camera: passo 3, imagem 1 %32 LG Optimus Fuel Camera Replacement, Camera: passo 3, imagem 2 %32 LG Optimus Fuel Camera Replacement, Camera: passo 3, imagem 3 %32
    • Remove the six 1.4mm screws using a Phillips head screwdriver with a size PH00 head and remove the back panel with a plastic opening tool.

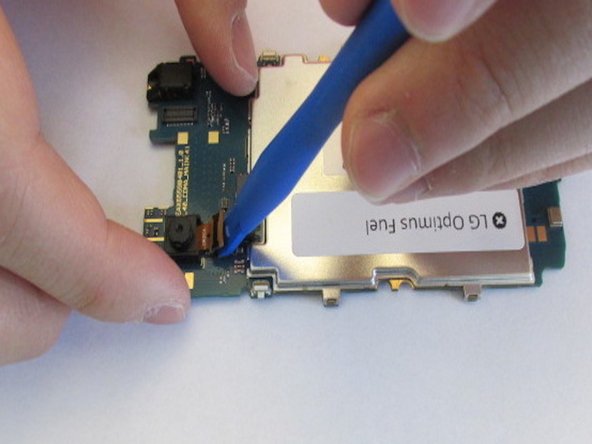
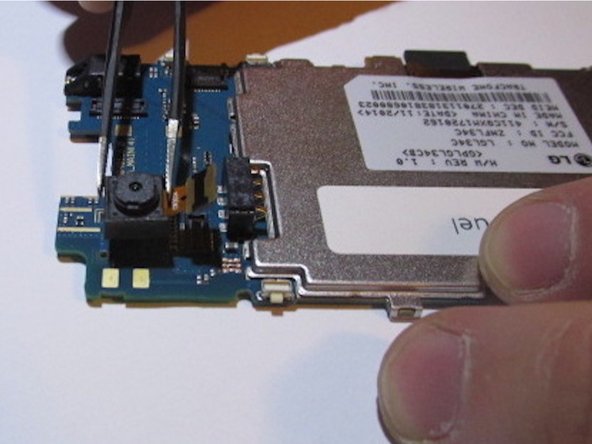
  4. LG Optimus Fuel Camera Replacement: passo 4, imagem 1 %32 LG Optimus Fuel Camera Replacement: passo 4, imagem 2 %32 LG Optimus Fuel Camera Replacement: passo 4, imagem 3 %32
    Ferramenta utilizada nesse passo:
    Tweezers
    $4.99
    Comprar
    • The camera has been secured to the circuit board using an adhesive. Use a plastic opening tool and precision tweezers to remove it. Don't be afraid to use a little force when pulling at the camera.

Conclusão

To reassemble your device, follow these instructions in reverse order.

0 comentários

Adicione um comentário

Exibir estatísticas:

Últimas 24 horas: 0

Últimos 7 dias: 1

Últimos 30 dias: 10

Duração total: 373