Esta versão pode conter edições incorretas. Mude para o último instantâneo verificado.
O que você precisa
-
Este passo não foi traduzido. Ajude a traduzi-lo
-
Flip open the phone and locate the four screw covers.
-
-
Este passo não foi traduzido. Ajude a traduzi-lo
-
Remove all four screw covers by using an IPod opening tool. They should come off relatively easy.
-
-
Este passo não foi traduzido. Ajude a traduzi-lo
-
Using a T6 Torx screwdriver, remove all four screws.
-
-
Este passo não foi traduzido. Ajude a traduzi-lo
-
Once the screws are removed, use an IPod opening tool to separate the front cover from the inner screen cover.
-
Run the Ipod opening tool down both sides,disconnecting the tabs that hold the covers together.
-
-
Este passo não foi traduzido. Ajude a traduzi-lo
-
Pull the inner screen cover towards you and up in order to separate it from the front cover.
-
-
-
Este passo não foi traduzido. Ajude a traduzi-lo
-
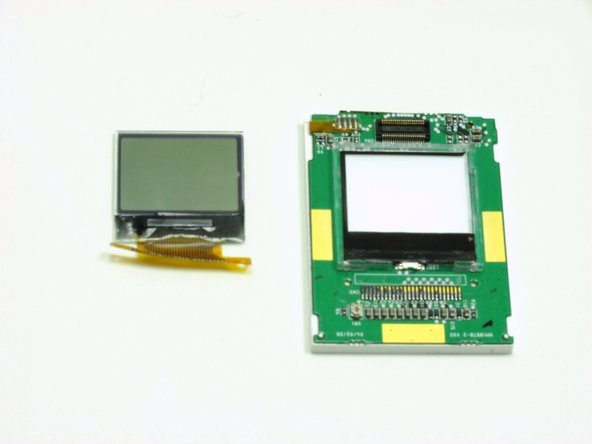
Carefully lift the LCD screen and peel it from the gold ribbon. The sticky connection runs all the way around the LCD screen.
-
-
Este passo não foi traduzido. Ajude a traduzi-lo
-
Flip the screen over so that you can see the outer LCD screen and the circuit board.
-
Insert spudger in the bottom right corner.
-
Lift up and move the spudger across the bottom.
-
-
Este passo não foi traduzido. Ajude a traduzi-lo
-
Use the pointy side of the spudger to peel off the interior tape.
-
Flip the assembly over and peel the circuit board from the screen.
-
-
Este passo não foi traduzido. Ajude a traduzi-lo
-
Use the spudger to remove the LCD screen from its backing.
-
-
Este passo não foi traduzido. Ajude a traduzi-lo
-
The outer LCD screen can be found on the circuit board, which is attached to the back of the inner LCD screen.
-
-
Este passo não foi traduzido. Ajude a traduzi-lo
-
Use an IPod opening tool to carefully lift the screen from its backing.
-
Use your finger to pull the screen forward.
-
-
Este passo não foi traduzido. Ajude a traduzi-lo
-
Pull the screen and the tape ribbon off the circuit board.
-


Equipe

Cal Poly, Team 6-14, Maness Spring 2010 Membro de Cal Poly, Team 6-14, Maness Spring 2010
CPSU-MANESS-S10S6G14
Membros da 4
Autoria de 16 guias