Ir para o conteúdo principal

LG Incite CT810 Motherboard Replacement

Guia arquivado
Este guia é mantido exclusivamente para fins históricos. Use a versão atualizada do guia para executar o reparo.

O que você precisa

  1. LG Incite CT810 Motherboard Replacement, Motherboard: passo 1, imagem 1 %32 LG Incite CT810 Motherboard Replacement, Motherboard: passo 1, imagem 2 %32 LG Incite CT810 Motherboard Replacement, Motherboard: passo 1, imagem 3 %32
    • Remove the four Phillips screws.

  2. LG Incite CT810 Motherboard Replacement: passo 2, imagem 1 %32 LG Incite CT810 Motherboard Replacement: passo 2, imagem 2 %32
    • With the screws set aside, wedge your plastic opening tool in between the screen and the case surrounding it. Gently move the tool along the edge to loosen the screen from the casing. Do this again on the other side as well. The screen and case won't be completely separate in this step.

  3. LG Incite CT810 Motherboard Replacement: passo 3, imagem 1 %32 LG Incite CT810 Motherboard Replacement: passo 3, imagem 2 %32 LG Incite CT810 Motherboard Replacement: passo 3, imagem 3 %32
    • Flip your phone over to the battery side. Locate the seam near the bottom of the phone between the plastic case and the metallic case. Like the previous step, wedge the opening tool into the seem, and slide it across. Then, pry the two pieces apart. Your phone should now be in two pieces.

  4. LG Incite CT810 Motherboard Replacement: passo 4, imagem 1 %32
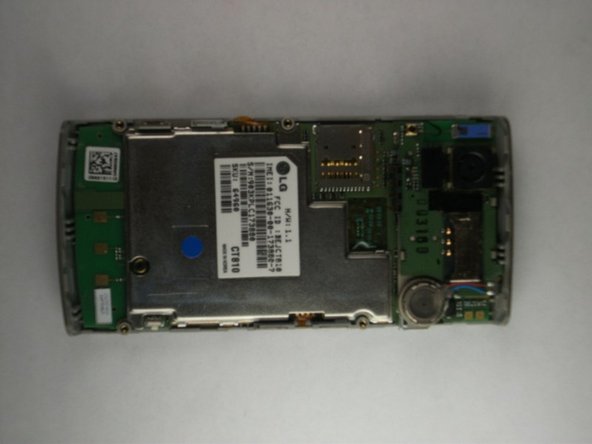
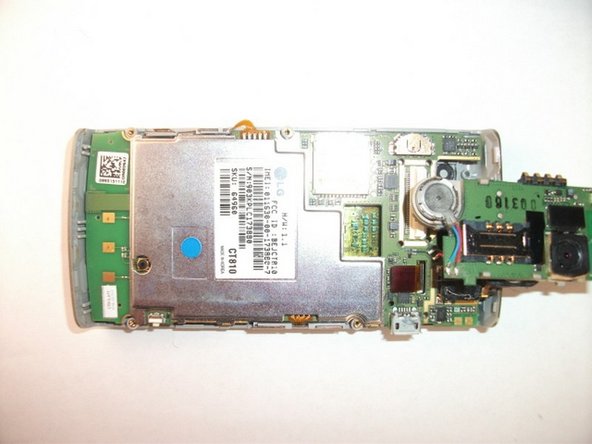
    • Here is a top-down view of what your phone should look like. There are three yellow tabs that need to be loosened in order to remove the motherboard. The third tab is located underneath the speak/camera board in red.

  5. LG Incite CT810 Motherboard Replacement: passo 5, imagem 1 %32 LG Incite CT810 Motherboard Replacement: passo 5, imagem 2 %32 LG Incite CT810 Motherboard Replacement: passo 5, imagem 3 %32
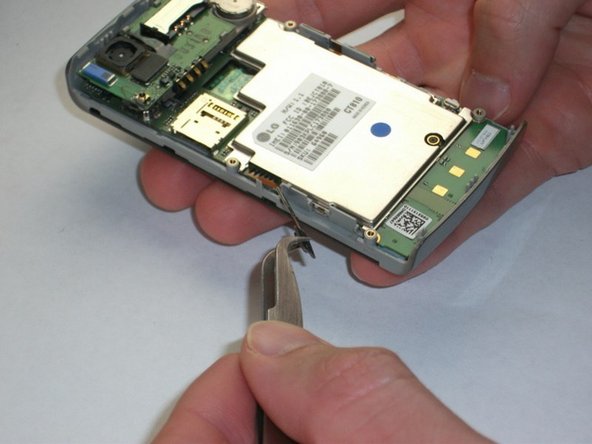
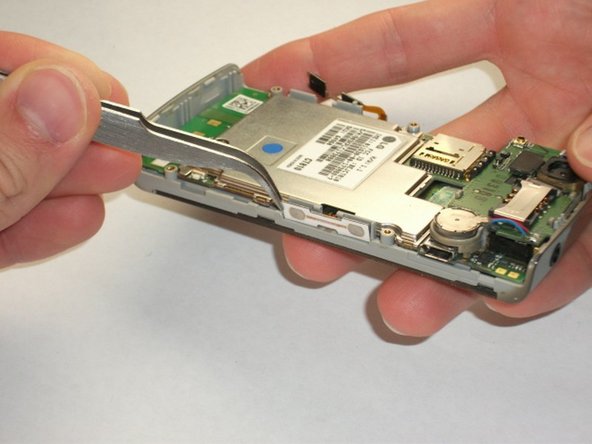
    • The first two tabs are the easiest to remove. Take your metal tweezers and gently separate the white panel from the gray surface they are attached to. Do the same thing to the white panel on the other side of the phone (as shown in image 3).

  6. LG Incite CT810 Motherboard Replacement: passo 6, imagem 1 %32 LG Incite CT810 Motherboard Replacement: passo 6, imagem 2 %32 LG Incite CT810 Motherboard Replacement: passo 6, imagem 3 %32
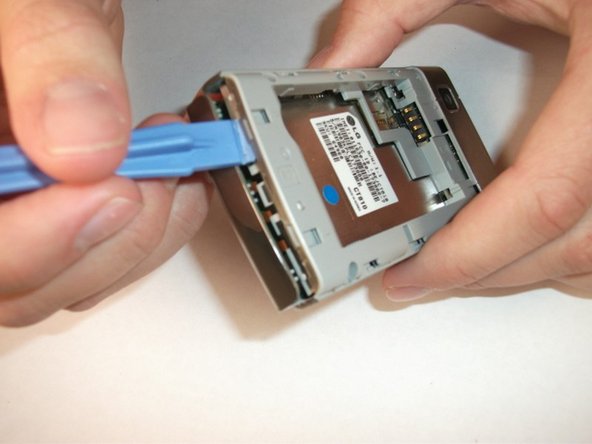
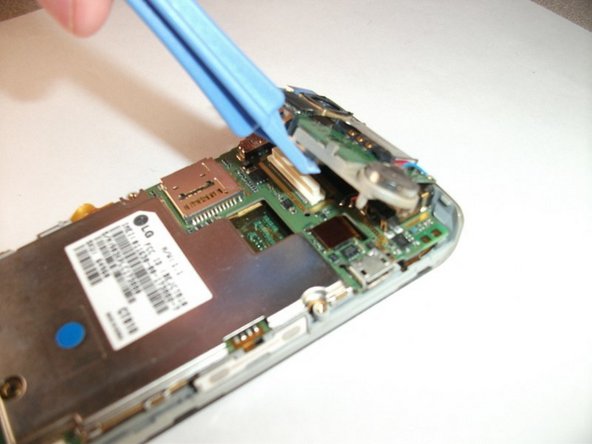
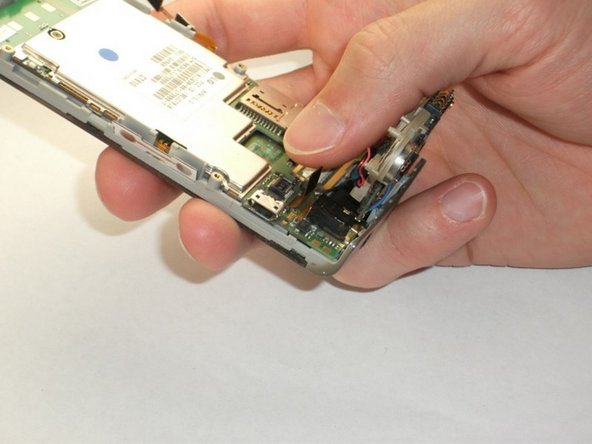
    • To get access to the third tab, insert your plastic opening tool underneath the speak/camera panel, and gently pry at it. Do not fully remove the board though! It should still be attached to the motherboard by a red and black wire. Images two and three show the tab is red.

  7. LG Incite CT810 Motherboard Replacement: passo 7, imagem 1 %32 LG Incite CT810 Motherboard Replacement: passo 7, imagem 2 %32
    • To loosen this tab, use your metal tweezers to lift the side of the tab shown in image 1. You only need to gently lift it, it should pop off quite easily.

  8. LG Incite CT810 Motherboard Replacement: passo 8, imagem 1 %32 LG Incite CT810 Motherboard Replacement: passo 8, imagem 2 %32 LG Incite CT810 Motherboard Replacement: passo 8, imagem 3 %32
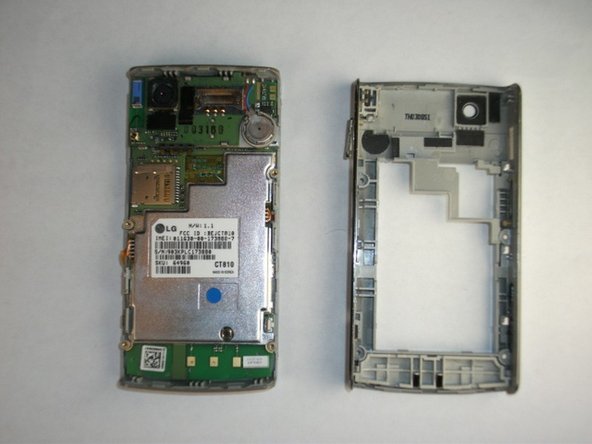
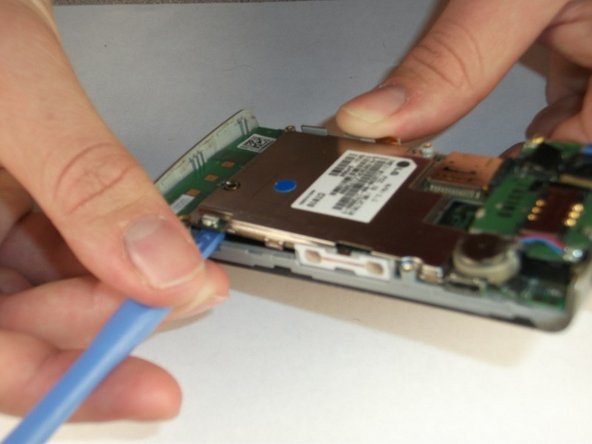
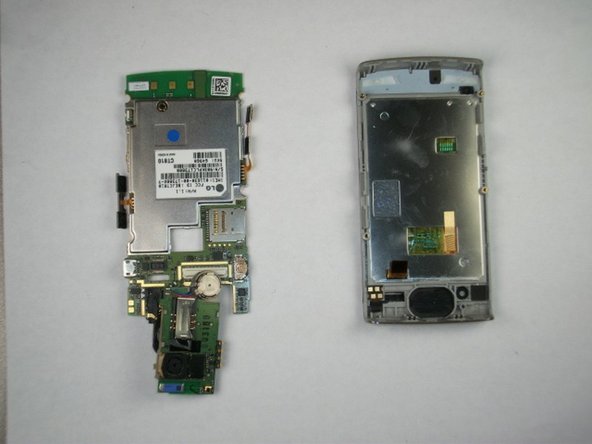
    • With all three tabs removed, its time to separate the motherboard from the other casing! Insert the plastic opening tool as shown, and gently pry the motherboard from its case. Make sure to do this on all sides before fully prying the two apart. The third image shows the motherboard on the left, and the second casing on the right.

Conclusão

To reassemble your device, follow these instructions in reverse order.

Matthew

Membro desde: 04/16/13

124 Reputação

Autoria de 1 guia

Equipe

Cal Poly, Team 2-18, Maness Spring 2013 Membro de Cal Poly, Team 2-18, Maness Spring 2013

CPSU-MANESS-S13S2G18

Membros da 4

Autoria de 11 guias

0 comentários

Adicione um comentário

Exibir estatísticas:

Últimas 24 horas: 0

Últimos 7 dias: 1

Últimos 30 dias: 1

Duração total: 113