Esta versão pode conter edições incorretas. Mude para o último instantâneo verificado.
O que você precisa
-
Este passo não foi traduzido. Ajude a traduzi-lo
-
Remove the back cover by placing the plastic opening tool on the bottom left side of the device and gently prying up.
-
-
Este passo não foi traduzido. Ajude a traduzi-lo
-
Insert the plastic opening tool into the indent at the bottom of the battery and lift up. Fully remove the battery with your fingers.
-
-
Este passo não foi traduzido. Ajude a traduzi-lo
-
Carefully use the Phillips #00 screwdriver to remove the eleven 3.9mm visible screws found on the back. The screws to be removed are marked with the given indicators.
-
-
-
Este passo não foi traduzido. Ajude a traduzi-lo
-
When you have finished removing all of the screws, place the plastic opening tool in the groove at the bottom left corner of the motherboard cover and lift up.
-
Make sure to remove the SIM card before you remove the motherboard cover. You can get the cover off without doing this, but the SIM card will be stuck underneath the cover once you put it back together.
-
Once a clip is released, you can detach the motherboard cover with your fingers and set aside.
-
-
Este passo não foi traduzido. Ajude a traduzi-lo
-
Carefully place the plastic opening tool under the ribbons where the cables are connecting and lift up to detach the cables.
-
-
Este passo não foi traduzido. Ajude a traduzi-lo
-
Fully remove the motherboard by prying upward with the plastic opening tool.
-
-
Este passo não foi traduzido. Ajude a traduzi-lo
-
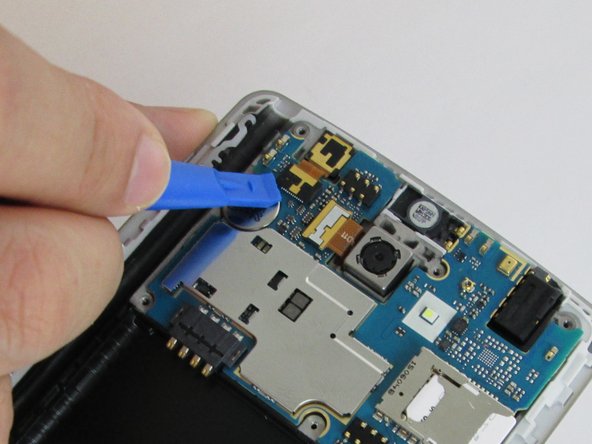
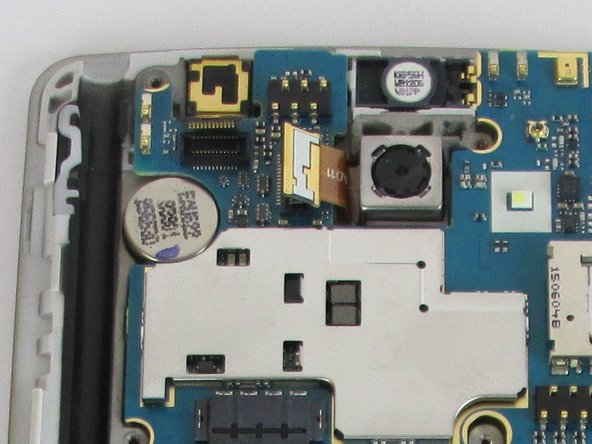
Gently wedge the plastic opening tool under the ribbon where the rear camera cable is connected. Slowly lift up to detach the cable from the mother board and replace the rear camera accordingly.
-


Equipe

USF Tampa, Team 11-7, Cheng Spring 2016 Membro de USF Tampa, Team 11-7, Cheng Spring 2016
USFT-CHENG-S16S11G7
Membros da 4
Autoria de 14 guias