Ir para o conteúdo principal

Kindle Fire HD 8.9" Speakers Replacement

O que você precisa

  1. Kindle Fire HD 8.9" Speakers Replacement, Screen: passo 1, imagem 1 %32 Kindle Fire HD 8.9" Speakers Replacement, Screen: passo 1, imagem 2 %32 Kindle Fire HD 8.9" Speakers Replacement, Screen: passo 1, imagem 3 %32
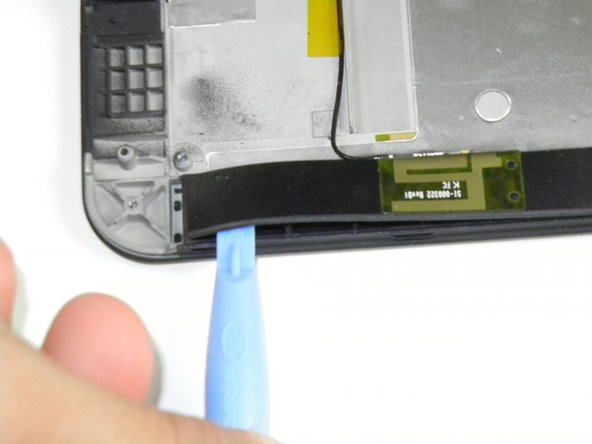
    • Insert a large plastic opening tool next to the Kindle's headphone jack.

    • Make sure the notch on the plastic opening tool is facing the back of the Kindle.

    • Move the plastic opening tool evenly around the Kindle, separating the two halves.

    • Be careful not to completely separate the rear cover. There are two delicate flex cables that connect the display assembly to the motherboard.

  2. Kindle Fire HD 8.9" Speakers Replacement: passo 2, imagem 1 %32
    • Set the Kindle down on the rear case.

    • Holding the display assembly near the camera, carefully open the display assembly up to about 90 degrees from the rear case.

    • These images show the Kindle laying flat. In order to prevent damage to the flex cables, keep the Kindle open at 90 degrees while disconnecting the display assembly.

  3. Kindle Fire HD 8.9" Speakers Replacement: passo 3, imagem 1 %32 Kindle Fire HD 8.9" Speakers Replacement: passo 3, imagem 2 %32 Kindle Fire HD 8.9" Speakers Replacement: passo 3, imagem 3 %32
    • Lift the retaining flap on the ZIF connector of the upper flex cable.

    • Gently pull the cable out of its socket.

    • This flex cable is delicate. Be careful not to crease or bend it while working.

  4. Kindle Fire HD 8.9" Speakers Replacement: passo 4, imagem 1 %32
    • Separate the display assembly from the rest of the device.

    • When reassembling the device, align the two halves of the case before connecting the flex cables.

  5. Kindle Fire HD 8.9" Speakers Replacement, Inner Metal Casing: passo 5, imagem 1 %32 Kindle Fire HD 8.9" Speakers Replacement, Inner Metal Casing: passo 5, imagem 2 %32
    • Remove the following sixteen screws from the metal midframe on the rear of the device:

    • Four 3 mm Phillips screw (located in each corner of the device - noted in red in the diagram)

    • Four 3 mm Phillips screws (surrounding the ports - noted in orange in the diagram)

    • Eight 3 mm Phillips screws (located around the body of the midframe - noted in yellow in the diagram)

  6. Kindle Fire HD 8.9" Speakers Replacement: passo 6, imagem 1 %32 Kindle Fire HD 8.9" Speakers Replacement: passo 6, imagem 2 %32
    • Carefully remove the metal midframe.

  7. Kindle Fire HD 8.9" Speakers Replacement, Battery: passo 7, imagem 1 %32 Kindle Fire HD 8.9" Speakers Replacement, Battery: passo 7, imagem 2 %32
    • For easier handling, position the Kindle as shown.

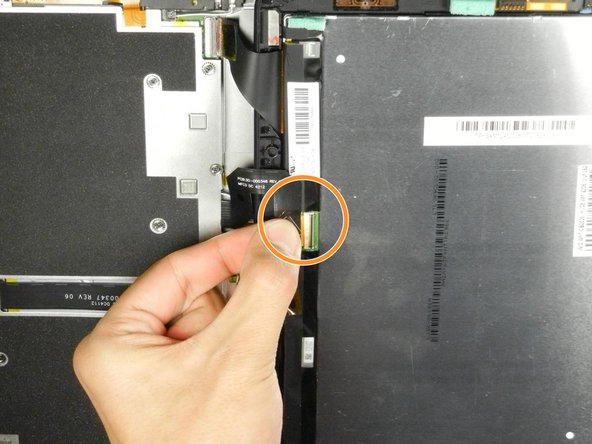
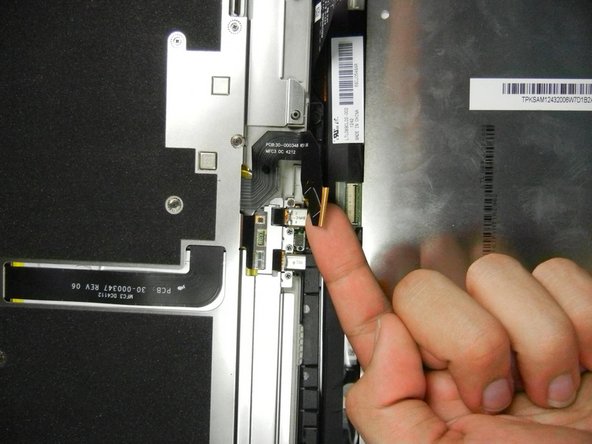
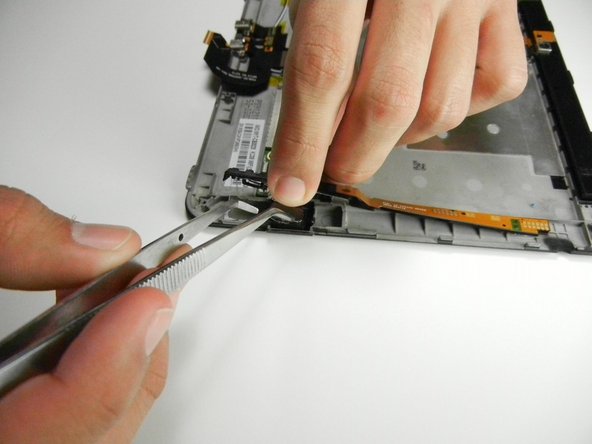
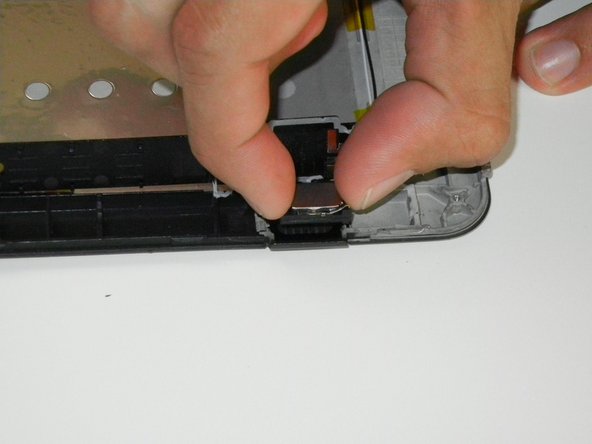
    • Lift up on the silver ends of the black flex cable that lays across the battery.

    • Gently pull the black flex cable from the battery.

  8. Kindle Fire HD 8.9" Speakers Replacement: passo 8, imagem 1 %32
    • Disconnect the orange button cable from its socket on the motherboard.

    • Don't remove the button from the device. It is adhered to the case and may tear during removal.

  9. Kindle Fire HD 8.9" Speakers Replacement: passo 9, imagem 1 %32 Kindle Fire HD 8.9" Speakers Replacement: passo 9, imagem 2 %32 Kindle Fire HD 8.9" Speakers Replacement: passo 9, imagem 3 %32
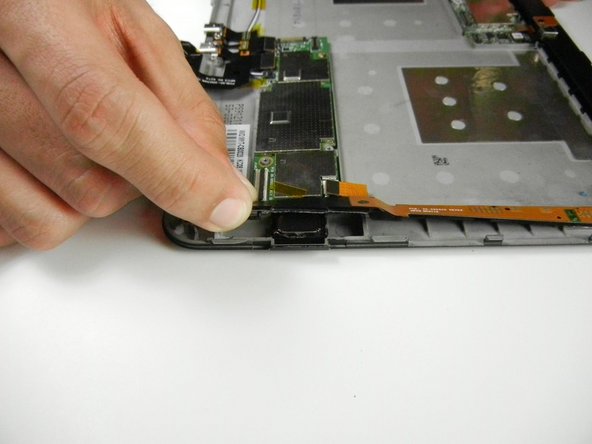
    • Starting at the outside edge of the battery, use the flat edge of a spudger to separate the battery from the rear of the device.

    • Work carefully. Excessive force on battery may cause it to bend, break, or crack.

    • Move the spudger along each side of the battery, prying upwards with even pressure.

    • As the adhesive releases, push the spudger further underneath the battery.

    • Once half of the battery is detached, pry the other half in the same manner.

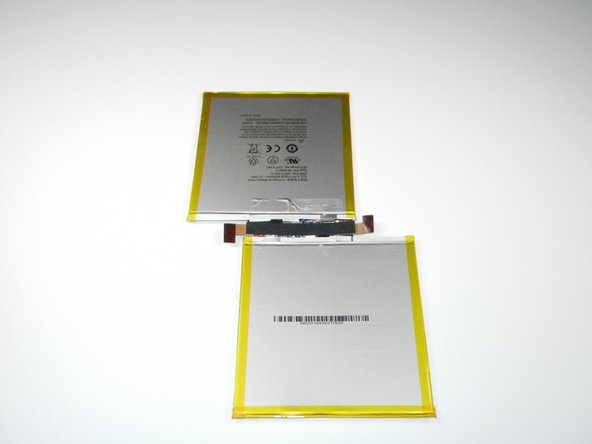
    • Remove the battery assembly from the Kindle.

  10. Kindle Fire HD 8.9" Speakers Replacement, Speakers: passo 10, imagem 1 %32
    • Looking back at the Kindle before the battery was removed, locate the the two speakers on the top and bottom.

    • We will be starting with the right (bottom) speaker.

  11. Kindle Fire HD 8.9" Speakers Replacement: passo 11, imagem 1 %32 Kindle Fire HD 8.9" Speakers Replacement: passo 11, imagem 2 %32 Kindle Fire HD 8.9" Speakers Replacement: passo 11, imagem 3 %32
    • With a plastic opening tool, pry along the top edge of the plastic casing.

    • Prying will be difficult considering the liberal amount of adhesive used to keep the casing in place. Don't give up.

    • Inside the casing is a small rectangular silver component. This is the speaker.

    • Pay attention to the orientation of the speaker.

    • Using pliers and enough force, pull the speaker upward and out of the casing. Once again adhesive may prove difficult.

  12. Kindle Fire HD 8.9" Speakers Replacement: passo 12, imagem 1 %32 Kindle Fire HD 8.9" Speakers Replacement: passo 12, imagem 2 %32
    • To get to the left speaker use a plastic opening tool and pry open the plastic casing.

    • We recommend starting at the edge furthest from the speaker because there is less adhesive.

    • Move along the edge, forcing the opening tool in further and prying the two sections apart.

    • Don't be afraid to use force as the casing is flexible.

  13. Kindle Fire HD 8.9" Speakers Replacement: passo 13, imagem 1 %32 Kindle Fire HD 8.9" Speakers Replacement: passo 13, imagem 2 %32
    • Continue to move the opening tool along the edge until the entire casing is open.

    • Around the speaker is an extensive amount of adhesive (the white ribbons) and will require more force to separate.

    • Pay attention to the orientation of the speaker.

    • Once the left speaker is accessible, use your fingers or some tweezers to pull the speaker upward and out.

    • Again there will be adhesive to make the process that much more enjoyable. Who doesn't like a challenge?

Conclusão

To reassemble your device, follow these instructions in reverse order. Be sure to replace the speakers in the correct orientation.

Uma outra pessoa concluiu este guia.

Ian Meeder

Membro desde: 01/11/13

626 Reputação

Autoria de 1 guia

Equipe

Cal Poly, Team 5-16, Forte Winter 2013 Membro de Cal Poly, Team 5-16, Forte Winter 2013

CPSU-FORTE-W13S5G16

Membros da 5

Autoria de 14 guias

0 comentários

Adicione um comentário

Exibir estatísticas:

Últimas 24 horas: 0

Últimos 7 dias: 0

Últimos 30 dias: 6

Duração total: 7,633