Esta versão pode conter edições incorretas. Mude para o último instantâneo verificado.
O que você precisa
-
Este passo não foi traduzido. Ajude a traduzi-lo
-
At each corner, use the blue plastic opening tool to unhook and separate the front panel from the adhesive.
-
Run the tool along the seams to pry open the front panel.
-
-
Este passo não foi traduzido. Ajude a traduzi-lo
-
Peel the front panel off to remove it from the Kindle.
-
To prevent damaging the front panel, peel the panel from the corners towards the middle of the Kindle.
-
-
Este passo não foi traduzido. Ajude a traduzi-lo
-
Working evenly along the corners and edges, separate the internal contents from the back panel.
-
-
Este passo não foi traduzido. Ajude a traduzi-lo
-
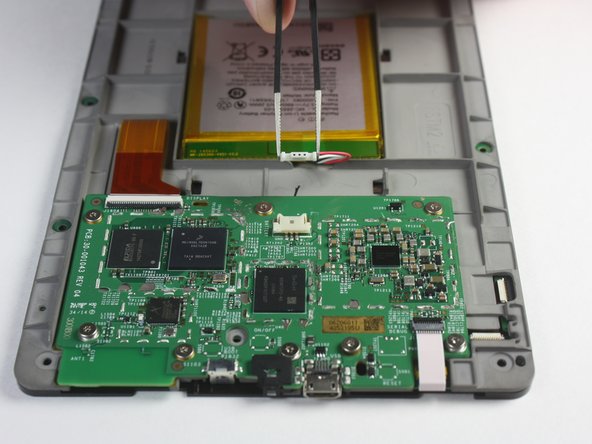
Flip the screen over to face the motherboard and battery pack.
-
Use the blunted precision tweezers to gently unclip and detach the cable connecting the battery pack and motherboard.
-
-
-
Este passo não foi traduzido. Ajude a traduzi-lo
-
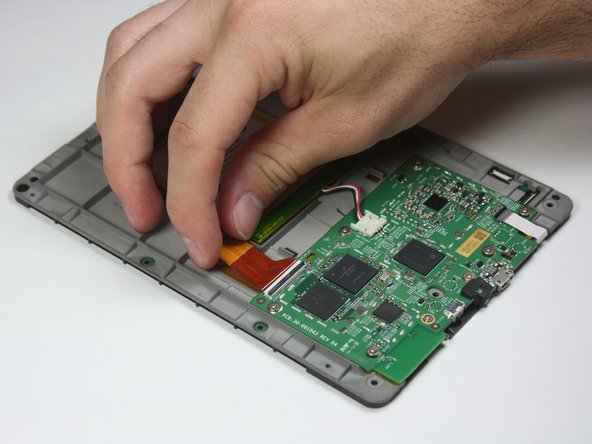
Use the tip of the spudger to flip up the small retaining flap on the copper colored zero insertion force (ZIF) connector.
-
Pull the cable from the connector.
-
-
Este passo não foi traduzido. Ajude a traduzi-lo
-
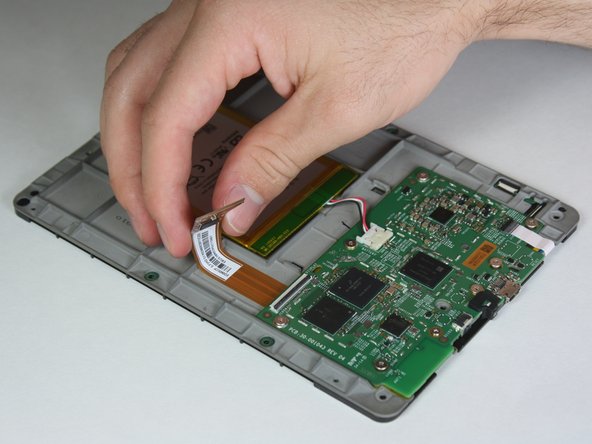
Similar to the previous step, flip up the retaining flap on the white cable connector.
-
Pull the white cable from the connection.
-
-
Este passo não foi traduzido. Ajude a traduzi-lo
-
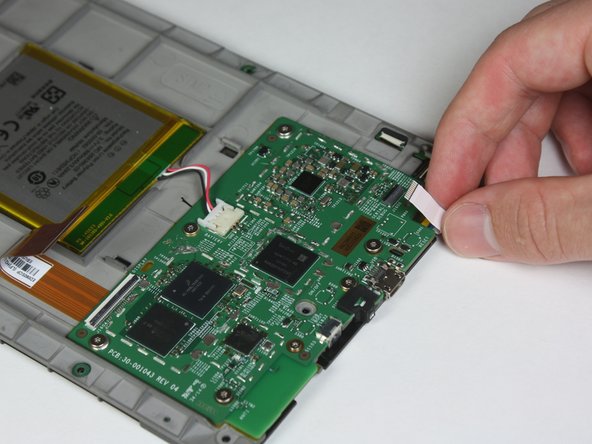
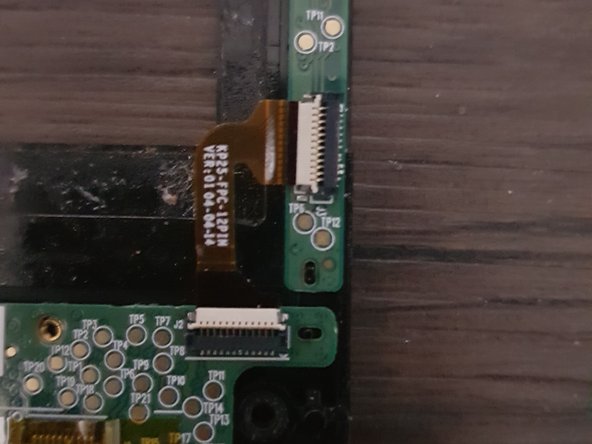
Disconnect the touch digitiser bridge cable by using your Spudger to lift up the white tabs on both connectors.
-
Use tweezers to pull out the cable.
-
The touch digitiser bridge cable is the one connecting between these two connectors.
-
-
Este passo não foi traduzido. Ajude a traduzi-lo
-
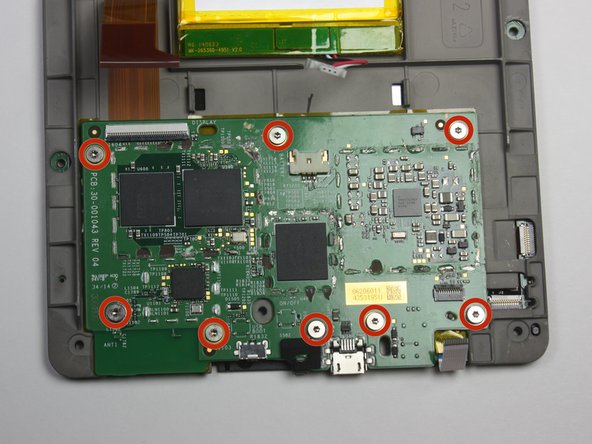
Use the T5 Torx screwdriver to remove the eight 3.0 mm Phillips Head screws.
-
-
Este passo não foi traduzido. Ajude a traduzi-lo
-
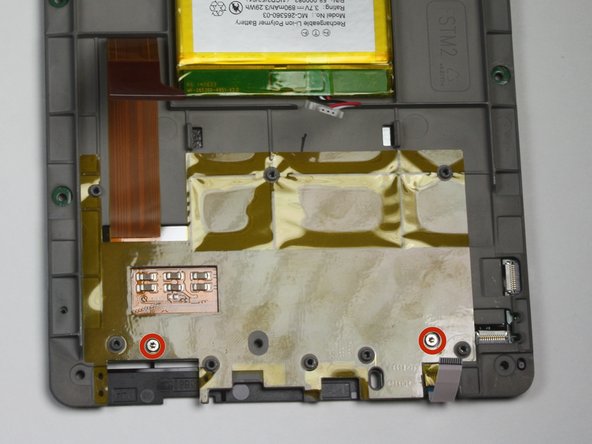
Remove the two 2.5 mm Phillips Head screws using the T5 Torx screwdriver.
-
-
Este passo não foi traduzido. Ajude a traduzi-lo
-
Run the plastic opening tool around the edge to separate the bezel from the adhesive.
-
-
Este passo não foi traduzido. Ajude a traduzi-lo
-
Flip the bezel over to view the circuit board.
-
Use the T5 Torx screwdriver to undo the six 2.0 mm screws holding the circuit board to the bezel.
-
Remove the LCD circuit board.
-


Cancelar: não concluí este guia.
Uma outra pessoa concluiu este guia.
Equipe

Cal Poly, Team 6-28, Amido Winter 2015 Membro de Cal Poly, Team 6-28, Amido Winter 2015
CPSU-AMIDO-W15S6G28
Membros da 4
Autoria de 18 guias