Introdução
This guide is designed to help users successfully repair battery terminals for your Kid Motorz Xtreme Quad 12V Vehicle
The battery allows for the device to be powered on and sustain power during use. If the battery is not working, the device may not be able to power on or stay on for very long.
Before you begin using this guide you will need to be familiar with soldering techniques and some materials require.
Make sure to preheat your soldering station before beginning.
Before you begin, make sure the device is powered off and disconnected from any external power source.
O que você precisa
-
-
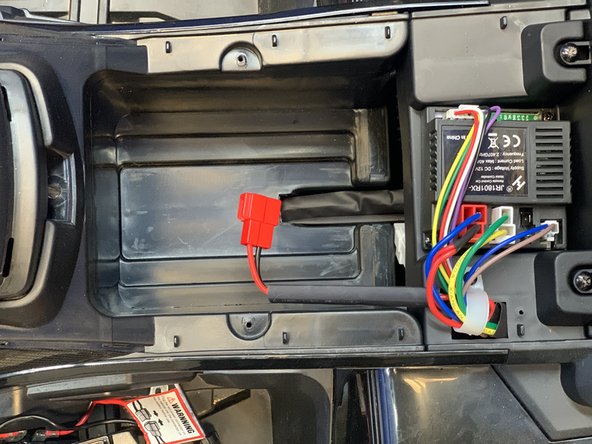
Remove the screw at the back of the seat.
-
Remove the seat from the device.
-
-


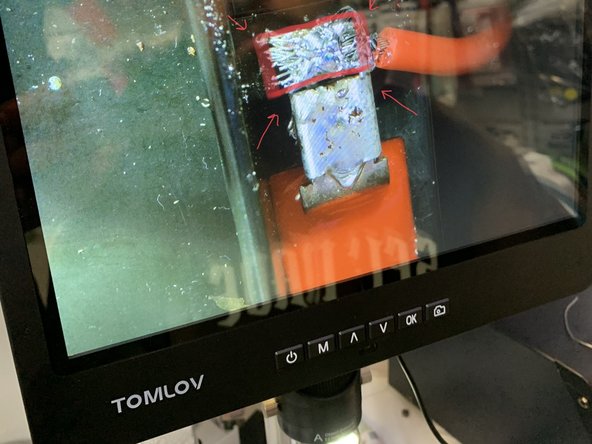


The goal of this guide is to repair a battery terminal through solder and after completing the guide you should be able to apply what you learned to other projects and similar electronics
The goal of this guide is to repair a battery terminal through solder and after completing the guide you should be able to apply what you learned to other projects and similar electronics
Cancelar: não concluí este guia.
Uma outra pessoa concluiu este guia.

Equipe

University of Memphis, Team Z-99, Cameron Spring 2023 Membro de University of Memphis, Team Z-99, Cameron Spring 2023
UM-CAMERON-S23SZG99
1 Membro
1 Guia de autoria