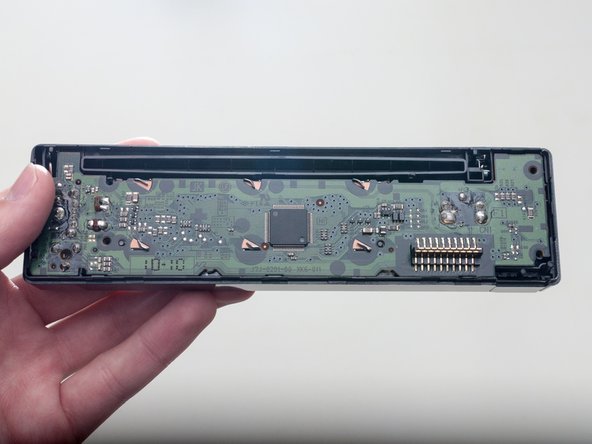
Ir para o conteúdo principal

Kenwood KDC-BT565U LCD Screen Replacement

O que você precisa

  1. Kenwood KDC-BT565U LCD Screen Replacement, Face Plate: passo 1, imagem 1 %32
    • Press the eject button on the bottom left corner of the face plate.

  2. Kenwood KDC-BT565U LCD Screen Replacement: passo 2, imagem 1 %32 Kenwood KDC-BT565U LCD Screen Replacement: passo 2, imagem 2 %32 Kenwood KDC-BT565U LCD Screen Replacement: passo 2, imagem 3 %32
    • Begin by slightly lifting the face plate out from the side located by the release button.

    • Slide towards the side of the eject button, then completely lift out.

  3. Kenwood KDC-BT565U LCD Screen Replacement, LCD Screen: passo 3, imagem 1 %32
    • Remove the four 7.5mm Phillips #0 screws on the back of the face-plate.

  4. Kenwood KDC-BT565U LCD Screen Replacement: passo 4, imagem 1 %32 Kenwood KDC-BT565U LCD Screen Replacement: passo 4, imagem 2 %32
    • Use a spudger or prying tool to open the back of the face plate. Pry the back at multiple points around the edge of the face plate. This will take some patience. Applying too much force risks breaking the plastic.

  5. Kenwood KDC-BT565U LCD Screen Replacement: passo 5, imagem 1 %32 Kenwood KDC-BT565U LCD Screen Replacement: passo 5, imagem 2 %32
    • Lift and remove the motherboard to reveal the inside of the front panel.

    • You might need to pry the right side up with the spudger.

  6. Kenwood KDC-BT565U LCD Screen Replacement: passo 6, imagem 1 %32 Kenwood KDC-BT565U LCD Screen Replacement: passo 6, imagem 2 %32 Kenwood KDC-BT565U LCD Screen Replacement: passo 6, imagem 3 %32
    • Use the plastic spudger to straighten out the six pegs to allow the removal of the LCD screen.

    • Make sure to use an ESD-safe prying tool when working on electrical boards. Here, we are using a plastic tool, not a metal one.

  7. Kenwood KDC-BT565U LCD Screen Replacement: passo 7, imagem 1 %32 Kenwood KDC-BT565U LCD Screen Replacement: passo 7, imagem 2 %32 Kenwood KDC-BT565U LCD Screen Replacement: passo 7, imagem 3 %32
    • Lift the LCD screen to remove and replace it.

Conclusão

To reassemble your device, follow these instructions in reverse order.

3 outras pessoas executaram este guia.

Yusef Flowers

Membro desde: 02/15/17

137 Reputação

Autoria de 1 guia

Equipe

USF Tampa, Team S2-G5, Lacy Spring 2017 Membro de USF Tampa, Team S2-G5, Lacy Spring 2017

USFT-LACY-S17S2G5

Membros da 4

Autoria de 11 guias

0 comentários

Adicione um comentário

Exibir estatísticas:

Últimas 24 horas: 0

Últimos 7 dias: 4

Últimos 30 dias: 8

Duração total: 453