Ir para o conteúdo principal

Jabra Speak 510 Outer Casing Replacement

Pré-requisito somente
Este guia destina-se apenas a ser usado como pré-requisito para outros guias. É incompleto por si só.

O que você precisa

  1. Jabra Speak 510 Outer Casing Replacement, Outer Casing: passo 1, imagem 1 %32 Jabra Speak 510 Outer Casing Replacement, Outer Casing: passo 1, imagem 2 %32
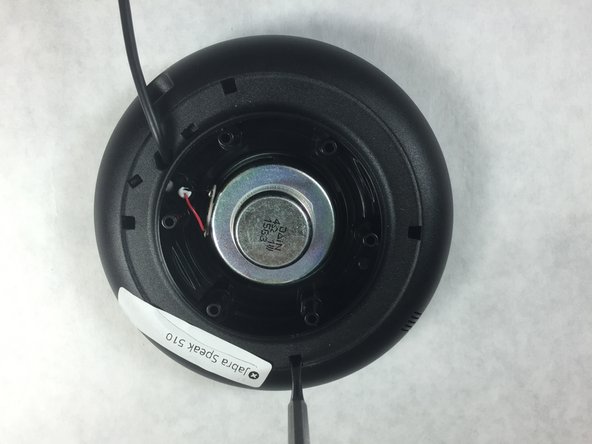
    • Using a metal spudger, peel back the foam pad on the bottom of the device to reveal six screws.

  2. Jabra Speak 510 Outer Casing Replacement: passo 2, imagem 1 %32
    • Remove the six 20 mm T6 screws from the bottom of the device.

  3. Jabra Speak 510 Outer Casing Replacement: passo 3, imagem 1 %32 Jabra Speak 510 Outer Casing Replacement: passo 3, imagem 2 %32
    • Remove the back plate and the grey foam underneath.

  4. Jabra Speak 510 Outer Casing Replacement: passo 4, imagem 1 %32 Jabra Speak 510 Outer Casing Replacement: passo 4, imagem 2 %32 Jabra Speak 510 Outer Casing Replacement: passo 4, imagem 3 %32
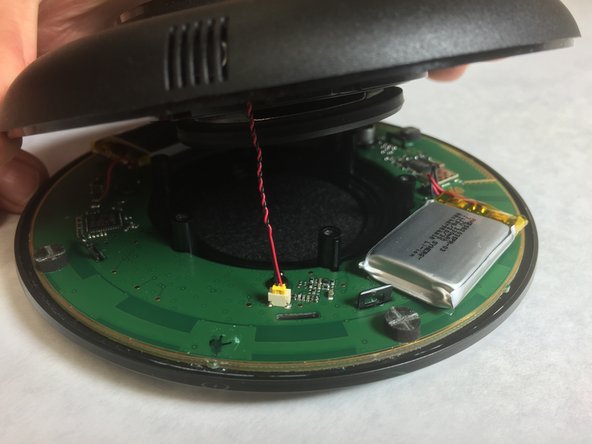
    • Use a small, pointed metal spudger to release the plastic tabs connecting the faceplate to the bottom of the speaker.

    • A small cable connects the faceplate to the device. Carefully disconnect the cable before fully opening the device.

    • Slowly flip the device open like a clam shell.

    • There are several wires soldered to the motherboard that prevent the faceplate from detaching completely.

Conclusão

To reassemble your device, follow these instructions in reverse order.

Jordan Murphy

Membro desde: 02/16/16

717 Reputação

Autoria de 3 guias

Equipe

IUPUI, Team 2-3, Harley Spring 2016 Membro de IUPUI, Team 2-3, Harley Spring 2016

IUPUI-HARLEY-S16S2G3

Membros da 4

Autoria de 8 guias

0 comentários

Adicione um comentário

Exibir estatísticas:

Últimas 24 horas: 0

Últimos 7 dias: 0

Últimos 30 dias: 1

Duração total: 136