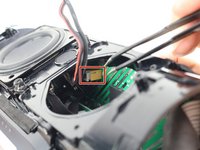
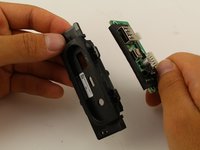
Ir para o conteúdo principal

JBL Charge 3 Motherboard Replacement

O que você precisa

  1. JBL Charge 3 Motherboard Replacement, Front Cover: passo 1, imagem 1 %32 JBL Charge 3 Motherboard Replacement, Front Cover: passo 1, imagem 2 %32 JBL Charge 3 Motherboard Replacement, Front Cover: passo 1, imagem 3 %32
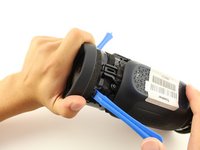
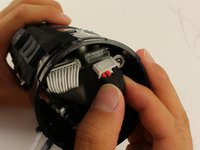
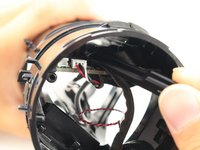
    • Turn your speaker upside down and insert the plastic opening tool vertically into the slit in the front cover.

    • Slowly pull the plastic opening tool outward to remove the four clips holding the covering in place.

    • Repeat this process for all four edges of the front cover.

  2. JBL Charge 3 Motherboard Replacement: passo 2, imagem 1 %32
    • Pull apart your cover gently from both sides and remove it from the speaker housing.

    • The inside of the front cover has holes that must match with their corresponding pins on the speaker housing for proper reassembly.

    • Removing the Front Cover does not affect the waterproof seals of the device. However, removing any further disassembly of your speaker will require removing waterproof seals and gaskets. Your device may no longer be waterproof after these have been altered.

  3. JBL Charge 3 Motherboard Replacement, Passive Radiators: passo 3, imagem 1 %32 JBL Charge 3 Motherboard Replacement, Passive Radiators: passo 3, imagem 2 %32 JBL Charge 3 Motherboard Replacement, Passive Radiators: passo 3, imagem 3 %32
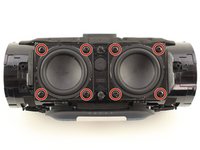
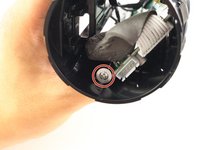
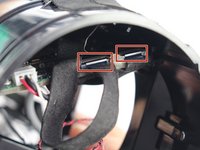
    • Remove the two 8mm Phillips #1 screws from the tabs.

    • NOTE: There may be only one screw.

  4. JBL Charge 3 Motherboard Replacement: passo 4, imagem 1 %32 JBL Charge 3 Motherboard Replacement: passo 4, imagem 2 %32
    • Insert the plastic opening tools underneath both tabs.

  5. JBL Charge 3 Motherboard Replacement: passo 5, imagem 1 %32
    • Twist and pull open the passive radiator. The left radiator twists off clockwise; the right counterclockwise.

  6. JBL Charge 3 Motherboard Replacement: passo 6, imagem 1 %32 JBL Charge 3 Motherboard Replacement: passo 6, imagem 2 %32
    • Repeat all previous steps for the other passive radiator.

    • NOTE: only the right radiator needs to be removed for changing the battery.

  7. JBL Charge 3 Motherboard Replacement, Speaker: passo 7, imagem 1 %32 JBL Charge 3 Motherboard Replacement, Speaker: passo 7, imagem 2 %32
    • Remove the eight 10mm Phillips #1 screws from around the two front speakers.

  8. JBL Charge 3 Motherboard Replacement: passo 8, imagem 1 %32
    • Pull gently on one of the speakers so it is outside of the housing. Be careful as it is still attached with the wires to the motherboard.

  9. JBL Charge 3 Motherboard Replacement: passo 9, imagem 1 %32 JBL Charge 3 Motherboard Replacement: passo 9, imagem 2 %32 JBL Charge 3 Motherboard Replacement: passo 9, imagem 3 %32
    • Press the small metal tab on the speaker connector with a Phillips #000 screwdriver and gently pull the connector apart.

  10. JBL Charge 3 Motherboard Replacement: passo 10, imagem 1 %32
    • Repeat the previous step for the second connector.

  11. JBL Charge 3 Motherboard Replacement: passo 11, imagem 1 %32 JBL Charge 3 Motherboard Replacement: passo 11, imagem 2 %32
    • Grab the bundled cable connector that joins the speakers to the motherboard with tweezers. Gently pull the connector free.

  12. JBL Charge 3 Motherboard Replacement: passo 12, imagem 1 %32
    • Now that the second speaker is disconnected from the motherboard, pull the speaker and wires out of the housing.

  13. JBL Charge 3 Motherboard Replacement, Battery: passo 13, imagem 1 %32 JBL Charge 3 Motherboard Replacement, Battery: passo 13, imagem 2 %32 JBL Charge 3 Motherboard Replacement, Battery: passo 13, imagem 3 %32
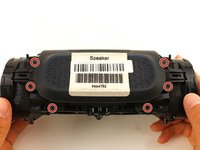
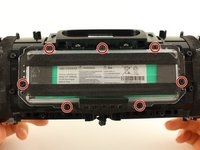
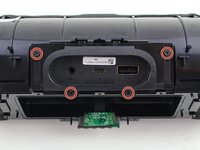
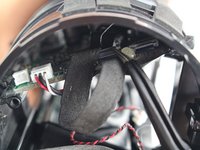
    • Remove the six 8mm Phillips #1 screws from the outer battery cover.

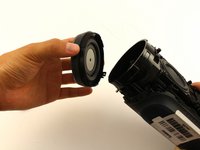
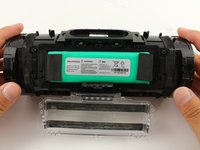
    • Peel the outer battery cover away from the speaker housing.

  14. JBL Charge 3 Motherboard Replacement: passo 14, imagem 1 %32 JBL Charge 3 Motherboard Replacement: passo 14, imagem 2 %32 JBL Charge 3 Motherboard Replacement: passo 14, imagem 3 %32
    • Remove the seven 8mm Phillips #1 screws from interior battery cover.

    • Remove the interior battery cover.

  15. JBL Charge 3 Motherboard Replacement: passo 15, imagem 1 %32 JBL Charge 3 Motherboard Replacement: passo 15, imagem 2 %32
    • Pull gently to disconnect the bundled cable connector in the side of the speaker. This action will separate the battery from the motherboard.

  16. JBL Charge 3 Motherboard Replacement: passo 16, imagem 1 %32
    • Pull the battery and battery cable out from their housing.

  17. JBL Charge 3 Motherboard Replacement, Port Bay: passo 17, imagem 1 %32 JBL Charge 3 Motherboard Replacement, Port Bay: passo 17, imagem 2 %32 JBL Charge 3 Motherboard Replacement, Port Bay: passo 17, imagem 3 %32
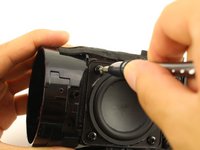
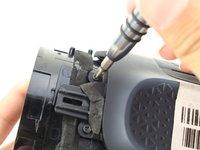
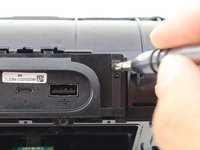
    • Take out the four 8mm Phillips #1 screws out of the port bay cover.

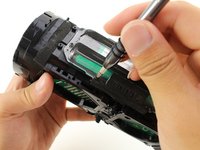
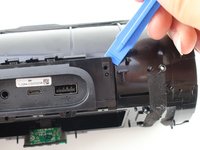
    • Wedge your plastic opening tool around the port bay to remove it.

  18. JBL Charge 3 Motherboard Replacement: passo 18, imagem 1 %32 JBL Charge 3 Motherboard Replacement: passo 18, imagem 2 %32 JBL Charge 3 Motherboard Replacement: passo 18, imagem 3 %32
    • Disconnect the two bundled cable connector from the port bay.

  19. JBL Charge 3 Motherboard Replacement: passo 19, imagem 1 %32 JBL Charge 3 Motherboard Replacement: passo 19, imagem 2 %32 JBL Charge 3 Motherboard Replacement: passo 19, imagem 3 %32
    • Remove the three 8mm Phillips #1 screws from the port bay circuit board.

    • Pull the port bay cover off of the circuit board.

  20. JBL Charge 3 Motherboard Replacement: passo 20, imagem 1 %32 JBL Charge 3 Motherboard Replacement: passo 20, imagem 2 %32
    • Desolder the USB, MicroUSB, or AUX port off of the circuit board.

  21. JBL Charge 3 Motherboard Replacement, Motherboard: passo 21, imagem 1 %32 JBL Charge 3 Motherboard Replacement, Motherboard: passo 21, imagem 2 %32 JBL Charge 3 Motherboard Replacement, Motherboard: passo 21, imagem 3 %32
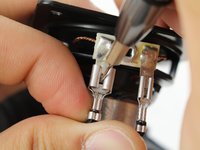
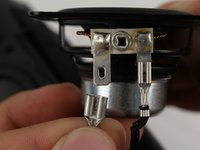
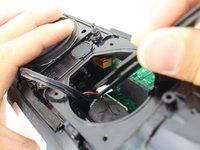
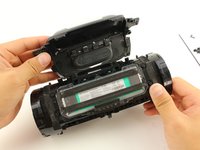
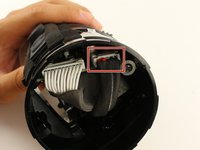
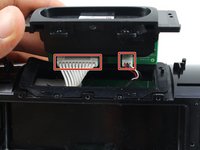
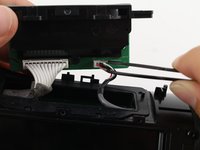
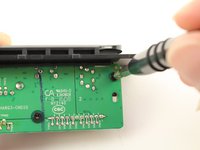
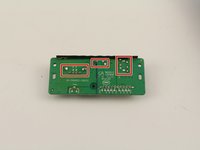
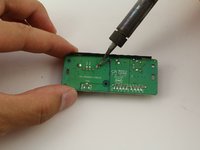
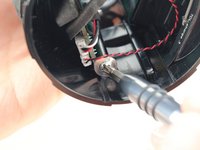
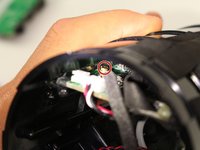
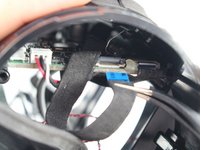
    • Remove the two 9mm Phillips #1 screws holding in the sides of the motherboard.

  22. JBL Charge 3 Motherboard Replacement: passo 22, imagem 1 %32 JBL Charge 3 Motherboard Replacement: passo 22, imagem 2 %32
    • Gently pull the bundled cable connector on the motherboard.

  23. JBL Charge 3 Motherboard Replacement: passo 23, imagem 1 %32 JBL Charge 3 Motherboard Replacement: passo 23, imagem 2 %32
    • Gently pull the golden connector off of the motherboard.

  24. JBL Charge 3 Motherboard Replacement: passo 24, imagem 1 %32 JBL Charge 3 Motherboard Replacement: passo 24, imagem 2 %32 JBL Charge 3 Motherboard Replacement: passo 24, imagem 3 %32
    • Flip open the top flap on the two ZIF connectors.

    • Gently pull out the ZIF connector cables with tweezers.

  25. JBL Charge 3 Motherboard Replacement: passo 25, imagem 1 %32
    • Slide the motherboard out of the housing.

Conclusão

To reassemble your device, follow these instructions in reverse order.

11 outras pessoas executaram este guia.

Sunmin Yoon

Membro desde: 10/30/18

1.850 Reputação

Autoria de 2 guias

Equipe

Cal Poly, Team S13-G1, White Fall 2018 Membro de Cal Poly, Team S13-G1, White Fall 2018

CPSU-WHITE-F18S13G1

Membros da 3

Autoria de 26 guias

10 comentários

Internation version is different. There are no screws for passive radiotors.

Tr0ll05aur0s 3z - Responder

You have to twist it. I have to managed to get it open because there is no video on youtube (I can’t find any)

Tr0ll05aur0s 3z -

If that even is Charge 3.

Tr0ll05aur0s 3z -

My JBL charge 3 is not charging …please give me idea to fix ..but it’s working perfectly only

nagendra.shriyan - Responder

My jbl charge are charging but it won't turn on…… i have tried several times to turn it on but it won't turn…… hoping for solutions……

cire_012881 - Responder

Adicione um comentário

Exibir estatísticas:

Últimas 24 horas: 12

Últimos 7 dias: 65

Últimos 30 dias: 286

Duração total: 26,792