Esta versão pode conter edições incorretas. Mude para o último instantâneo verificado.
O que você precisa
-
Este passo não foi traduzido. Ajude a traduzi-lo
-
Loosen the single Phillips screw in the center of the access door.
-
Remove the access door from your iMac.
-
-
Este passo não foi traduzido. Ajude a traduzi-lo
-
Stick two suction cups to opposing corners of the glass panel.
-
-
Este passo não foi traduzido. Ajude a traduzi-lo
-
Gently pull the glass panel straight up off the iMac.
-
-
Este passo não foi traduzido. Ajude a traduzi-lo
-
Remove the following 12 screws securing the front bezel to the rear case:
-
Eight 13 mm T8 Torx screws
-
Four 25 mm T8 Torx screws
-
Six 13 mm T8 Torx screws
-
Four 25 mm T8 Torx screws
-
Two 35 mm T8 Torx screws
-
-
Este passo não foi traduzido. Ajude a traduzi-lo
-
Gently lift the front bezel from its top edge off the rear case. It helps to use your thumbs to push down very gently on the corners of the display.
-
Once the top edge of the front bezel has cleared the rear case, rotate the front bezel toward the stand and lift it off the rear case.
-
-
Este passo não foi traduzido. Ajude a traduzi-lo
-
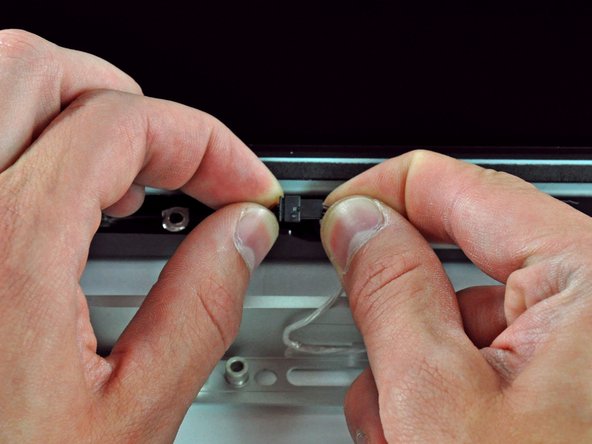
Disconnect the microphone cable connector, removing tape as necessary.
-
-
Este passo não foi traduzido. Ajude a traduzi-lo
-
Disconnect the LCD temperature sensor by pulling the connector straight out of its socket on the logic board.
-
-
Este passo não foi traduzido. Ajude a traduzi-lo
-
Remove the two 5.3 mm T6 Torx screws securing the display data cable to the logic board.
-
-
Este passo não foi traduzido. Ajude a traduzi-lo
-
Disconnect the display data cable connector from its socket on the logic board by pulling the attached plastic tab towards you and away from the iMac.
-
-
Este passo não foi traduzido. Ajude a traduzi-lo
-
Remove the eight 12 mm T8 Torx screws securing the display panel to the rear case.
-
Lift the right side of the display panel a few inches up from the iMac.
-
-
-
Este passo não foi traduzido. Ajude a traduzi-lo
-
With the LCD lifted, disconnect the LCD cable by pulling down.
-
Alternatively, the LCD power cable can be disconnected from the LCD, rather than the power supply.
-
-
Este passo não foi traduzido. Ajude a traduzi-lo
-
Continue to lift the LCD from the right side.
-
Remove the LCD.
-
-
Este passo não foi traduzido. Ajude a traduzi-lo
-
If necessary, remove the pieces of tape securing the hard drive/optical drive thermal sensor cables to your iMac.
-
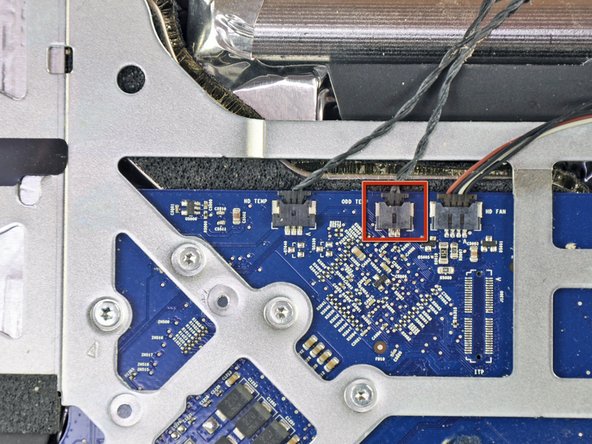
Disconnect the optical drive thermal sensor connector from the logic board by pulling its connector toward the top of your iMac.
-
-
Este passo não foi traduzido. Ajude a traduzi-lo
-
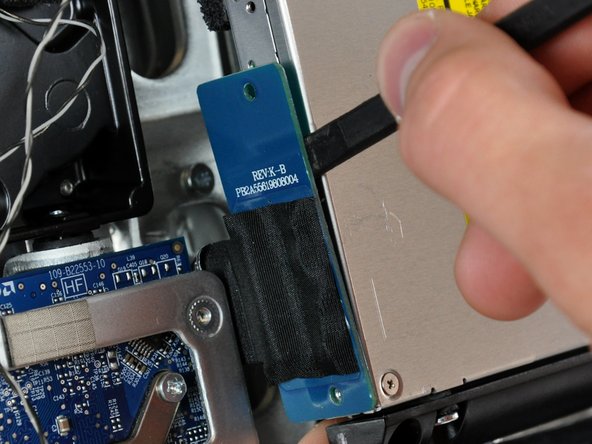
Remove the two fine-thread 7 mm T10 Torx screws securing the optical drive to the rear case.
-
-
Este passo não foi traduzido. Ajude a traduzi-lo
-
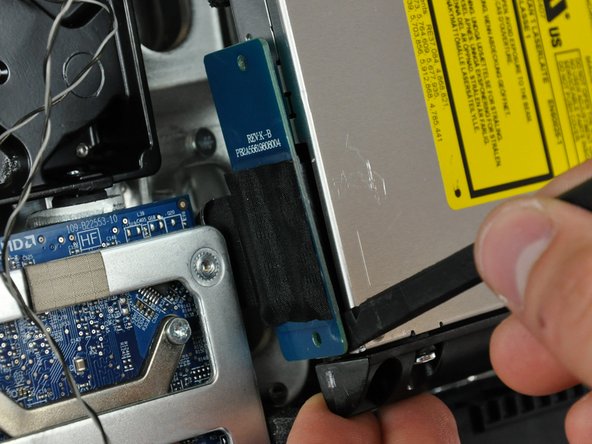
Lift the free end of the optical drive slightly out of the rear case.
-
Remove the two 3.5 mm T6 Torx screws securing the optical drive connector to the optical drive.
-
-
Este passo não foi traduzido. Ajude a traduzi-lo
-
Insert the flat end of a spudger between the optical drive connector and the body of the optical drive.
-
Twist the spudger to separate the connector from the optical drive.
-
-
Este passo não foi traduzido. Ajude a traduzi-lo
-
Lift the optical drive out of the rear case and pull it away from the side of the rear case to release the strip of EMI tape attached to its surface.
-
-
Este passo não foi traduzido. Ajude a traduzi-lo
-
If necessary, remove the piece of foam tape covering the optical drive thermal sensor.
-
To remove the optical drive thermal sensor, use the tip of a spudger to lift the center finger of the thermal sensor bracket while applying slight tension to the thermal sensor cable.
-
-
Este passo não foi traduzido. Ajude a traduzi-lo
-
Use the flat end of a spudger to pry the optical drive thermal sensor bracket up off the adhesive securing it to the optical drive.
-
-
Este passo não foi traduzido. Ajude a traduzi-lo
-
Use a spudger to remove the small piece of EMI foam from the bottom of the optical drive.
-
-
Este passo não foi traduzido. Ajude a traduzi-lo
-
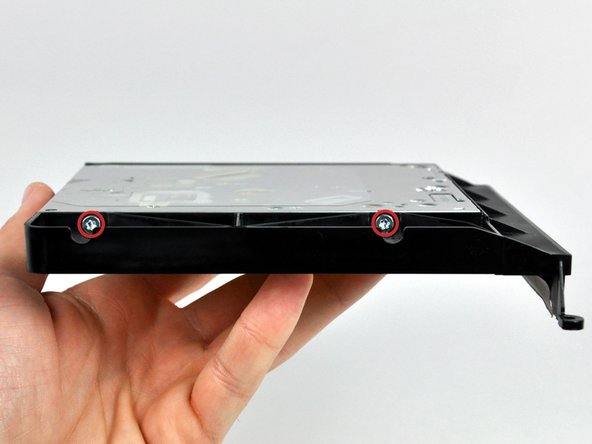
Remove the two 6.5 mm T10 Torx screws from both sides of the optical drive (four screws total).
-
-
Este passo não foi traduzido. Ajude a traduzi-lo
-
Slightly rotate the optical drive bracket away from the optical drive.
-
Pull the optical drive bracket away from the open end of the optical drive, minding any tabs that may get caught.
-
-
Este passo não foi traduzido. Ajude a traduzi-lo
-
Remove the three 3.0 mm Phillips screws from the optical bay enclosure.
-
-
Este passo não foi traduzido. Ajude a traduzi-lo
-
Starting from the left edge, gently pull open the optical bay enclosure.
-
Continue to pull open the two halves of the enclosure until they separate.
-
-
Este passo não foi traduzido. Ajude a traduzi-lo
-
Remove the two 3.0 mm Phillips screws securing the faceplate to the optical bay enclosure.
-
-
Este passo não foi traduzido. Ajude a traduzi-lo
-
Lift the black plastic faceplate out of the optical bay enclosure.
-
Reassemble the optical bay enclosure without the faceplate, reusing the original three 3.0 mm Phillips screws to keep it intact.
-
-
Este passo não foi traduzido. Ajude a traduzi-lo
-
Remove the plastic positioner from the optical bay hard drive enclosure by pressing in on one of the clips on either side and lifting it up and out of the enclosure.
-
-
Este passo não foi traduzido. Ajude a traduzi-lo
-
Make sure that the hard drive connectors are facing down before placing it into the enclosure.
-
Gently place the hard drive into the enclosure's hard drive slot.
-
While firmly holding the enclosure in place with one hand, use your other hand to press the hard drive into the enclosure connectors.
-
-
Este passo não foi traduzido. Ajude a traduzi-lo
-
Once the hard drive is snug, reinsert the plastic positioner while holding the hard drive against the bottom of the enclosure.
-
Reconnect any cables you have removed from the original optical drive onto the optical bay enclosure.
-


Cancelar: não concluí este guia.
43 outras pessoas executaram este guia.


5 comentários
These iMacs use ATA DVD drives. Using the SATA drive enclosure linked above is guaranteed to fail. :-(
My EMC 2134 has a SATAII optical drive.
I apologize for the reply after over a year.
No iMac 24 "both 2007 and 2008 can accommodate a SATA Superdrive. This is certain.
It is clear that this installation is made to the adapter referred to as "Related Products": [produto vinculado ausente ou desativado: IF107-079].
So any HDD or SSD you enter this run at high speed to 100 MB / sec of UltraATA100.
Henry -
Do I assume correctly that this iMac model doesn't have two SATA ports on the logic board, so a dual 2.5" SSD/HDD drive could be installed in the 3.5" bay with an adapter/bracket? This way one could save the optical drive... Anyone?
All I have to say on this thread is: I can’t even begin to understand how this machine is still running as it is. When it was new, circa 2007-2008, a coffee-like beverage was knocked off a shelf above the iMac. It poured all the way through to the bottom. Even though it missed the power supply, it covered everything else INCLUDING the Superdrive. Which still ran but obviously the eye was permanently blind. Between the primary fan and heat dissipation block, there was about one square centimeter of partially obstructed airway. the rest was caked at about a 2-3mm depth. All of the black consolidating foam? Turned to dust at the slightest touch. This was initially going to be a part out on eBay journey. After all, to find a replacement 24” display would be legendarily unlikely. The way this machine was running… another day at the park. She’s clean and I’m keeping her.
AMAZING GUIDE… This was my first iMac teardown :-)
If only I could share the photos and video…