Ir para o conteúdo principal

Infant Optics DXR-8 Monitor Replacement

Guia arquivado
Este guia é mantido exclusivamente para fins históricos. Use a versão atualizada do guia para executar o reparo.

O que você precisa

  1. Infant Optics DXR-8 Monitor Replacement, Monitor: passo 1, imagem 1 %32
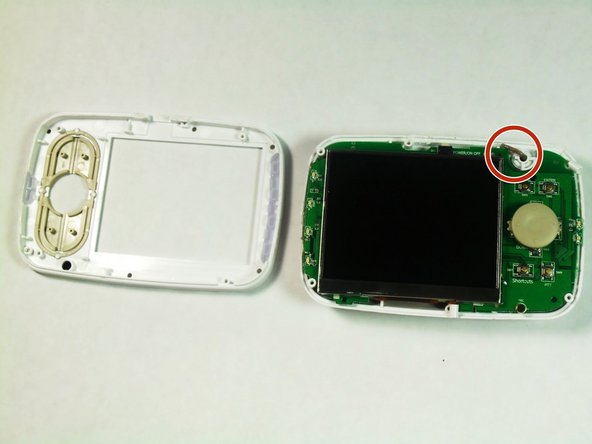
    • Start by gently inserting the plastic opening tool between the led and casing.

  2. Infant Optics DXR-8 Monitor Replacement: passo 2, imagem 1 %32
    • Slowly pry the cover away from the bottom using the plastic opening tool.

  3. Infant Optics DXR-8 Monitor Replacement: passo 3, imagem 1 %32
    • Glide the tool around the entire cover to reveal the screws, which are 5.0 mm.

  4. Infant Optics DXR-8 Monitor Replacement: passo 4, imagem 1 %32
    • Remove the cover and set it aside.

  5. Infant Optics DXR-8 Monitor Replacement: passo 5, imagem 1 %32 Infant Optics DXR-8 Monitor Replacement: passo 5, imagem 2 %32
    • Remove the four corner screws, 5.0 mm, using a J1 bit.

    • Lift the top away from the bottom using the metal spudger. Be careful not to rip the antenna wire.

Conclusão

To reassemble your device, follow these instructions in reverse order.

6 outras pessoas executaram este guia.

Larsha Johnson

Membro desde: 08/26/15

526 Reputação

Autoria de 3 guias

Equipe

USF Tampa, Team 6-4, Remmell Fall 2015 Membro de USF Tampa, Team 6-4, Remmell Fall 2015

USFT-REMMELL-F15S6G4

Membros da 4

Autoria de 3 guias

2 comentários

What is the part number for the LCD?

jstarion - Responder

From the pictures LQ035NC111 seem to be the part number.

Michael C -

Adicione um comentário

Exibir estatísticas:

Últimas 24 horas: 0

Últimos 7 dias: 1

Últimos 30 dias: 2

Duração total: 5,830