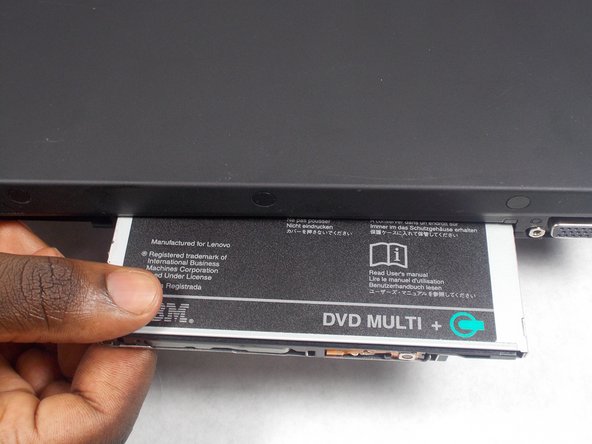
Ir para o conteúdo principal

IBM ThinkPad T43 CD Drive Replacement

O que você precisa

  1. IBM ThinkPad T43 CD Drive Replacement, CD Drive: passo 1, imagem 1 %32
    • Start by having the right side of the laptop facing you.

    • The laptop can be open if you would like, but it can be done easier if it is closed.

  2. IBM ThinkPad T43 CD Drive Replacement: passo 2, imagem 1 %32
    • Remove the screw to be able to use the CD drive unlock switch

  3. IBM ThinkPad T43 CD Drive Replacement: passo 3, imagem 1 %32
    • Locate the switch on the right side of the CD Drive.

  4. IBM ThinkPad T43 CD Drive Replacement: passo 4, imagem 1 %32 IBM ThinkPad T43 CD Drive Replacement: passo 4, imagem 2 %32 IBM ThinkPad T43 CD Drive Replacement: passo 4, imagem 3 %32
    • Place finger in between the switch and the bumper

    • Slide the switch to the right until the plastic tab ejects.

  5. IBM ThinkPad T43 CD Drive Replacement: passo 5, imagem 1 %32 IBM ThinkPad T43 CD Drive Replacement: passo 5, imagem 2 %32 IBM ThinkPad T43 CD Drive Replacement: passo 5, imagem 3 %32
    • Place fingers on the plastic tab.

    • Pull on the tab until the CD Drive ejects.

    • The tab only comes out about an inch to inch and a half.

    • Do not try to pull the tab all the way out.

    • If after you have removed the CD Drive and the tab goes back in, it is alright. It does not affect the later process.

  6. IBM ThinkPad T43 CD Drive Replacement: passo 6, imagem 1 %32 IBM ThinkPad T43 CD Drive Replacement: passo 6, imagem 2 %32
    • Grab the end of the CD Drive and pulls straight out towards your body.

    • Be careful not to pull it out at an angle to not risk damage.

  7. IBM ThinkPad T43 CD Drive Replacement: passo 7, imagem 1 %32
    • Now that you have successfully removed the CD Drive you can put in the new one.

    • Place the end of the new CD Drive in and slide in until it clicks.

    • If you are using slight force and it doesn't go in, it could be jammed. Just take it out and try again.

    • If you had not already, you can push back in the tab.

Conclusão

To reassemble your device, follow these instructions in reverse order.

Uma outra pessoa concluiu este guia.

aLiX pIeRRe

Membro desde: 03/19/18

855 Reputação

Autoria de 5 guias

Equipe

UMass Dartmouth, Team S6-G4, Bernier Spring 2018 Membro de UMass Dartmouth, Team S6-G4, Bernier Spring 2018

UMASSD-BERNIER-S18S6G4

Membros da 4

Autoria de 10 guias

0 comentários

Adicione um comentário

Exibir estatísticas:

Últimas 24 horas: 1

Últimos 7 dias: 5

Últimos 30 dias: 19

Duração total: 819