Ir para o conteúdo principal

Huawei P9 Front Facing Camera Replacement

O que você precisa

  1. Huawei P9 Front Facing Camera Replacement, Back Cover: passo 1, imagem 1 %32 Huawei P9 Front Facing Camera Replacement, Back Cover: passo 1, imagem 2 %32 Huawei P9 Front Facing Camera Replacement, Back Cover: passo 1, imagem 3 %32
    • First switch off your phone and remove the SIM card tray.

    • Unscrew the two Pentalobe P2 screws located at the bottom next to the device's USB C port.

    • If the screen is cracked you might want to use some tape to protect your eyes from glass shreds and get a better grip to open the phone.

  2. Huawei P9 Front Facing Camera Replacement: passo 2, imagem 1 %32 Huawei P9 Front Facing Camera Replacement: passo 2, imagem 2 %32
    • Avoid to lift only the display instead of the whole phone assembly as doing so may cause damage to the screen.

    • Use an iSclack or a suction handle to separate the phone assembly from the rear panel.

    • In case you can‘t manage to lift the phone assembly out of the rear panel you can insert the pointed end of a spudger in the headphone jack opening and press the phone assembly upwards until you create a gap between assembly and rear panel. Then use the spudger to lever the phone assembly out of the panel.

    • Don't remove the rear panel completely yet. There is a cable connected to it! It is running from the finger print sensor to the display unit.

  3. Huawei P9 Front Facing Camera Replacement, Fingerprint sensor: passo 3, imagem 1 %32 Huawei P9 Front Facing Camera Replacement, Fingerprint sensor: passo 3, imagem 2 %32
    • Disconnect the fingerprint sensor using a spudger.

  4. Huawei P9 Front Facing Camera Replacement, Front Facing Camera: passo 4, imagem 1 %32 Huawei P9 Front Facing Camera Replacement, Front Facing Camera: passo 4, imagem 2 %32 Huawei P9 Front Facing Camera Replacement, Front Facing Camera: passo 4, imagem 3 %32
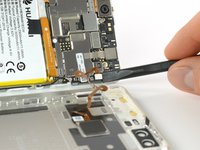
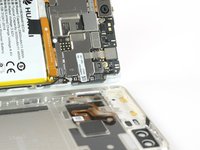
    • Peel off the conducting fabric.

    • You will have to transfer it to the new camera (careful it's sticky).

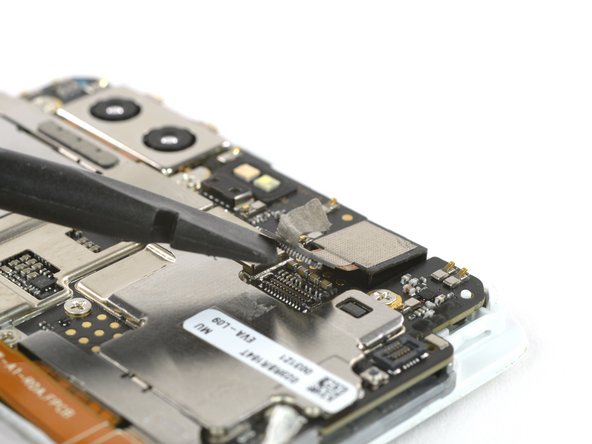
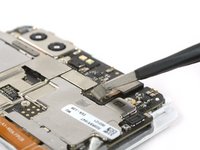
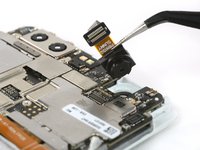
    • Unplug the camera connector.

    • Now you can remove the front camera.

Conclusão

To reassemble your device, follow these instructions in reverse order.

Uma outra pessoa concluiu este guia.

Dominik Schnabelrauch

Membro desde: 11/23/16

203.115 Reputação

Autoria de 682 guias

Equipe

iFixit Membro de iFixit

Staff

Membros da 135

Autoria de 16.767 guias

0 comentários

Adicione um comentário

Exibir estatísticas:

Últimas 24 horas: 0

Últimos 7 dias: 1

Últimos 30 dias: 4

Duração total: 1,611