Introdução
If you've got a damaged or missing eyelet on your favorite pair of shoes, don't worry – replacing it is surprisingly simple! And not only will it keep your shoes looking good, but replacing a defective eyelet will also prevent further damage to the surrounding fabric, and stop the laces from getting frayed and snapping. This guide will walk you through the steps, ensuring your shoes are back to top-notch condition in no time.
O que você precisa
-
-
Important: The first step of the repair - the preparation - is very important! Spend some time to do this carefully, and the next steps will fly by.
-
First, pull out the lace from the damaged or lost eyelet hole.
-
If the old eyelet is only damaged, but still attached, it will need removing:
-
Use a pair of pliers to gently grip the damaged eyelet from the outside, and gently turn and rotate it simultaneously. With some effort, you should be able to separate the front half of the eyelet from the back half. If needed, take a second pair of pliers to grip the inside, while you pull/turn the outside half away.
-
A successful removal of the eyelet is when the front half separates from the back half, and both are removed without damaging the backing fabric.
-
Once the eyelet is removed, take note of the inner hole size (inner diameter) and the outer metal size (outer diameter).
-
Use these sizes when purchasing a new eyelet. We recommend purchasing an eyelet replacement kit, which includes the "punch" tools too (see photo).
-
-
-
Place the shoe on a clean and stable surface.
-
Prepare the eyelet, the hammer and the "punch" tool.
-
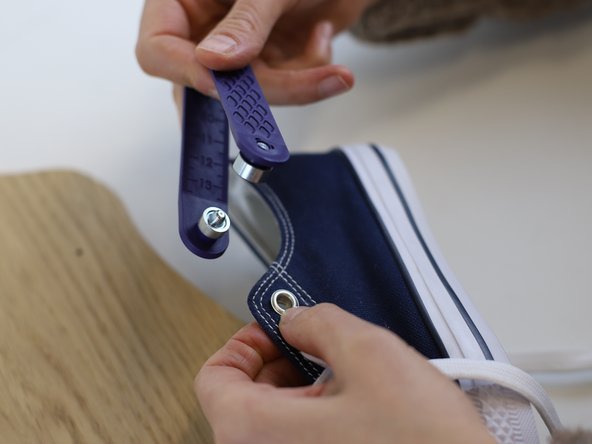
Note: Take time to understand the punch tool and match the appropriate halves of the new eyelet to the matching sides of the punch tool. One half is for the inside; the other is for the outside.
-
On the sample shown here, the yellow arrow shows the inside half; and the green arrow shows the outside half.
-
Insert the replacement eyelet to the lace hole using your fingers. Take care to insert the outside half from the outside, and the inside half from the inside.
-
-
-
-
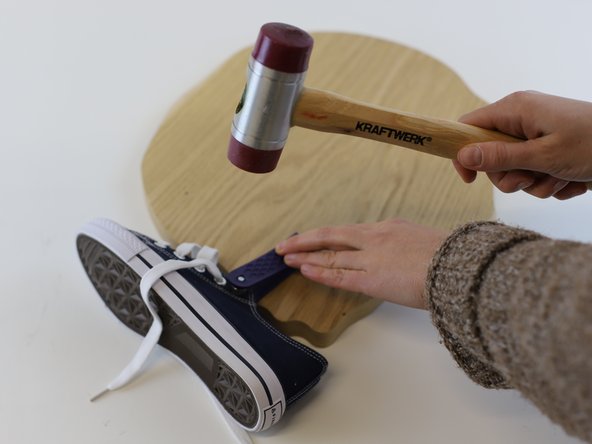
Tip: For the next step, we advise protecting your work surface during hammering. A wooden/plastic chopping board, or an old piece of wood will work well for this.
-
Position the frontside half of the eyelet through the eyelet hole in the shoe. It should remain relatively well in place.
-
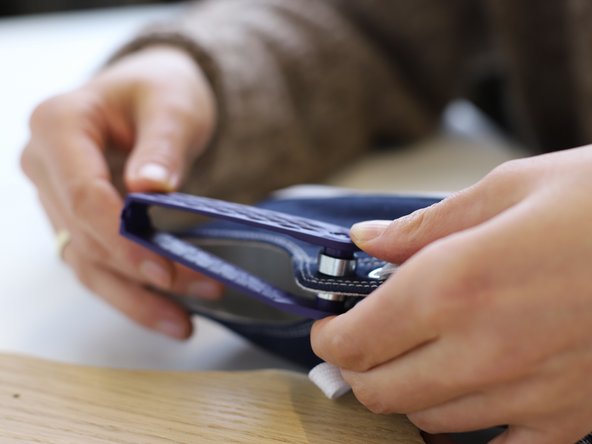
Next, position the backside eyelet half onto the punch tool, and carefully lift the tool to the eyelet hole.
-
This can be fiddly! Take your time and if the eyelet halves fall out, take care to re-install them back onto the correct sides.
-
Close the punch tool, to keep the two halves securely together. Make sure this is in a comfortable orientation, to allow hammering onto the wooden block in the next step.
-
-
-
Take care: Check that the eyelet is located in the right place and that both metal rings are closely connected.
-
Start hammering! The goal is to connect the two halves together securely, but it isn't normally needed to apply lots of force. Use a soft tapping motion with the hammer and after a few taps the two halves should be connected.
-
Gently open the punch tool and check whether the two halves have connected correctly. If not: close the tool and tap a few mor times, until completed.
-
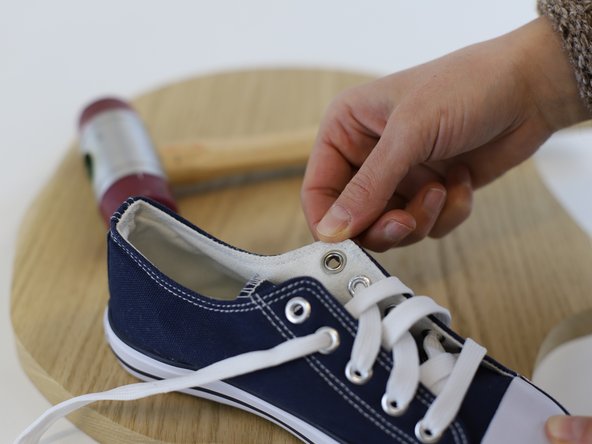
A correctly installed eyelet will be secure with no loose parts and no defects. Check the other eyelets for reference.
-
In case of defects, return to the beginning of this guide and remove the eyelet to try again.
-
-
-
🛠️🏆👏 Congratulations! The repair is complete, and you're ready to go!
-
Now simply re-lace the shoe and start wearing it again.
-


To reassemble your device, follow these instructions in reverse order.
To reassemble your device, follow these instructions in reverse order.

Equipe
