Introdução
After searching for hours on the internet to find some instructions to be able to remove stuck grounds from my Cuisinart DGB 850 coffee maker, I decided to tackle the problem myself.
Starting with the DGB-850, Cuisinart has sealed off the ability for the customer to clean the grinder. To their credit, ours has worked flawlessly for the past two years, but just recently, I accidentally started a grind and stopped it a few seconds into it. It then started to brew. That resulted in wet grounds in the grinder.
O que você precisa
-
-
The Cuisinart DGB-850 is a great "Grind and Brew" 10-cup coffee maker and we've been very happy with it. One drawback thou is on this model (and ones going forward) Cuisinart has disallowed the ability for the user to clean out the grinder hooper shoot. Ours has worked reliably for about 2 years.
-
-
-
But recently I accidentally stopped the grind in the middle of the cycle and because of this, coffee started to brew and the grind in the grinder and became wet and stuck in the grinder. I've heard of other customers who had a power failure durning the middle of the grind and the same thing happened to them.
-
-
-
Unfortunately, Cuisinart has made it almost impossible to get at the grinder to clean it out manually because the domed cap is permanently molded to the bean hopper shoot area and there is no visible way to remove the hopper shute. Fortunately, being a Product Designer, I figured out how to get to the grinder to clean it.
-
-
-
before disassembling, I would first recommend that if you have an air compressor or compressed air canister ( purchased at a hobby store) attach a small vinyl hose to it (6mm or smaller) and stick it down into the opening underneath the dome to blow out the stuck grind. Be sure to let the grinder dry for at least 24 hours before doing this.
-
-
-
-
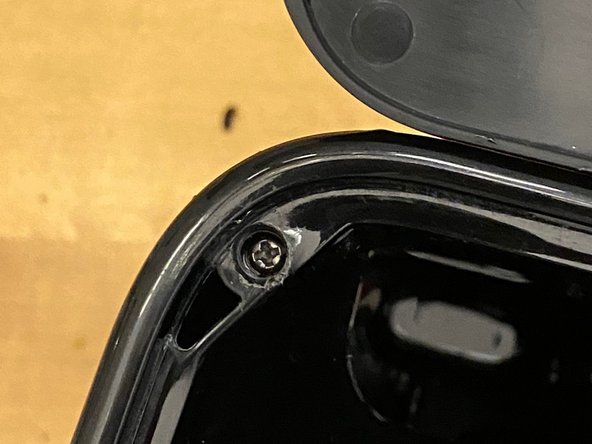
The last step in removing the hopper is to overcome the two snaps at the top of the rear housing. Using a medium flat-blade screwdriver, press into the slot while at the same time lifting up on the hopper housing. until the snap hook is released. Do this for both left and right hooks.
-


Reverse order of disassembly to reassemble.
Reverse order of disassembly to reassemble.
Cancelar: não concluí este guia.
2 outras pessoas executaram este guia.
