Esta versão pode conter edições incorretas. Mude para o último instantâneo verificado.
O que você precisa
-
Este passo não foi traduzido. Ajude a traduzi-lo
-
Turn the toaster over and remove the rubber bumper feet.
-
-
Este passo não foi traduzido. Ajude a traduzi-lo
-
Use a Phillips #2 screwdriver to remove four 12 mm screws at the base of the toaster shell.
-
-
Este passo não foi traduzido. Ajude a traduzi-lo
-
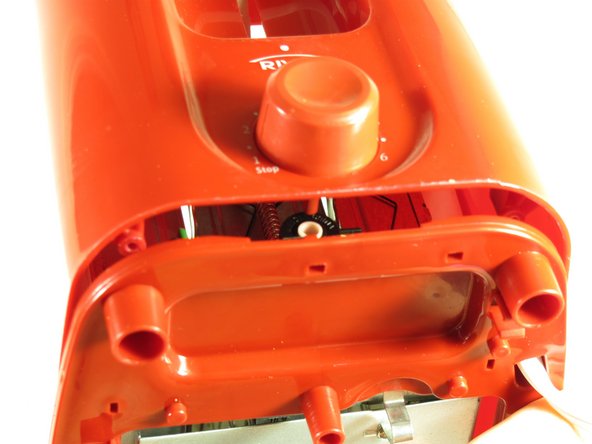
With the dial facing you, push the toaster base up and away until the base is just over the lip of the shell. This will disconnect the browning dial from the rest of the toaster.
-
-
-
Este passo não foi traduzido. Ajude a traduzi-lo
-
Reach into the shell and grab the back white part of the lever.
-
Hold the grey lever with both your index finger and middle finger. Next, pull it.
-
Remove the shell.
-
-
Este passo não foi traduzido. Ajude a traduzi-lo
-
To begin fixing the lever spring, remove the top metal plate of the toaster.
-
To do this, locate the four metal bending couples that keep it attached (two in front, two in back).
-
Bend down each of the bending couples that are currently at a ninety degree angle.
-
Lift the plate and remove.
-
-
Este passo não foi traduzido. Ajude a traduzi-lo
-
Locate the metal "U" bracket that is in the middle of the two toaster slots.
-
The bracket is secured by two protruding metal strips that are twisted and one metal strip on the lever side that is bent over the pole.
-
Using pliers or tweezers, untwist the two metal strips.
-
Use pliers or tweezers to unfold the metal sheet that keeps the pole in place.
-
Pull up on the bracket and remove.
-
-
Este passo não foi traduzido. Ajude a traduzi-lo
-
Remove the short top spring from the pole.
-
Find the bottom of the pole and push it up through the top of the white lever bracket.
-
-
Este passo não foi traduzido. Ajude a traduzi-lo
-
Ensure there are no crumbs restricting the compression of the spring or movement along the pole.
-
Now use a commercial lubricant, such as WD-40, to re-lubricate the pole and springs.
-


Equipe

Cal Poly, Team 2-8, Propen Fall 2012 Membro de Cal Poly, Team 2-8, Propen Fall 2012
CPSU-PROPEN-F12S2G8
Membros da 5
Autoria de 6 guias