Ir para o conteúdo principal

How to Replace Magliner Hand Truck Wheels

O que você precisa

  1. How to Replace Magliner Hand Truck Wheels, Replacement of Magliner Hand Truck Wheel: passo 1, imagem 1 %32 How to Replace Magliner Hand Truck Wheels, Replacement of Magliner Hand Truck Wheel: passo 1, imagem 2 %32 How to Replace Magliner Hand Truck Wheels, Replacement of Magliner Hand Truck Wheel: passo 1, imagem 3 %32
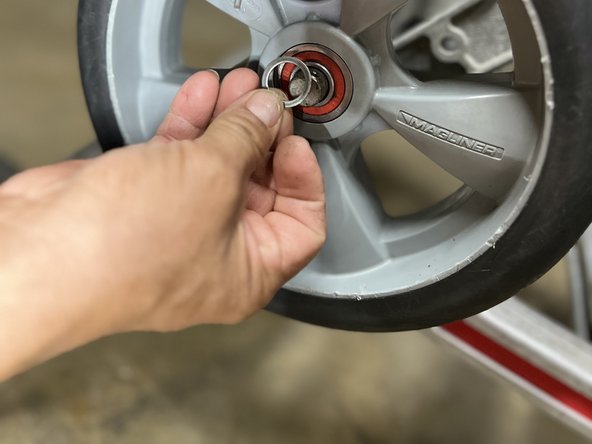
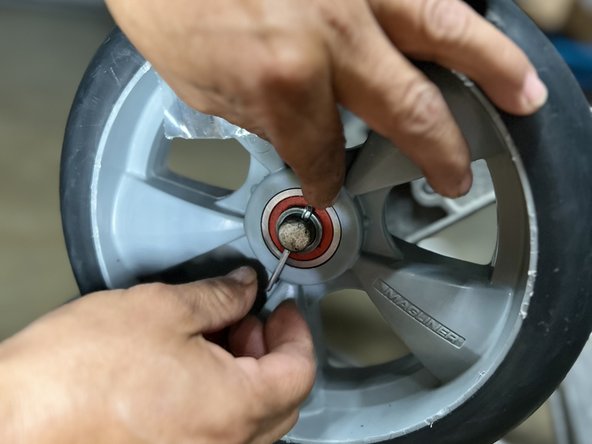
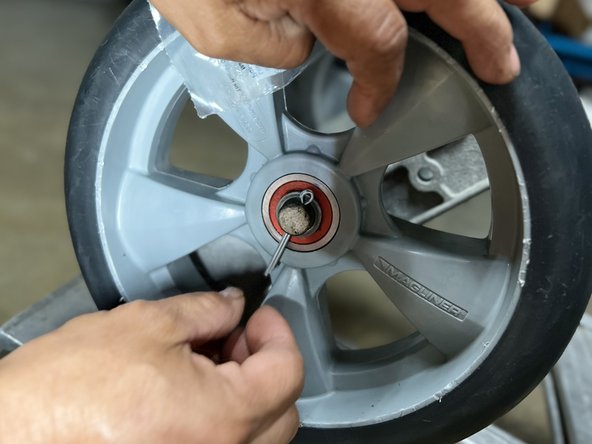
    • Straighten the bottom of the cotter pin with the pliers to slide out the cotter pin.

  2. How to Replace Magliner Hand Truck Wheels: passo 2, imagem 1 %32 How to Replace Magliner Hand Truck Wheels: passo 2, imagem 2 %32
    • Remove the stainless steel washer(s) before pulling out the wheel(s) from the spindle.

  3. How to Replace Magliner Hand Truck Wheels: passo 3, imagem 1 %32 How to Replace Magliner Hand Truck Wheels: passo 3, imagem 2 %32
    • Pull the wheel in the opposite direction and slide out the old wheel(s).

  4. How to Replace Magliner Hand Truck Wheels: passo 4, imagem 1 %32 How to Replace Magliner Hand Truck Wheels: passo 4, imagem 2 %32 How to Replace Magliner Hand Truck Wheels: passo 4, imagem 3 %32
    • Insert the new wheel into the wheel spindle.

    • There should be about half an inch left of the wheel spindle.

  5. How to Replace Magliner Hand Truck Wheels: passo 5, imagem 1 %32 How to Replace Magliner Hand Truck Wheels: passo 5, imagem 2 %32 How to Replace Magliner Hand Truck Wheels: passo 5, imagem 3 %32
    • Replace the old washer(s) and add a new washer(s) on top of the wheel.

  6. How to Replace Magliner Hand Truck Wheels: passo 6, imagem 1 %32 How to Replace Magliner Hand Truck Wheels: passo 6, imagem 2 %32 How to Replace Magliner Hand Truck Wheels: passo 6, imagem 3 %32
    • Replace the old cotter pin with a new cotter pin and slide it back into the hole at the edge of the wheel spindle.

  7. How to Replace Magliner Hand Truck Wheels: passo 7, imagem 1 %32 How to Replace Magliner Hand Truck Wheels: passo 7, imagem 2 %32 How to Replace Magliner Hand Truck Wheels: passo 7, imagem 3 %32
    • Spread the right end of the new cotter pin(s) slightly outwards with the pliers.

    • This will create almost an L shape and secure the cotter pin in place.

Conclusão

To reassemble your device, follow these instructions in reverse order.

Melissa Gaspar

Membro desde: 03/25/24

145 Reputação

Autoria de 1 guia

Equipe

0 comentários

Adicione um comentário

Exibir estatísticas:

Últimas 24 horas: 1

Últimos 7 dias: 4

Últimos 30 dias: 14

Duração total: 59