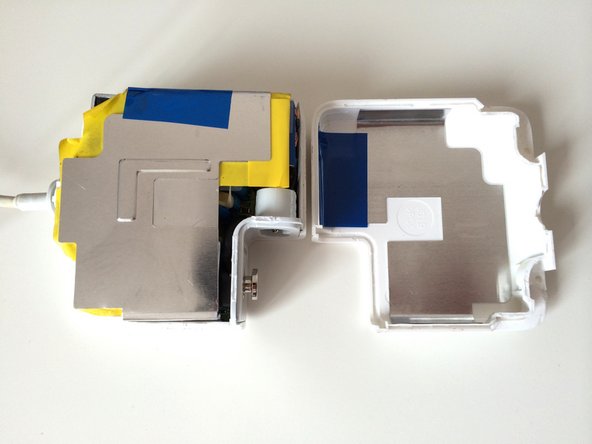
Ir para o conteúdo principal

How to Repair an Apple AC Adapter Broken Cable

O que você precisa

  1. How to Repair an Apple AC Adapter Broken Cable, How to Repair an Apple AC Adapter Broken Cable: passo 1, imagem 1 %32
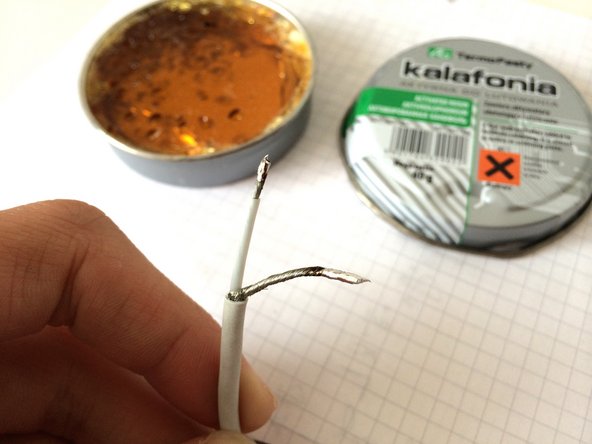
    • The first thing you'll need, is to have managed to break the cable of your MagSafe Adapter.

  2. How to Repair an Apple AC Adapter Broken Cable: passo 2, imagem 1 %32 How to Repair an Apple AC Adapter Broken Cable: passo 2, imagem 2 %32
    • Lift up the 2 flaps, and SLOWLY separate the two halves of the casing with a set of pliers.

    • Be careful, as this step can potentially do the most damage to the outer casing. Take your time, and wrap the plier tips with some tape if you don't want to leave any marks.

    • After a good couple of pops, you'll be able to hold it open with your hands.

  3. How to Repair an Apple AC Adapter Broken Cable: passo 3, imagem 1 %32 How to Repair an Apple AC Adapter Broken Cable: passo 3, imagem 2 %32
    • Rinse and repeat: now heat the lower part of the adapter.

    • Gently pull the two halves of the case apart.

  4. How to Repair an Apple AC Adapter Broken Cable: passo 4, imagem 1 %32 How to Repair an Apple AC Adapter Broken Cable: passo 4, imagem 2 %32
    • Heat the lower part some more—this will loosen the AC Input Connector, which should still be stuck to one of the two sides.

    • Give it a bit of screwdriver action if it's stubborn like mine was.

  5. How to Repair an Apple AC Adapter Broken Cable: passo 5, imagem 1 %32
    • If all went well, you should have completely separated the 2 parts of the case from the actual power supply.

  6. How to Repair an Apple AC Adapter Broken Cable: passo 6, imagem 1 %32
    • Cut both wires as close to the little plastic thingy as possible.

  7. How to Repair an Apple AC Adapter Broken Cable: passo 7, imagem 1 %32 How to Repair an Apple AC Adapter Broken Cable: passo 7, imagem 2 %32
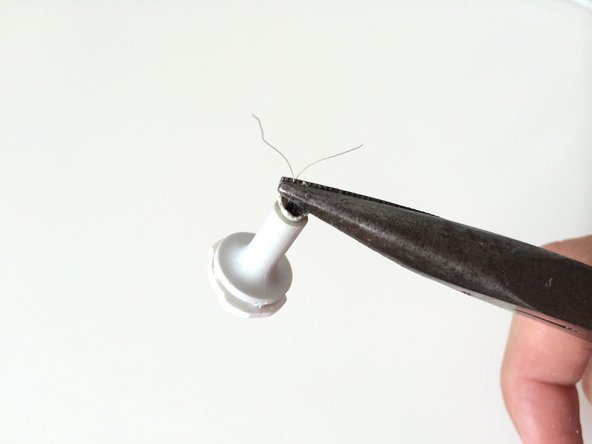
    • To reuse the plastic stopper, using whatever you want (I used a cutting plier), remove as much of the white plastic as to still leave the lip for further reattachment.

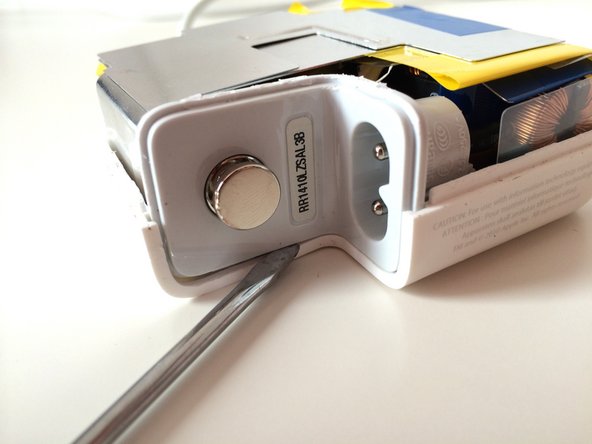
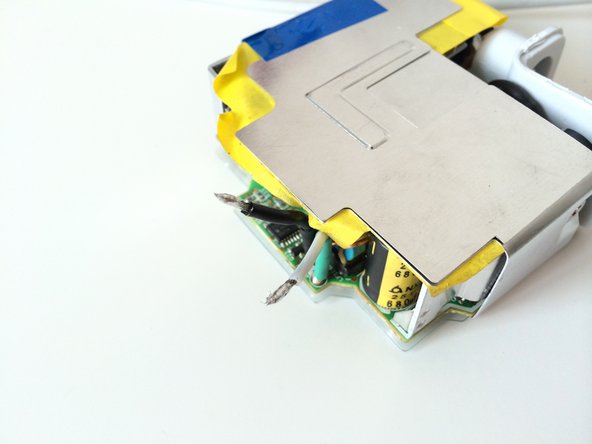
    • Using your normal pliers and/or a fine screwdriver/knife, try to jam out a little metal part that is clipping the two wires and attaching them to the white plastic.

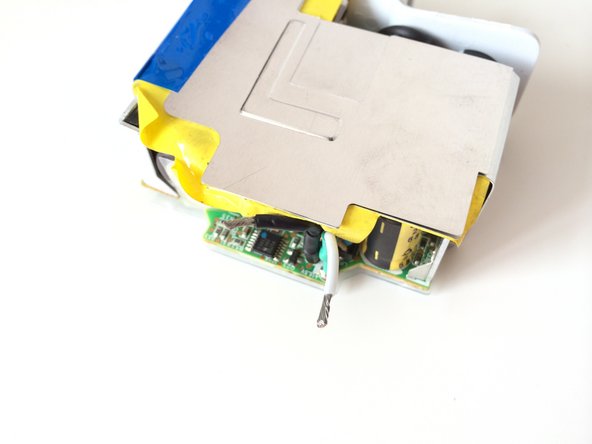
    • Next, pull out all the wires.

  8. How to Repair an Apple AC Adapter Broken Cable: passo 8, imagem 1 %32 How to Repair an Apple AC Adapter Broken Cable: passo 8, imagem 2 %32 How to Repair an Apple AC Adapter Broken Cable: passo 8, imagem 3 %32
    • The plastic mantle of the wire will still likely be attached to the plastic stopper.

    • To get it out, sprinkle the thing with some rubbing alcohol (or water).

    • Then, push it out with a bigger screwdriver head.

    • This took the most time in my case, so, be patient—it'll give up eventually.

  9. How to Repair an Apple AC Adapter Broken Cable: passo 9, imagem 1 %32
    • Now to start prepping the wires:

    • Cut the main wire at a few centimetres away from where the tear occurred. This'll ensure you won't be reusing any damaged piece of the wire.

  10. How to Repair an Apple AC Adapter Broken Cable: passo 10, imagem 1 %32 How to Repair an Apple AC Adapter Broken Cable: passo 10, imagem 2 %32
    • Using a utility knife or wire cutters, expose and prep the 4 wires like so.

  11. How to Repair an Apple AC Adapter Broken Cable: passo 11, imagem 1 %32 How to Repair an Apple AC Adapter Broken Cable: passo 11, imagem 2 %32 How to Repair an Apple AC Adapter Broken Cable: passo 11, imagem 3 %32
    • Using a soldering iron/gun, apply solder to all 4 ends of the wires.

  12. How to Repair an Apple AC Adapter Broken Cable: passo 12, imagem 1 %32
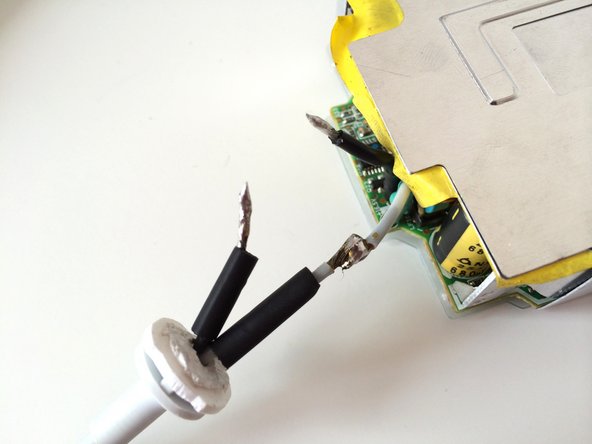
    • Thread the rubber/plastic stopper back onto the wires.

    • Do this AFTER you have applied solder to the tips of the wires.

    • To do this, I sprayed a bit of alcohol on the whole thing, and pulled the wires with the pliers. It required a pretty decent amount of force—but don't worry, the cables should hold without a problem. Just make sure you're pulling both at the same time.

    • Note that I've also added a tiny length of shrink-tube on the exposed wire.

  13. How to Repair an Apple AC Adapter Broken Cable: passo 13, imagem 1 %32 How to Repair an Apple AC Adapter Broken Cable: passo 13, imagem 2 %32 How to Repair an Apple AC Adapter Broken Cable: passo 13, imagem 3 %32
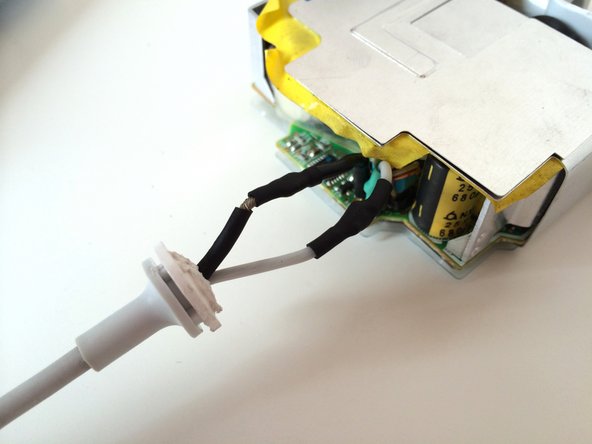
    • Add 2 lengths of shrink-tube on the 2 wires.

    • Now, solder the 4 wires together.

    • Make sure to connect white to white, and black to the bare metal one.

    • Make sure to do this step really quickly, as the heat-shrink tube will contract from the heat of the soldering.

    • Alternatively, you could just use duct tape—just be careful so it doesn't slide off when you're bending the wires.

    • Move the shirk-tube over the soldering spots, and heat it up. (Mine fell a bit short, so I did end up using a bit of duct tape.)

  14. How to Repair an Apple AC Adapter Broken Cable: passo 14, imagem 1 %32 How to Repair an Apple AC Adapter Broken Cable: passo 14, imagem 2 %32 How to Repair an Apple AC Adapter Broken Cable: passo 14, imagem 3 %32
    • Set the plastic stopper in its groove.

    • Put the 4 pieces of the wire holder assembly back into place.

    • Make sure the metal part goes UNDER the case, like so.

  15. How to Repair an Apple AC Adapter Broken Cable: passo 15, imagem 1 %32 How to Repair an Apple AC Adapter Broken Cable: passo 15, imagem 2 %32
    • Close up the case! You're done.

    • I had some issues getting it to clamp back properly—check the part of the case with the groove on the edge for any left over pieces of plastic, and try your best to get them out.

    • You can glue the case back together, or, in my case, since I had none, I used clear duct tape to stick it back together.

    • Make sure you take good care of the wire from now on; make sure it doesn't get bent when you carry it around. :)

Linha de Chegada

209 outras pessoas executaram este guia.

Darie H

Membro desde: 11/20/12

4.550 Reputação

Autoria de 5 guias

50 comentários

This is an excellent guide! No need to throw 79 € into Apple's throat for something that btw should last longer than just a few years.

alois - Responder

Just did this - it worked for me. Many thanks!

Pyotr - Responder

I did it too, but no current to the mac. I guess there may also be a loan fuse inside?

ola m - Responder

I had to drill out the plastic thing in step 9 to remove the wires. I added a tiny zip-tie on the wires on the inside of the plastic thing to help prevent them from getting pulled out. I ended up using liquid electrical tape because my shrink tubing shrunk while soldiering.

ylojelo - Responder

There is a metallic ring inside the plastic. That little devil has two small claws inserted into the plastic. What I did was dig with the tip of my soldering iron at low temp (just enough to soften the plastic) and pull it off with pliers when I found them. After that it's pretty easy to clean up the hole to let the cable pass. When straightened, the ring and claws look like those donkey ears they used to embarrass bad students, in comics. :)

Aristarco Palacios -

Adicione um comentário

Exibir estatísticas:

Últimas 24 horas: 5

Últimos 7 dias: 36

Últimos 30 dias: 159

Duração total: 155,623